

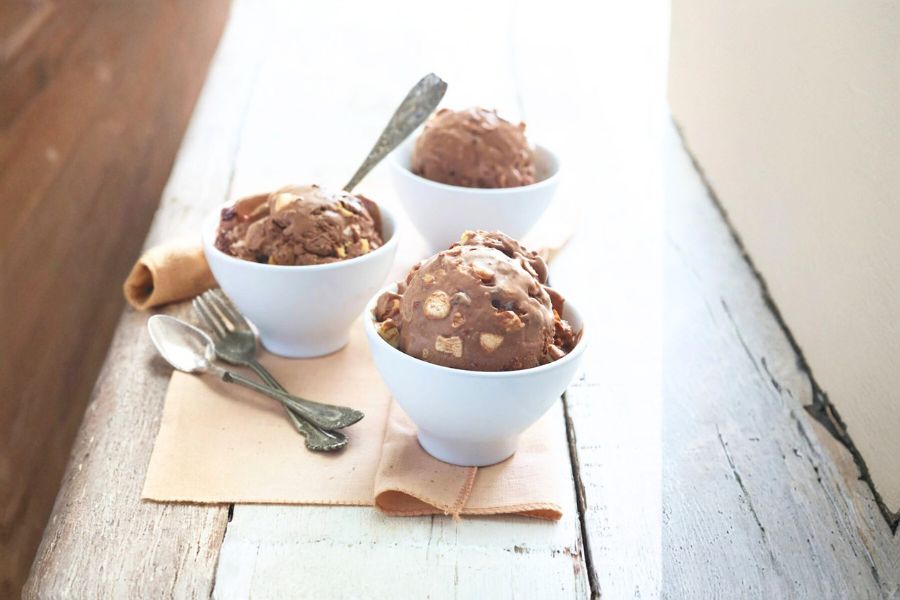
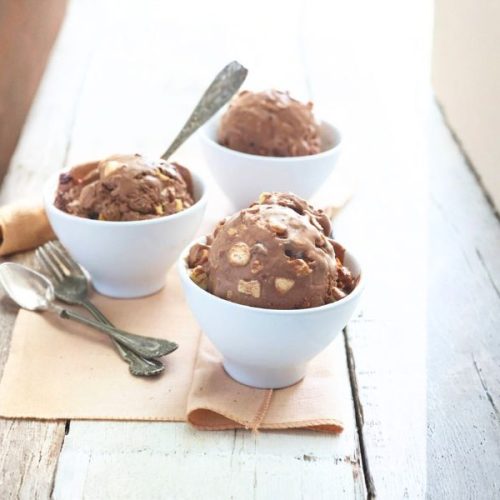
This homemade Rocky Road ice cream recipe stands out for its rich, indulgent flavor combined with a satisfying mix of textures from marshmallows, honey-roasted almonds, and chunks of white and dark chocolate.
What makes it extra appealing is the balance of creamy sweetness and nutty crunch, offering a dessert experience that feels both luxurious and homemade. While it’s a treat, this recipe packs some nutritional benefits too.
The almonds provide plant-based protein, healthy fats, and fiber, making every scoop more satiating than store-bought ice creams filled with empty sugars.
The dark chocolate offers antioxidants, and the milk and cream provide a source of calcium and protein.
It’s a great option for everyday cooking because it’s simple to prepare in stages, freezer-friendly, and perfect for making ahead for family gatherings or portioning for treats throughout the week.
Must-Have Tools for Perfect Results
Cuisinart ICE-30BC Ice Cream Maker
Effortlessly churns the mixture to creamy perfection, saving you time and ensuring professional-quality ice cream at home. A must-have for endless frozen dessert creations.
OXO Good Grips Fine Mesh Strainer
Essential for creating a silky, lump-free custard base. This versatile tool also works for sifting dry ingredients and rinsing grains.
All-Clad Stainless Steel Saucepan (2-Quart)
Ideal for heating milk, cream, and cocoa mixtures evenly without scorching, making it a long-term kitchen investment for soups, sauces, and more.
KitchenAid Digital Instant-Read Thermometer
Ensures the custard reaches the perfect 170–175°F for safe, creamy results every time. A reliable tool for all precision cooking tasks.
Pyrex Glass Mixing Bowls (Set of 3)
Perfect for mixing, whisking, and chilling your base. Durable and microwave-safe, they’re an everyday kitchen essential.
Cream Rocky Road Ice Cream
Equipment
- 1 Quart Saucepan – for heating cocoa and cream mixture.
- 1 Fine Mesh Strainer – to ensure a smooth custard base.
- 1 Mixing Bowl (medium-large) – for combining cream and chocolate.
- 1 Whisk – for dissolving cocoa and whisking egg yolks.
- 1 Instant-Read Thermometer – to reach the ideal custard temperature.
- 1 Ice Cream Maker – to churn the mixture to creamy consistency.
- 1 Airtight Container – for storing the finished ice cream.
Ingredients
- 2 cups divided heavy whipping cream
- 3 tablespoons Dutch-process cocoa powder
- 5 ounces bittersweet chocolate finely chopped
- 1 cup whole milk
- ¾ cup granulated sugar
- 1 pinch salt
- 5 large egg yolks
- ½ teaspoon pure vanilla extract
- 1½ cups miniature marshmallows
- 1 cup honey-roasted almonds coarsely chopped
- ¼ cup dark chocolate chunks
- ¼ cup white chocolate chunks
- ¼ cup soft caramel candies diced into small pieces
Instructions
- Create a Chocolate Cream Base: In a medium saucepan, pour 1 cup of heavy cream and whisk in the cocoa powder until completely dissolved. Place over medium heat and bring just to a gentle boil. Lower the heat to a soft simmer, whisking continuously for about 30 seconds to ensure a rich chocolate flavor develops. Remove from the heat, add the chopped bittersweet chocolate, and stir until smooth and glossy. Mix in the remaining 1 cup of cream, then transfer this mixture to a large heatproof bowl. Place a fine mesh sieve over the bowl for later use.
- Prepare a Sweet Milk Mixture: Using the same saucepan, combine milk, sugar, and a pinch of salt, warming the mixture over medium heat until the sugar dissolves completely. Meanwhile, whisk egg yolks in a separate bowl until smooth and slightly pale.
- Temper the Eggs for Custard: Slowly drizzle the warm milk mixture into the beaten yolks while whisking constantly to prevent scrambling. Once combined, return the mixture to the saucepan. Cook over medium heat, stirring constantly with a heatproof spatula, until it thickens slightly and reaches 170–175°F (77–80°C) on an instant-read thermometer.
- Combine and Chill the Base: Strain the custard through the fine mesh sieve into the chocolate cream mixture. Stir well until everything is blended and silky. Add vanilla extract and mix to combine. Cover the bowl with plastic wrap and refrigerate for at least 2 hours (or overnight) until completely chilled.
- Churn the Ice Cream: Once the base is fully cooled, pour it into your ice cream maker and churn according to the manufacturer’s instructions until it reaches a soft-serve consistency.
- Add the Rocky Road Mix-Ins: Transfer the churned ice cream into a large mixing bowl. Gently fold in the marshmallows, chopped honey-roasted almonds, dark chocolate chunks, white chocolate chunks, and caramel pieces, making sure they are evenly distributed.
- Freeze and Serve: Spoon the ice cream into an airtight container, smooth the top, and freeze for at least 4 hours or until firm enough to scoop. Allow the ice cream to sit at room temperature for a few minutes before serving for easier scooping.
Notes
- Soften Before Scooping: Homemade ice cream hardens more than store-bought; letting it rest for 5–10 minutes makes it easier to serve.
- Nut-Free Option: Swap almonds for crunchy granola or sunflower seeds for a nut-free treat.
- Chocolate Variations: Experiment with milk chocolate or flavored white chocolate chips for different flavor twists.
- Storage: Keeps well in a sealed container for up to 2 weeks without losing texture.
- Tip for Creaminess: Chill your mixing bowl before adding the churned ice cream; it helps maintain a smooth texture while folding in mix-ins.
Chef’s Secrets for Rocky Road Perfection
Creating a luscious, creamy Rocky Road ice cream at home is all about balance and technique.
The first secret is tempering the eggs properly; slowly whisking warm milk into the yolks ensures a silky custard without curdling.
Using high-quality chocolate—preferably bittersweet with at least 60–70% cocoa—intensifies the flavor and keeps the sweetness from becoming overpowering.
Lightly toasting the honey-roasted almonds before folding them in deepens their nutty aroma and adds a satisfying crunch.
Lastly, patience is key: chilling the custard base thoroughly before churning guarantees smoother, creamier results every time.
Think of each step as layering flavor and texture—this is what transforms a simple dessert into something truly special.
Serving Suggestions for Ultimate Enjoyment
Rocky Road ice cream shines as a stand-alone dessert, but you can easily elevate its presentation.
Serve it in waffle bowls or alongside warm brownies for a hot-and-cold contrast that dessert lovers adore.
Drizzle with homemade chocolate or caramel sauce for extra decadence, or sprinkle crushed graham crackers on top for added crunch.
For a lighter option, pair a single scoop with fresh strawberries or raspberries to cut through the richness. Hosting a party?
Create a “Rocky Road Sundae Bar” with bowls of extra marshmallows, nuts, and chocolate chunks so guests can customize their scoops.
Storage Tips for Lasting Freshness
Homemade ice cream can lose its creamy texture if not stored correctly.
Always transfer your freshly churned dessert to an airtight, freezer-safe container to protect it from freezer burn and unwanted odors.
Pressing a layer of parchment paper or plastic wrap directly on the ice cream’s surface before sealing the lid helps prevent ice crystals from forming. Keep it in the coldest part of the freezer, not the door, where temperature fluctuations can affect its texture.
Properly stored, your Rocky Road ice cream stays at peak quality for up to two weeks.
Allow it to soften at room temperature for 5–10 minutes before scooping for the best consistency.
Frequently Asked Questions About This Recipe
1. Can I make this without an ice cream maker?
Yes! Prepare the custard base as instructed, then pour it into a shallow, freezer-safe dish. Stir every 30–45 minutes for about 3–4 hours to break up ice crystals until you reach a creamy texture.
2. Can I use milk chocolate instead of bittersweet?
You can, but keep in mind that milk chocolate is sweeter and less intense. If you swap it in, consider reducing the sugar slightly to maintain balance.
3. How do I make this recipe nut-free?
Simply omit the almonds or replace them with crunchy granola, toasted pumpkin seeds, or crisped rice for a similar texture without allergens.
4. Why does my ice cream turn icy?
Ice crystals form if the custard isn’t chilled enough before churning or if it’s stored improperly. Always cool the base thoroughly and press parchment or plastic wrap on top before freezing.
5. Can I add other mix-ins?
Absolutely! Try peanut butter swirls, crushed cookies, or flavored chocolate chips to make your own unique Rocky Road variation while keeping the same creamy base.
This recipe has been adapted and simplified from the original version by whatsgabycooking. We’ve refined the steps for a smoother cooking experience and added helpful notes, nutrition insights, and essential kitchen tools to make it even easier for home cooks.