

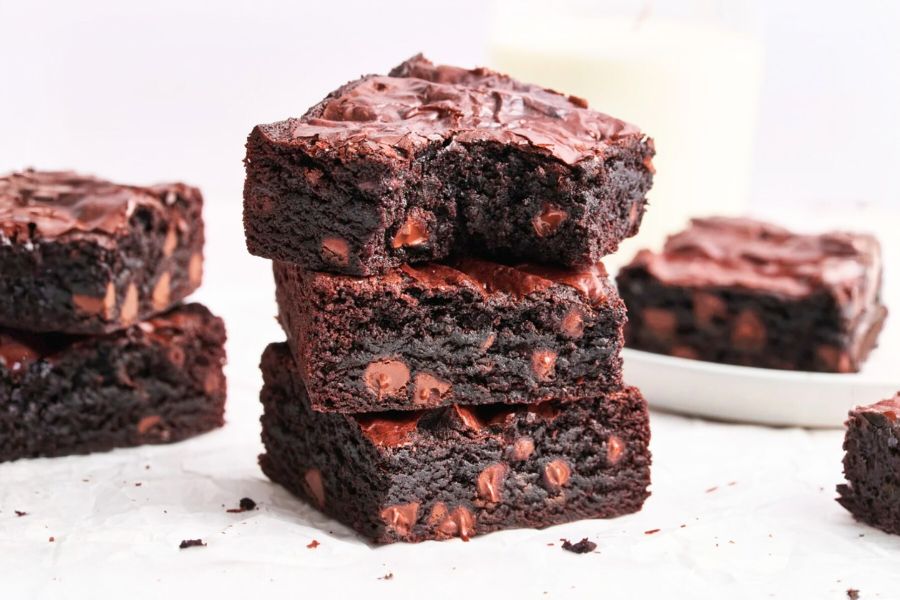
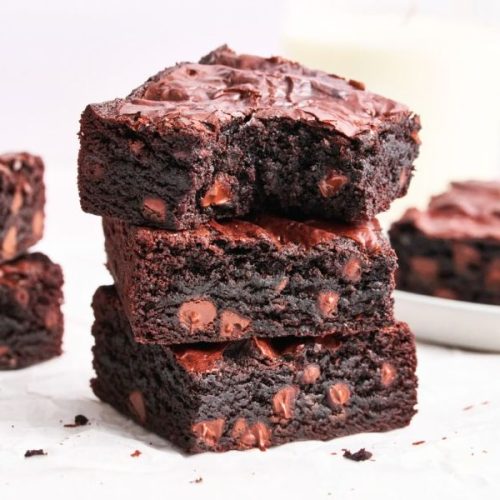
Tessa Arias’ Best Ever Chewy Brownies stand out for their perfect balance of chewy texture and rich chocolate flavor, rivaling boxed mixes while using simple pantry staples.
This one-bowl recipe is designed for convenience, requiring minimal cleanup and delivering bakery-quality brownies in under an hour.
While brownies are generally indulgent, this recipe uses cocoa powder and semisweet chocolate chips, which provide antioxidants from cocoa flavonoids that may support heart health.
Using vegetable oil introduces good fats that are lower in saturated fat compared to butter-only recipes, making this a slightly lighter option without sacrificing taste.
These brownies are great for everyday baking because they’re easy to whip up for family desserts, meal prepping for treats throughout the week, or impressing guests without the need for complex techniques or equipment.
Must-Have Tools for Perfect Results
USA Pan 8×8 Inch Square Cake Pan
Ensures even baking with its light-colored metal design, preventing over-browning for perfectly chewy brownies. A must-have for consistent baking results across all desserts.
OXO Good Grips Silicone Spatula
Ideal for mixing the batter thoroughly and scraping every bit into the pan. Its heat resistance and durability make it indispensable for all baking and cooking needs.
Pyrex Glass Mixing Bowl Set
Perfect for melting butter and sugar in the microwave, minimizing dishwashing while allowing easy visibility of mixing progress. A versatile kitchen staple for prep, storage, and serving.
ThermoPro Instant Read Digital Thermometer
Helps check when brownies are done without overbaking, ensuring a moist, chewy texture. Useful for all baking and cooking to achieve precise doneness.
Reynolds Kitchens Parchment Paper
Makes lining the pan simple, preventing sticking and making cleanup effortless. Essential for hassle-free baking, roasting, and meal prepping.
Quick One-bowl Brownies
Equipment
- 1 8×8-inch Light-Colored Metal Baking Pan
- 1 Microwave-Safe Mixing Bowl
- 1 Whisk
- 1 Rubber or Silicone Spatula
- 1 Parchment Paper or Aluminum Foil
Ingredients
- 5 tablespoons 71 g unsalted butter
- 1 ¼ cups 249 g granulated sugar
- 2 large eggs cold
- 1 large egg yolk cold
- 1 teaspoon pure vanilla extract
- ⅓ cup 74 g vegetable oil
- ¾ cup 75 g unsweetened cocoa powder (Dutch-processed recommended)
- ½ cup 63 g all-purpose flour, measured accurately
- 1 tablespoon cornstarch
- ¼ teaspoon fine sea salt
- ¾ cup 128 g semi-sweet chocolate chips
Instructions
- Prepare Your Pan and Oven: Preheat the oven to 325°F (165°C). Line an 8×8-inch square metal baking pan with parchment paper or foil, ensuring there’s some overhang for easy brownie removal. Lightly coat with nonstick spray to prevent sticking.
- Melt Butter and Sugar: In a microwave-safe mixing bowl, combine butter and sugar. Heat for about 1 minute, or until the butter is completely melted. Stir until the sugar begins to dissolve, creating a glossy mixture.
- Whisk in Eggs and Flavorings: Add the eggs and the extra yolk to the butter-sugar mixture. Whisk vigorously for 1 full minute, incorporating air for a crackly brownie top. Mix in the vanilla extract until well combined.
- Incorporate Oil and Cocoa: Pour in the vegetable oil, followed by the cocoa powder. Stir until a rich, dark chocolate mixture forms, ensuring no dry cocoa lumps remain.
- Add Dry Ingredients: Using a rubber spatula, gently fold in the flour, cornstarch, and salt. Mix only until the batter is combined; avoid overmixing to keep the brownies soft and chewy.
- Stir in Chocolate Chips: Fold the chocolate chips evenly throughout the batter, adding pockets of melted chocolate in every bite.
- Bake to Perfection: Spread the batter evenly into your prepared pan. Bake for 28–32 minutes, or until a toothpick inserted in the center comes out with a few moist crumbs (not wet batter). Avoid overbaking, as this can dry out the brownies.
- Cool and Slice: Allow brownies to cool completely in the pan before lifting them out using the parchment overhang. Slice into 9 large or 16 smaller pieces. Enjoy warm for gooey brownies, at room temperature for chewy texture, or chilled for a fudgier bite.
Notes
- Pan Choice Matters: A light-colored metal pan gives even heat distribution and prevents hard edges. Glass or ceramic pans may require extra time and can alter texture.
- Cocoa Powder: Dutch-processed cocoa yields a deeper, richer flavor, but natural cocoa can be swapped in with equal measurement.
- Storage: Store in an airtight container at room temperature for up to 3 days. Refrigerating creates a firmer, fudgier brownie, while warming briefly in the microwave brings back a gooey texture.
- Doubling the Recipe: For larger batches, double the ingredients and bake in a 9×13-inch pan, adding a few extra minutes to the baking time.
- Optional Add-Ins: Try adding chopped nuts, a sprinkle of flaky sea salt, or swirling in peanut butter for variations.
Chef’s Secrets for Perfect Brownies
Achieving irresistibly chewy brownies isn’t just about following the recipe—it’s also about technique. One of the biggest secrets is whisking the eggs and sugar vigorously for a full minute.
This step adds air to the batter, creating the thin, glossy crust everyone loves on top of brownies.
Using Dutch-processed cocoa powder gives a richer, smoother chocolate flavor, but natural cocoa can still produce delicious results if that’s what you have on hand.
Always measure your flour correctly by spooning it into the cup and leveling it off; too much flour can lead to dense, cakey brownies.
Finally, watch your baking time closely—pulling the brownies out when a toothpick shows moist crumbs (not raw batter) ensures they stay fudgy and chewy even after cooling.
Serving Suggestions for Chocolate Bliss
These brownies are delicious on their own, but you can take them to the next level with a few simple touches.
Serve them warm with a scoop of vanilla ice cream and a drizzle of hot fudge for a classic sundae-style dessert.
For a more elegant presentation, sprinkle a light dusting of powdered sugar or cocoa powder on top before serving.
If you’re entertaining guests, consider cutting the brownies into bite-sized squares and pairing them with espresso or red wine, as the rich chocolate flavor complements both beautifully.
They also make a wonderful base for layered desserts like brownie parfaits or brownie sundaes in a jar for picnics or parties.
Storage Tips for Lasting Freshness
Brownies taste best the day they’re baked but can stay soft and flavorful for several days if stored correctly. Allow them to cool completely before cutting to avoid excess crumbling.
Place leftover brownies in an airtight container, separating layers with parchment paper to prevent sticking.
Keep them at room temperature for up to 3 days or refrigerate for up to 5 days for a firmer, fudgier bite.
For longer storage, wrap brownies tightly in plastic wrap and foil, then freeze for up to 3 months.
To enjoy frozen brownies, simply thaw at room temperature or reheat for a few seconds in the microwave for that fresh-from-the-oven taste.
Frequently Asked Questions About Brownies
1. Can I substitute butter with margarine or coconut oil?
Yes, but the flavor and texture may slightly change. Butter adds richness and depth of flavor, while coconut oil will create a softer, slightly coconut-scented brownie. Stick to unsalted butter for the classic taste.
2. How do I know if brownies are done baking?
Insert a toothpick into the center—if it comes out with a few moist crumbs, they’re ready. Overbaking can dry them out, so it’s better to check a minute or two early than too late.
3. Can I make these brownies gluten-free?
Absolutely! Substitute the all-purpose flour with a 1:1 gluten-free baking flour blend. The texture may be slightly different but still delicious and chewy.
4. Why is my brownie top not shiny and crackly?
The glossy top comes from properly whisking the eggs and sugar, which emulsifies the batter. Whisking for a full minute is essential for achieving that signature brownie crust.
5. Can I add nuts or other mix-ins?
Yes! Chopped walnuts, pecans, or even white chocolate chips can be folded into the batter for extra flavor and texture. Just avoid overloading the batter, as too many add-ins can affect baking time.
This recipe has been adapted and simplified from the original version by inspiredtaste. We’ve refined the steps for a smoother cooking experience and added helpful notes, nutrition insights, and essential kitchen tools to make it even easier for home cooks.