
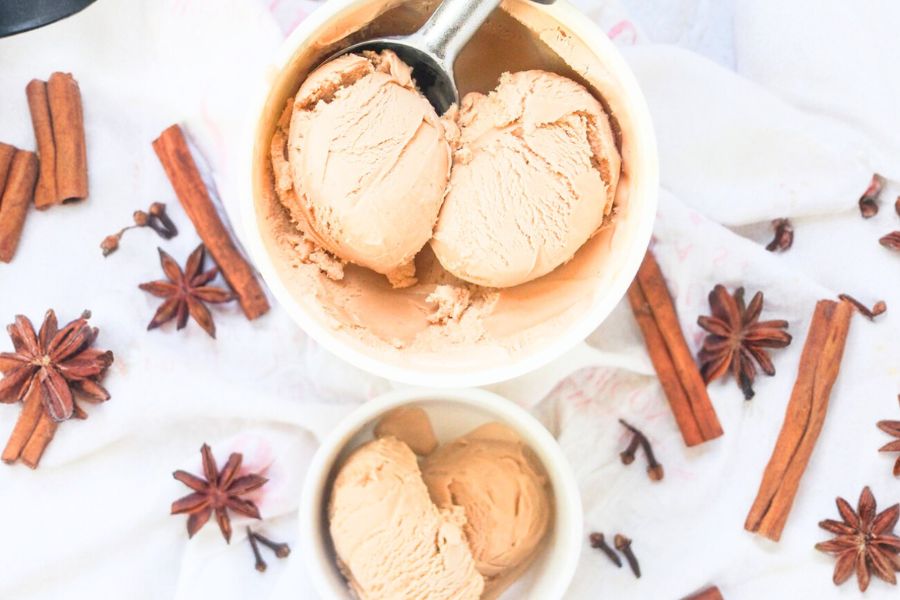
This chai ice cream recipe stands out for its sophisticated blend of warm spices and creamy texture, creating a delightful fusion of traditional chai flavors in a frozen dessert form.
The use of whole spices like cinnamon, cardamom, and star anise infuses the ice cream with aromatic complexity, while the fresh ginger adds a subtle zing.
Nutritionally, it offers a moderate calorie count with a good balance of fat and protein from whole milk, heavy cream, and egg yolks, providing sustained energy and richness.
Though indulgent, this dessert features natural spices known for digestive benefits and anti-inflammatory properties.
It’s an excellent option for those seeking a gourmet yet approachable treat that fits well into everyday cooking, requiring minimal active time and allowing for easy prep ahead.
The infusion method enhances flavor without artificial additives, making it satisfying and wholesome.
Must-Have Tools for Perfect Results
Measuring Cups and Spoons
Accurate measurement of spices, liquids, and sugar is key to balancing flavors; essential tools for consistency in all cooking and baking.
Heavy-Based Saucepan
Essential for evenly warming the milk, cream, and spices without scorching. Its heat retention ensures gentle infusion, making it a versatile pot for sauces and custards.
Fine Mesh Strainer
Critical for removing spices and solids to achieve a smooth, velvety ice cream base. Perfect for straining stocks, sauces, and purees in any kitchen.
Whisk
Used to blend egg yolks and sugar into a glossy mixture and for tempering eggs with warm cream. A quality whisk is indispensable for emulsifying dressings, batters, and custards.
Ice Cream Maker
Allows you to churn the mixture to a perfect soft-serve texture before freezing. A worthwhile investment for homemade frozen desserts and refreshing treats.
Creamy Spiced Chai Ice Cream
Equipment
- 1 Heavy-Based Saucepan (medium size)
- 1 fine mesh strainer
- 1 Whisk
- 1 Ice Cream Maker
- Measuring Cups and Spoons (various sizes)
Ingredients
Spiced Milk and Cream Base
- 1½ cups whole milk full-fat
- 1½ cups heavy cream double cream
- 1 large cinnamon stick or 2 small ones
- 1 whole star anise
- 8 green cardamom pods
- 8 whole cloves
- 8 whole allspice berries
- ½ teaspoon whole black peppercorns
- 3 thin slices fresh ginger
For the Ice Cream Mixture
- 2 black tea bags use 3 for a stronger flavor
- ¼ teaspoon ground masala chai spice optional, to taste
- 3 egg yolks
- ⅔ cup granulated sugar divided
Instructions
- Preparing the Spiced Milk and Cream Infusion: Begin by pouring the whole milk and heavy cream into a heavy-bottomed saucepan. Add in the cinnamon stick, star anise, green cardamom pods, whole cloves, allspice berries, black peppercorns, and fresh ginger slices. Place the saucepan over medium-low heat. Gently warm the mixture, stirring occasionally to prevent sticking, until it is hot but not boiling—this should take about 5 to 10 minutes. Once warmed, remove the pan from the heat and cover it loosely. Allow the spices to steep in the warm milk and cream for about 45 minutes. This slow infusion draws out the deep, aromatic flavors essential to the chai profile.
- Infusing the Tea and Sweetening: After the initial steeping, add the black tea bags directly to the spiced milk and cream mixture along with half of the sugar. Return the pan to low heat and warm gently for 2 to 3 minutes—again, be careful not to boil. This process releases the robust flavors and tannins from the tea leaves. Once warmed, remove the pan from the heat and allow the tea to steep for an additional 10 minutes. You will notice the liquid darkening to a rich amber color, signaling the depth of flavor has developed.
- Preparing the Egg Yolks and Sugar Mixture: While the tea is steeping, combine the egg yolks and the remaining sugar in a medium-sized bowl. Using a whisk, beat the mixture vigorously until it turns pale, thick, and slightly glossy. This step is crucial for incorporating air and creating a smooth custard texture. The sugar helps stabilize the eggs and adds sweetness.
- Tempering the Eggs: Before combining the eggs with the warm milk base, taste the infused liquid. If you desire a stronger chai spice punch, sprinkle in a small amount of ground masala chai spice and stir well. Now, to avoid cooking the eggs too quickly, slowly add a few tablespoons of the warm milk mixture into the egg yolks while continuously whisking. Repeat this gradual addition two or three times, allowing the eggs to warm evenly and safely without curdling.
- Cooking the Custard Base: Once the egg yolk mixture is tempered, pour it back into the saucepan with the remaining spiced milk and cream. Remove the tea bags at this stage to prevent bitterness. Place the saucepan over medium-low heat and stir constantly with a wooden spoon or heatproof spatula. The goal is to gently heat the mixture until it thickens slightly, which usually occurs around 170°F (76°C). Do not let the mixture boil, as this will cause the custard to split. You will notice the texture becoming creamier and coating the back of the spoon lightly.
- Straining and Cooling the Custard: When the custard reaches the right thickness, immediately remove it from the heat. Pour the mixture through a fine mesh strainer into a clean bowl to remove all the whole spices, ginger, and any cooked egg bits. This step ensures a smooth, silky ice cream base without any gritty or chewy pieces. Allow the strained custard to cool to room temperature, then cover tightly and refrigerate for at least several hours or preferably overnight. Chilling the custard thoroughly improves the flavor melding and results in a better texture when churned.
- Churning the Ice Cream: Once the custard is well chilled, prepare your ice cream maker according to its instructions. Pour the custard base into the machine and churn until it reaches a soft-serve consistency. This process typically takes 20-30 minutes but will vary depending on your equipment.
- Adding the Final Touches and Freezing: During the last few minutes of churning, add finely chopped crystallized ginger for a burst of sweet, spicy texture that complements the chai flavors beautifully.Mix thoroughly to distribute the ginger evenly. Transfer the ice cream into a freezer-safe container and smooth the surface. Cover and freeze for several hours, or until firm, before serving.
Notes
- For quicker sugar dissolution, caster sugar is ideal, but granulated sugar works fine as well—avoid coarse sugars that might not dissolve fully during heating.
- The sweetness level here is moderate; feel free to adjust the sugar quantity to suit your preference for sweeter or more tangy ice cream.
- Using sliced fresh ginger makes straining easier. If chopped, ginger pieces can be harder to remove from the mixture.
- When heating the mixture, keep it below boiling to prevent curdling, especially after adding the egg yolks.
- Chilling the custard base overnight intensifies the flavors and helps achieve a smoother texture during churning.
Cef’s Secrets for Flavor Depth
To truly elevate your chai ice cream, patience is key during the steeping stages.
Allowing the whole spices and tea bags to infuse fully into the warm milk and cream develops a rich, layered flavor that makes this dessert stand out.
Don’t rush the cooling process either; chilling the custard overnight not only enhances the taste but also helps the texture improve during churning.
When tempering the eggs, add the warm milk slowly while whisking constantly to avoid scrambling—this technique ensures a smooth, creamy custard.
Experiment with spice ratios to suit your preference—adding a pinch more cardamom or ginger can subtly shift the profile.
Lastly, incorporating crystallized ginger at the end provides a delightful burst of texture and spicy sweetness that balances the creamy base perfectly.
Serving Suggestions for Best Enjoyment
Chai ice cream pairs wonderfully with warm desserts like apple pie or spiced pumpkin cake, complementing their autumnal flavors.
Serve a scoop atop freshly baked brownies or drizzle with a caramel or honey sauce for an indulgent treat. For a refreshing contrast, try it alongside tropical fruit like mango or pineapple.
This ice cream also works beautifully in affogato style, poured over a shot of hot espresso for a sophisticated twist.
When plating, consider garnishing with a sprinkle of cinnamon or crushed cardamom pods for an elegant touch.
Whether as a solo dessert or paired creatively, chai ice cream’s complex spice notes bring warmth and comfort to any meal.
Storage Tips for Lasting Freshness
Proper storage is essential to maintain the creamy texture and vibrant flavors of your chai ice cream.
Always transfer the churned ice cream into an airtight, freezer-safe container to prevent ice crystals from forming and absorbing odors.
Press a piece of parchment paper or plastic wrap directly onto the surface before sealing to minimize air exposure.
Store it at the back of the freezer where temperatures are most stable, avoiding frequent temperature changes.
Homemade ice cream is best consumed within two weeks for optimal taste and texture, although it can safely last up to a month.
When ready to serve, let it sit at room temperature for 5-10 minutes to soften slightly for easier scooping.
Frequently Asked Questions Answered Clearly
1. Can I use different types of tea?
Yes! While black tea is traditional for chai ice cream, you can experiment with green or rooibos tea for unique flavor variations. Just adjust steeping time as green teas are more delicate.
2. Is it possible to make this recipe dairy-free?
Absolutely. Substitute coconut milk and coconut cream for the dairy components. The spices will still shine, though the texture may be slightly different due to fat content changes.
3. How do I prevent the ice cream from becoming icy?
Chilling the custard thoroughly before churning and using a quality ice cream maker helps prevent ice crystals. Also, avoid storing the ice cream uncovered and try not to refreeze melted portions.
4. Can I prepare the spice base ahead of time?
Yes, you can infuse the milk and cream with spices a day in advance and refrigerate. Reheat gently before adding tea and continuing with the recipe.
5. What can I substitute for crystallized ginger?
If crystallized ginger is unavailable, finely chopped candied ginger or a small amount of freshly grated ginger added after churning can work, but avoid fresh ginger during freezing as it can become too sharp.
This recipe has been adapted and simplified from the original version by carolinescooking. We’ve refined the steps for a smoother cooking experience and added helpful notes, nutrition insights, and essential kitchen tools to make it even easier for home cooks.