
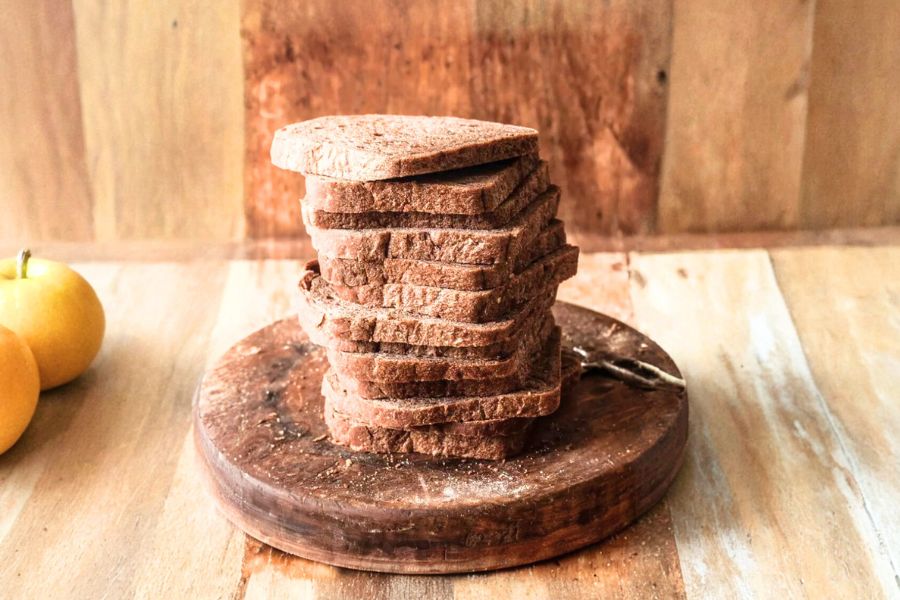
This homemade rye bread recipe stands out for its hearty flavor and wholesome ingredients, making it a delicious and nutritious choice for any meal.
Rye flour brings a rich, earthy taste and adds fiber, which supports digestion and keeps you full longer.
Combined with molasses, it delivers a subtle sweetness without refined sugars.
The recipe offers a good balance of plant-based protein from the rye and bread flours, along with healthy fats from vegetable oil, making it both satisfying and nourishing. Its moderate carb content is ideal for balanced energy release throughout the day.
Beyond its health benefits, this bread is remarkably easy to prepare with straightforward steps, making it perfect for everyday baking or meal prep.

Whether toasted for breakfast or paired with hearty soups and stews, it adds a rustic charm and a comforting homemade touch to your table.
Must-Have Tools for Perfect Results
Mixing Bowl
Essential for combining and proofing your yeast and dough, a sturdy mixing bowl allows for efficient mixing and ample space for the dough to rise. Its versatility makes it indispensable for countless kitchen tasks, from marinating to salad prep.
Wooden Spoon
Ideal for initially mixing sticky dough ingredients without overworking the gluten. Its durable yet gentle design protects your cookware and provides excellent leverage for mixing thick batters or doughs.
Bread Loaf Pans (8×4 inch)
These pans shape your dough into classic loaf forms, ensuring even baking and a professional finish. Beyond bread, they’re perfect for meatloaf, pound cakes, or layered desserts.
Plastic Wrap or Damp Cloth
Maintaining the perfect humidity during dough rising is crucial. Covering your dough with plastic wrap or a damp cloth traps moisture and warmth, creating an ideal environment for yeast fermentation. This simple tool supports perfect dough texture every time.
Baking Stone (optional
For those seeking bakery-quality crust, a baking stone evenly distributes heat and retains warmth, resulting in a beautifully crisp bottom crust. It’s a versatile addition that elevates pizza, bread, and pastry baking at home.
Healthy Rye Bread You’ll Love
Equipment
- 1 Large Mixing Bowl
- 1 Wooden Spoon
- 1 2 bread loaf pans (8×4 inch) or baking sheet
- 1 Plastic wrap or damp cloth
- 1 Optional: Baking stone
Ingredients
- 2 packages active dry yeast 4 ½ teaspoons or 16 grams
- 2 ½ cups warm water just barely warm to the touch
- ⅔ cup molasses regular, not blackstrap
- 2 tablespoons caraway seeds optional
- 1 tablespoon salt
- ¼ cup vegetable oil
- ¼ cup unsweetened cocoa powder
- 2 cups rye flour
- 5 cups bread flour
Instructions
- Activate the Yeast: Begin by dissolving the active dry yeast in the warm water, ensuring the water feels just barely warm to the touch to avoid killing the yeast.Stir in the molasses thoroughly, creating a sweet yeast mixture. Let it sit for 5–10 minutes until it becomes foamy and bubbly, indicating the yeast is active and ready.
- Combine Initial Ingredients: Into the large mixing bowl containing the yeast mixture, add the caraway seeds if using, followed by the salt, vegetable oil, and unsweetened cocoa powder. Mix these ingredients gently with a wooden spoon to incorporate the flavors evenly before adding any flour.
- Add Flours and Mix Dough: Add 2 cups of rye flour to the bowl and stir well to blend it into the liquid mixture. Then add 2 cups of bread flour, mixing after each addition to develop the dough’s consistency. Continue adding bread flour one cup at a time, stirring until the dough becomes too stiff to mix with the spoon.
- Transfer and Knead Dough: Sprinkle half a cup of flour onto a clean, flat surface and turn the dough onto it. Knead by pressing down with the heel of your hand, stretching, folding, and turning the dough in quarters. Continue kneading for 5–7 minutes, adding more flour as needed, until the dough is smooth, elastic, and no longer sticky.
- First Rise: Lightly oil a large bowl and place your kneaded dough inside, turning it so every side is coated with oil to prevent drying. Cover the bowl tightly with plastic wrap or a damp cloth and let it rise in a warm spot for 1 to 1½ hours, or until the dough doubles in size.
- Shape the Loaves: After the dough has risen, gently punch it down to release excess air. Turn it onto a lightly floured surface, knead briefly to smooth it out, and cut it into two equal portions using a sharp knife. Shape each portion into a loaf by folding and tucking the dough into a tight oval or rectangle.
- Prepare for Second Rise: Place each shaped loaf into oiled 8×4-inch bread pans or directly onto a cornmeal-dusted baking sheet if baking freeform. Cover again with plastic wrap or a damp cloth, allowing the dough to rise for 30 to 45 minutes, until it increases by about half and just begins to peek over the pan edges.
- Preheat the Oven and Score (if needed): While the dough rises, preheat your oven to 350°F (175°C). If using a baking stone, place it in the oven at least 30 minutes before baking. Just before placing the bread in the oven, score the tops of the loaves with a sharp knife to help control expansion and create a decorative finish.
- Bake the Bread: Transfer the loaves to the oven and bake for 40 to 50 minutes. If available, mist the bread with water during the first 10 minutes of baking to develop a crisp crust. The bread is done when it sounds hollow when tapped on the bottom and has a deep brown crust.
- Cool and Serve: Remove the bread from the oven and allow it to cool completely on a wire rack before slicing.Cooling lets the crumb set properly and prevents the bread from becoming gummy. Enjoy fresh or toasted with your favorite spreads or meals.
Notes
- Use warm water carefully; too hot will kill the yeast, too cold will slow fermentation.
- Cocoa powder adds depth to the rye bread’s color and flavor without making it taste like chocolate.
- Caraway seeds are optional but provide a classic rye flavor that pairs well with savory dishes.
- For a crustier loaf, bake directly on a preheated baking stone instead of pans.
- Store bread in an airtight container or bread box to maintain freshness up to 3 days, or freeze slices for longer storage.
Chef’s Insider Tips for Success
To achieve the best rye bread, always ensure your yeast is fresh and the water temperature is just right—warm, not hot—to activate the yeast properly without killing it.
Kneading the dough thoroughly until it’s smooth and elastic is key for developing gluten, which gives the bread its structure and chew.
Don’t rush the rising times; patience allows the flavors to deepen and the crumb to become airy yet substantial. Incorporating cocoa powder might seem unusual, but it enriches the bread’s color and adds subtle complexity without sweetness.
If you prefer a crustier loaf, baking directly on a preheated stone with steam will help create that bakery-style crust.
Lastly, lightly oiling your hands when shaping prevents sticking and helps form neat, tight loaves.
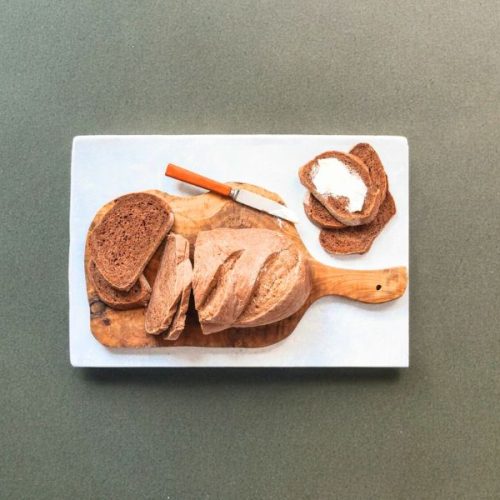
Delicious Rye Bread Serving Suggestions
Rye bread’s distinctive flavor pairs beautifully with savory and hearty foods. Try it toasted with a smear of creamy butter and a sprinkle of sea salt for a simple breakfast or snack.
It also complements robust cheeses like aged cheddar, smoked gouda, or a tangy goat cheese, making it perfect for sandwiches or cheese boards.
Rye’s earthy notes work wonderfully with pickled vegetables, smoked fish, or cured meats such as pastrami or corned beef, ideal for deli-style sandwiches.
For a wholesome meal, serve thick slices alongside soups and stews—its dense crumb soaks up broths beautifully.
You can also use it as a base for open-faced sandwiches topped with avocado, tomatoes, and sprouts for a fresh twist.
Best Practices for Bread Storage
To keep your rye bread fresh, store it in a breathable container such as a paper bag or a cloth-lined bread box, which helps maintain the crust’s texture while preventing it from drying out too quickly.
Avoid sealing the bread in plastic wrap unless you plan to freeze it, as trapped moisture can cause the crust to become soggy.
For longer storage, slice the bread and freeze individual portions in airtight bags; this way, you can thaw only what you need without sacrificing freshness.
When ready to enjoy, toast frozen slices directly or let them thaw at room temperature for 30 minutes.
Proper storage ensures your homemade rye bread stays flavorful and enjoyable for several days.
Common Questions About Rye Bread
Q1: Can I substitute whole wheat flour for bread flour?
Yes, you can replace bread flour with whole wheat, but the texture will be denser and less airy because whole wheat has less gluten. Adjust rising time and hydration accordingly.
Q2: Why is cocoa powder included in this recipe?
Cocoa powder enriches the bread’s color and adds a subtle depth of flavor, balancing the earthiness of rye without making it taste like chocolate.
Q3: How do I know when the bread is fully baked?
The bread is done when it sounds hollow when tapped on the bottom and has a deep brown crust. You can also use a thermometer—the internal temperature should reach about 190°F (88°C).
Q4: Can I make this recipe without caraway seeds?
Absolutely! Caraway seeds are optional and add a traditional rye flavor, but the bread will still be delicious and flavorful without them.
Q5: Is this bread suitable for freezing?
Yes, homemade rye bread freezes well. Slice before freezing and store in airtight bags. Thaw slices as needed and toast for best results.
This recipe has been adapted and simplified from the original version by simplyrecipes. We’ve refined the steps for a smoother cooking experience and added helpful notes, nutrition insights, and essential kitchen tools to make it even easier for home cooks.