
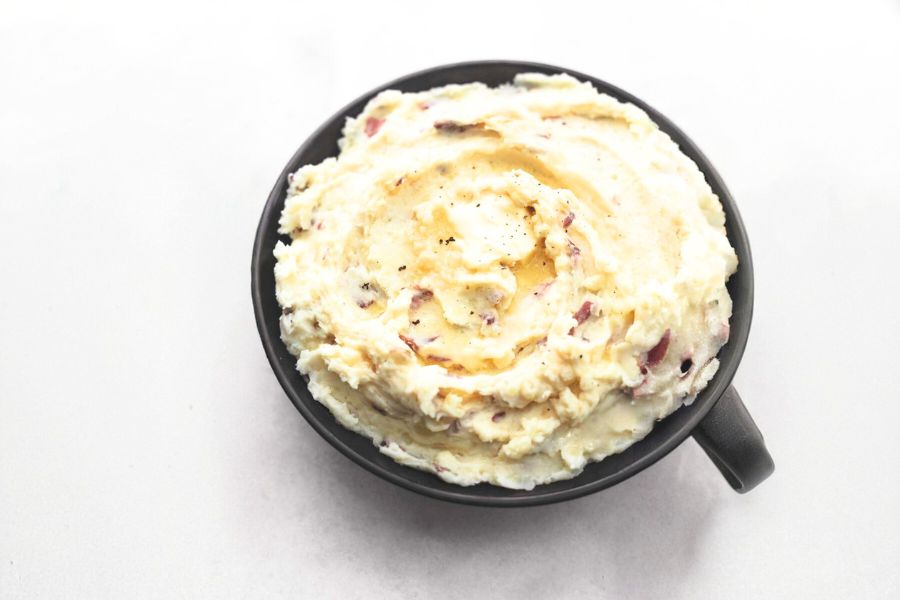
This garlic mashed potatoes recipe stands out for its perfect balance of rich, creamy texture and bold, comforting garlic flavor.
Using red potatoes with skins on adds a lovely rustic touch and boosts fiber content, while the combination of sour cream and whole milk delivers smoothness with a dose of calcium and healthy fats.
The recipe is naturally high in potassium and vitamin C, making it a nutritious side that supports heart health and immune function.
With a moderate protein content and a good mix of fats, it’s satisfying without feeling heavy. Its simplicity and quick cooking methods—whether stovetop or Instant Pot—make it an ideal everyday side dish, great for weeknight dinners or meal prep.
The garlic adds a flavorful punch, perfect for those who love a savory, homemade feel without extra fuss.
Must-Have Tools for Perfect Results
Potato Masher
Essential for achieving the ideal texture, this tool helps mash potatoes just enough to be creamy yet still slightly chunky. Beyond this recipe, it’s a versatile kitchen staple for mashing veggies and fruits.
Instant Pot (or Pressure Cooker)
Speeds up cooking time dramatically while locking in moisture and flavor. It’s a multifunctional appliance perfect for busy cooks who want quick, consistent results with minimal effort.
Large Mixing Bowl
Provides ample space to combine hot potatoes with dairy and seasonings without mess. A sturdy bowl is indispensable for mixing, marinating, and serving in any kitchen.
Hand Mixer
Makes blending ingredients smooth and easy without overworking the potatoes, ensuring a light texture. It’s a great investment for whipping, mixing batters, and making creamy dips.
Knife and Cutting Board
Necessary for prepping potatoes quickly and safely. A sharp knife and stable cutting board are essential tools for efficient meal preparation in any home kitchen.
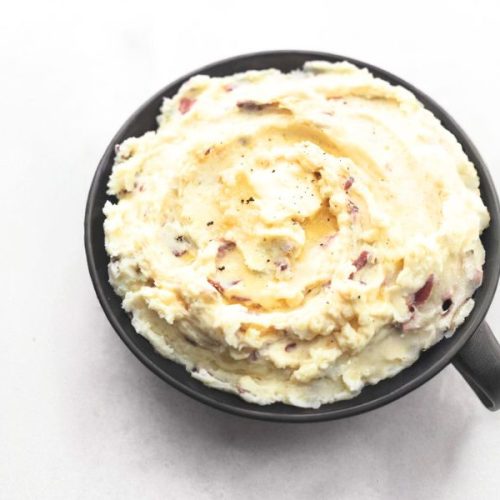
Delicious Creamy Garlic Mashed Potatoes
Equipment
- 1 large pot or Instant Pot
- 1 potato masher
- 1 Large Mixing Bowl
- 1 hand mixer
- 1 knife and cutting board
Ingredients
- 3 pounds red potatoes peeled optional
- 4 tablespoons butter
- 8 ounces sour cream
- ½ cup whole milk
- 1 tablespoon minced garlic
- 1 –2 teaspoons garlic powder
- 1 –2 teaspoons salt
- ¼ teaspoon cracked black pepper or 1/8 teaspoon ground
Instructions
- Prepare the Potatoes: Begin by thoroughly washing your red potatoes under cold running water to remove any dirt or debris.If you prefer a smoother texture, you can peel the potatoes, but leaving the skins on adds extra fiber and nutrients while providing a rustic, hearty flavor. Cut the potatoes into uniform quarters to ensure they cook evenly. Try to make the pieces roughly the same size so some don’t overcook while others remain firm.
- Choose Your Cooking Method: Stovetop or Instant Pot: If you’re using the stovetop, place the quartered potatoes in a large pot and fill it with enough cold water to cover the potatoes by about an inch. Adding cold water helps the potatoes cook more evenly from the inside out. Set the pot on the stove over high heat and bring it to a boil. Once boiling, reduce the heat to medium-high and let the potatoes cook for approximately 10 to 12 minutes. To check for doneness, pierce a potato piece with a fork—it should slide in easily with little resistance. Alternatively, if you prefer the Instant Pot method for faster cooking, place a metal trivet or rack at the bottom of the pressure cooker insert. Pour in 1 cup of water, then carefully place the quartered potatoes on the rack to avoid direct contact with water, which prevents sogginess. Seal the lid securely and set the vent to the sealing position. Program the Instant Pot to “Pressure Cook” or “Manual” on high pressure for 8 minutes.When the timer beeps, perform a quick release by carefully turning the vent to “venting” to release steam. Wait for the float valve to drop before opening the lid.
- Drain and Transfer the Potatoes: Once the potatoes are fully cooked and tender, carefully drain the hot water using a colander. If you used the Instant Pot, remove the potatoes from the pot with tongs or a slotted spoon and drain any excess liquid.Transfer the drained potatoes to a large mixing bowl while they are still hot—this helps the butter and sour cream melt smoothly into the potatoes, creating that creamy texture we want.
- Add Creamy Ingredients and Seasonings: Add 4 tablespoons of butter to the hot potatoes so it melts and infuses richness throughout. Next, pour in 8 ounces of sour cream and ½ cup of whole milk, which will lend the potatoes a luscious, velvety consistency. Then add 1 tablespoon of freshly minced garlic for bold, fragrant flavor. To amplify the garlic punch, sprinkle 1 to 2 teaspoons of garlic powder according to your taste preference. Season with 1 to 2 teaspoons of salt and ¼ teaspoon cracked black pepper for balanced seasoning. Remember, you can adjust salt and pepper later after tasting.
- Mash the Potatoes to Perfect Texture: Using a potato masher or your preferred hand mixer, begin mashing the potatoes gently. The goal is to combine all ingredients thoroughly without turning the mixture into gluey mush. If using a potato masher, press down and twist to break up lumps, but stop when a few small chunks remain for texture.If using a hand mixer, start on a low speed to avoid overworking the potatoes and slowly increase speed just enough to blend everything smoothly. Be careful not to overmix, as that can make the potatoes gummy and heavy.
- Taste and Adjust Seasoning: Once mashed, take a small spoonful and taste for seasoning. Add more salt, pepper, or garlic powder as needed to suit your personal preference. Stir gently to incorporate any additional seasonings evenly.
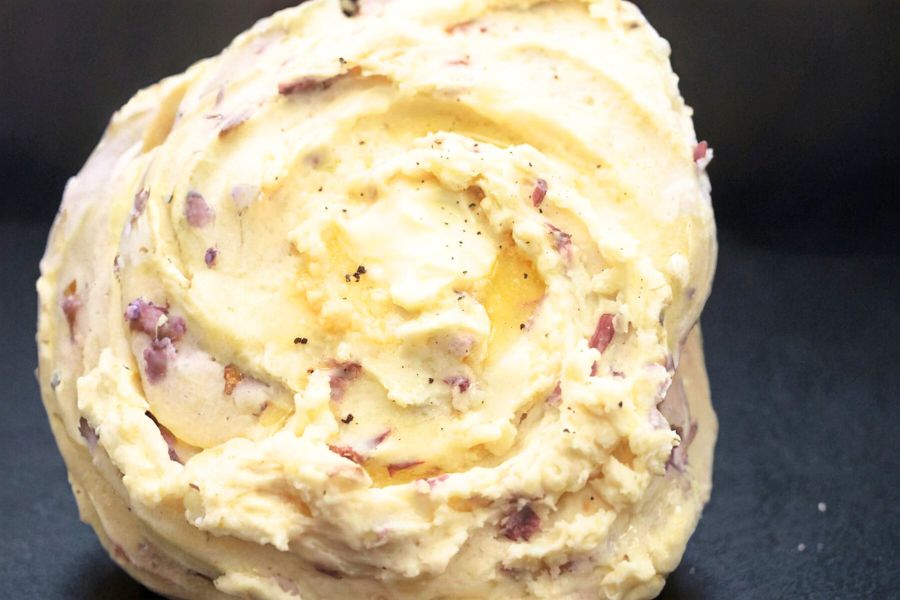
- Serve Immediately or Keep Warm: For best results, serve the garlic mashed potatoes immediately while they’re warm and fluffy. They make an ideal side dish to complement roasts, grilled meats, or vegetable mains.If you need to keep them warm, cover the bowl with foil or a lid and place it in a low oven or use a slow cooker on the warm setting. Before serving, give the potatoes a quick stir and add a small pat of butter on top for extra indulgence.
Notes
- Red potatoes with skins on add extra fiber and a rustic texture, but you can peel if you prefer a smoother mash.
- Fresh minced garlic offers the best vibrant flavor, but garlic powder boosts garlic intensity without extra prep. Adjust amounts to taste.
- Avoid over-mixing the potatoes to keep them fluffy and prevent a gluey, gummy texture.
- Sour cream and whole milk create creaminess with a subtle tang—feel free to substitute with Greek yogurt or cream for different richness.
- This recipe works great for make-ahead meals; gently reheat with a splash of milk or broth to restore creaminess.
Chef’s Secrets For Creamy Perfection
The secret to irresistibly creamy mashed potatoes lies in balancing heat and mixing technique.
Always mash the potatoes while they’re hot so the butter and dairy melt evenly into the potatoes, creating a luscious texture.
Using red potatoes with skins on not only adds fiber but naturally thickens the mash due to their waxy texture, preventing watery results. Resist the urge to overwork the potatoes—gentle mashing preserves airiness and keeps the dish light.
Adding both fresh garlic and garlic powder layers the flavor, ensuring a robust garlic presence without overpowering bitterness.
Finally, adjust seasoning carefully after mashing, as potatoes tend to absorb salt, so tasting and tweaking at the end is crucial for perfect flavor.
Serving Suggestions For Every Occasion
These garlic mashed potatoes pair beautifully with a variety of main dishes, making them a versatile side for weeknight dinners or holiday feasts.
Serve alongside roasted chicken, grilled steak, or pan-seared fish to balance hearty proteins with creamy comfort.
For a vegetarian meal, they complement sautéed mushrooms or roasted vegetables beautifully.
You can top them with a pat of herb butter, chopped fresh parsley, or a drizzle of warm gravy to elevate presentation and flavor.
They’re also excellent when layered in a casserole or shepherd’s pie, adding creamy richness that satisfies every palate.
Storage Tips To Keep Fresh
Store leftover mashed potatoes in an airtight container in the refrigerator for up to 3-4 days.
To prevent drying out, add a splash of milk or broth and stir well before reheating.
Reheat gently over low heat on the stovetop or in the microwave, stirring occasionally to maintain smoothness.
For longer storage, mashed potatoes freeze well; portion into freezer-safe containers or bags and freeze for up to 2 months.
When ready to eat, thaw overnight in the fridge and reheat slowly, adding liquid as needed to restore the creamy texture.
Frequently Asked Questions Answered
Q1: Can I use other types of potatoes?
Yes! Russet potatoes work well for fluffy mashed potatoes, though they tend to be more starchy and might require less liquid. Yukon Golds offer a buttery flavor and creamy texture. The key is to choose potatoes that mash well and suit your texture preference.
Q2: Can I make this dairy-free?
Absolutely. Substitute butter with plant-based margarine or olive oil, use coconut or almond milk instead of whole milk, and replace sour cream with a dairy-free alternative like coconut yogurt for similar creaminess.
Q3: How do I prevent lumps?
Mashing the potatoes while hot and using a potato masher or hand mixer helps create a smooth texture. For extra smoothness, you can pass the potatoes through a ricer before mixing, but avoid overmixing to keep them light.
Q4: Is it okay to add garlic powder and fresh garlic?
Yes, combining both gives a richer garlic flavor—fresh garlic offers a bright punch, while garlic powder adds depth and smoothness. Adjust amounts based on how strong you want the garlic presence.
Q5: Can I prepare these in advance?
Yes, you can make mashed potatoes a day ahead. Store them covered in the fridge and gently reheat, adding a splash of milk or broth to refresh their creamy consistency.
This recipe has been adapted and simplified from the original version by lecremedelacrumb. We’ve refined the steps for a smoother cooking experience and added helpful notes, nutrition insights, and essential kitchen tools to make it even easier for home cooks.