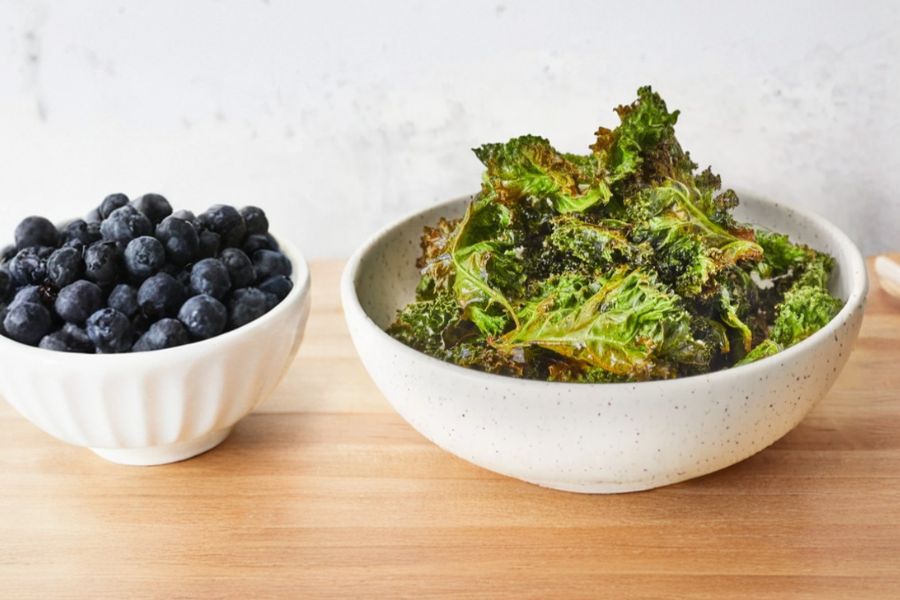
These baked kale chips are a crunchy, guilt-free snack that turns simple ingredients into a satisfying treat.
Bursting with fiber, plant-based protein, and heart-healthy fats from olive oil, they’re naturally low in calories and carbs, making them perfect for mindful eating.
The process is quick and approachable—just tear, season, and bake—so even busy home cooks can whip up a batch in under 30 minutes.
Their versatility makes them ideal for everyday snacking, meal prep, or adding a crisp topping to salads and bowls.

The gentle baking method locks in flavor while ensuring a crispy texture, letting you enjoy the wholesome benefits of kale in a fun and convenient way.
Must-Have Tools for Perfect Results
Rimmed Baking Sheet
Ensures kale chips bake evenly without spilling, and its raised edges are perfect for other roasting tasks, from vegetables to nuts.
Parchment Paper
Prevents sticking and makes cleanup effortless, while also protecting delicate ingredients during baking.
Salad Spinner
Quickly dries washed kale, crucial for achieving crisp chips, and doubles as a time-saving tool for rinsing greens for salads.
Kitchen Shears
Easily trims tough stems and tears kale into bite-sized pieces, speeding up prep and reducing waste.
Measuring Spoons
Ensures precise amounts of olive oil and salt, promoting consistent flavor and healthier portion control.

30-Minute Baked Kale Chips
Equipment
- 1 Rimmed Baking Sheet
- 1 sheet of parchment paper,
- 1 Salad Spinner
- 1 pair of kitchen shears,
- 1 Set of measuring spoons
Ingredients
- 1 bunch kale
- 1 tablespoon olive oil
- 1 teaspoon flaked sea salt
Instructions
- Preheat the Oven: Begin by setting your oven to 300°F (150°C) and allow it to fully preheat. Line a rimmed baking sheet with parchment paper to prevent sticking, ensure even heat distribution, and make cleanup effortless, creating the perfect foundation for crisp kale chips.
- Prepare the Kale: Using kitchen shears or a sharp knife, carefully remove the thick stems from each kale leaf and tear the leaves into uniform, bite-sized pieces. This step ensures even baking, prevents chewy stems in the chips, and makes them easy to snack on.
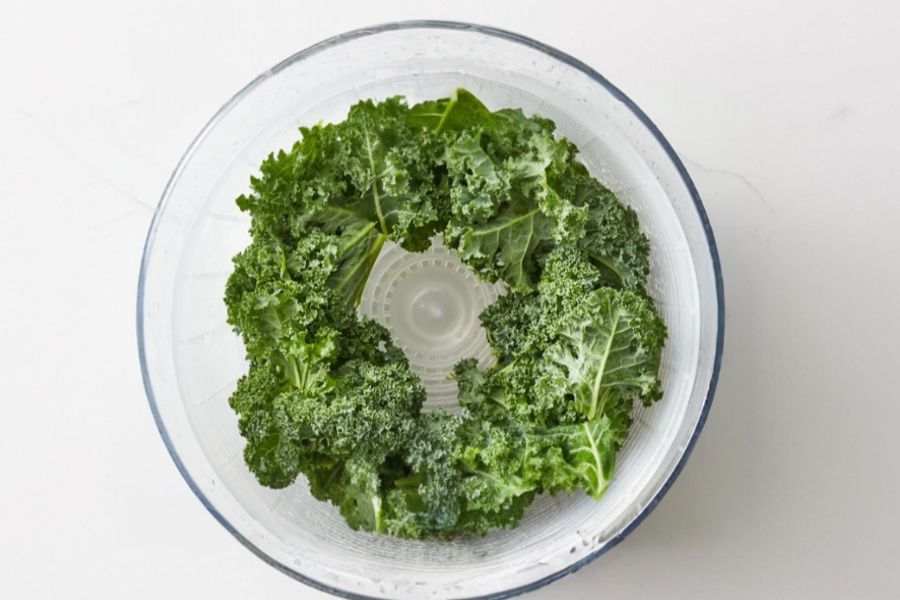
- Wash and Dry: Rinse the torn kale thoroughly under cold water, then use a salad spinner or pat dry with a clean towel to remove all moisture. Completely dry leaves are essential for achieving crispiness, as any water left on the surface can create soggy chips.
- Season the Kale: Place the dry kale in a large mixing bowl, drizzle lightly with olive oil, and toss gently to coat every leaf evenly. Sprinkle flaked sea salt on top, adjusting to taste, to enhance flavor without overpowering the natural green freshness.
- Arrange on Baking Sheet: Spread the kale in a single, flat layer on the prepared baking sheet, avoiding overlaps or bunching. Proper spacing allows hot air to circulate around each piece, ensuring consistent crisping and avoiding burnt or undercooked spots.
- Bake to Perfection: Slide the baking sheet into the preheated oven and bake for 20–30 minutes, checking frequently. Remove the chips when the edges are just starting to brown but still slightly soft in the center, as they will continue to crisp as they cool.
- Cool and Serve: Transfer the baked kale chips to a wire rack or plate and let them cool completely. This step locks in crunchiness and prevents steam from making them soggy, so they are ready to enjoy immediately or store in an airtight container for later snacking.
Notes
- Ensure kale is completely dry before baking to achieve maximum crispiness.
- Use a light drizzle of olive oil; too much prevents chips from crisping.
- Spread leaves in a single layer to avoid uneven baking.
- Remove chips from oven before they brown; they will crisp as they cool.
- Experiment with seasonings like paprika, garlic powder, or nutritional yeast for variety.
Chef’s Secrets To Crispy Kale Chips
The key to perfect kale chips lies in attention to moisture and heat. Always thoroughly dry your kale leaves, as even a few droplets of water can cause soggy results.
Use a gentle hand when coating the leaves with olive oil—each leaf should be lightly coated, not drenched.
Baking at a low temperature of 300°F allows the kale to crisp evenly without burning, while spreading the leaves in a single layer ensures consistent texture.
Finally, resist the urge to overbake; chips are done when edges are slightly brown but still soft in the center, and they will continue to crisp as they cool.
Following these techniques consistently produces light, crunchy, and perfectly seasoned kale chips every time.
Serving Suggestions For Maximum Enjoyment
Baked kale chips make an incredibly versatile snack.
Enjoy them straight from the oven as a healthy alternative to potato chips, or sprinkle them over salads and grain bowls to add texture and flavor.
They also pair wonderfully with dips like hummus, guacamole, or yogurt-based dressings.
For lunch or dinner, crushed kale chips can serve as a crunchy topping for soups, pasta, or roasted vegetables, giving dishes extra nutrition and an appealing visual touch.
Their portability makes them ideal for packed lunches or on-the-go snacking, turning a simple green into a fun, satisfying treat for the whole family.
Storage Tips To Keep Crispy
To maintain their crunch, let kale chips cool completely before storing.
Place them in an airtight container at room temperature for up to a week; they are best enjoyed within two to three days.
Avoid storing in a humid environment, as moisture will soften the chips.
If you add perishable flavorings, like cheese or fresh herbs, store the chips in the refrigerator in an airtight container and consume within two days.
Re-crisping slightly in a low oven (250°F) for a few minutes can restore their original crunch if they soften during storage.
Frequently Asked Questions Answered Clearly
1. Can I use other kale types?
Yes! Both curly kale and lacinato (“dinosaur”) kale work well. Curly kale provides a light, frilly texture, while lacinato kale offers a sturdier, chewier bite. Choose your favorite based on preference.
2. How do I prevent soggy chips?
Thoroughly dry each kale leaf after washing and avoid over-oiling. Spread in a single layer on a baking sheet to ensure hot air circulates evenly, and remove chips before they turn brown.
3. Can I add flavors or spices?
Absolutely! Try paprika, garlic powder, chili flakes, nutritional yeast, or even a dash of vinegar for unique variations. Season after lightly coating with olive oil to help flavors stick.
4. What is the best way to serve?
Serve kale chips as a standalone snack, atop salads, soups, or grain bowls, or alongside dips. They make a crunchy, satisfying addition to any meal or snack platter.
5. Can I make these ahead?
Yes, baked kale chips can be prepared in advance. Store in an airtight container at room temperature for 2–3 days, or re-crisp briefly in a low oven if they lose crunchiness..
This recipe has been adapted and simplified from the original version by allrecipes. We’ve refined the steps for a smoother cooking experience and added helpful notes, nutrition insights, and essential kitchen tools to make it even easier for home cooks.

