
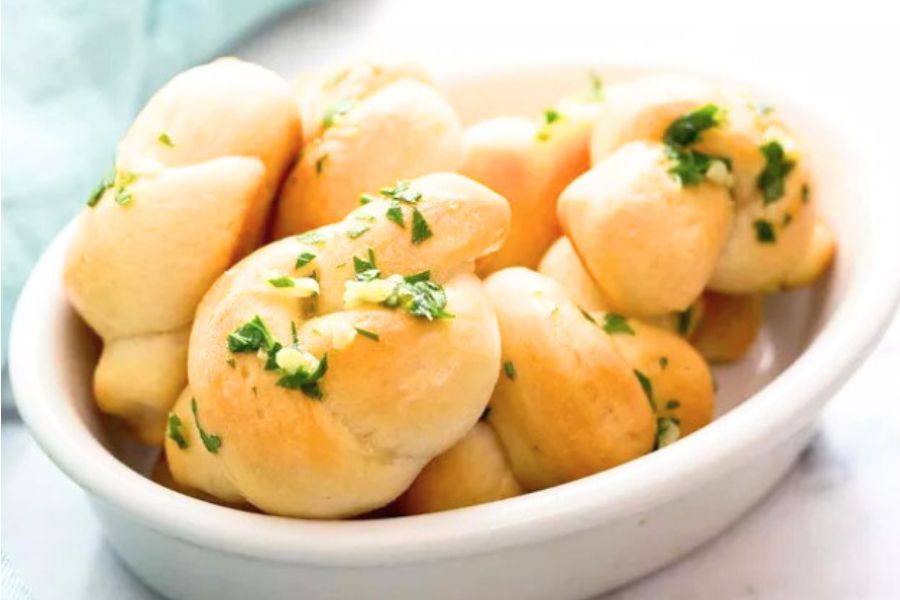
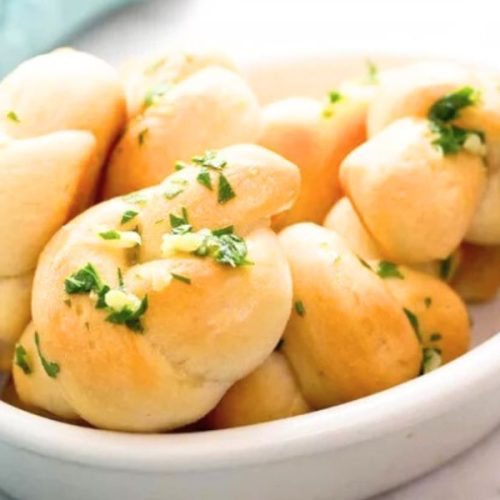
Garlic knots are a timeless comfort food that balances indulgence and simplicity, making them a standout choice for home cooks.
Soft, airy dough combined with a fragrant garlic-butter coating creates irresistible flavor in every bite.
Using bread flour ensures a slightly crisp crust while keeping the interior tender.
Beyond taste, this recipe offers nutritional benefits: olive oil provides heart-healthy monounsaturated fats, garlic delivers antioxidants and immune support, and parsley adds fiber, vitamins, and minerals.
Whether you make your own dough or use store-bought, these knots are quick to prepare, ideal for weeknight dinners, party appetizers, or meal prep.
The recipe is forgiving for beginners, yet satisfying enough for experienced bakers.
With just a few staple ingredients, it transforms simple components into a crowd-pleasing, aromatic dish that pairs beautifully with pasta, soups, or salads.
Must-Have Tools for Perfect Results
Mixing Bowl
Essential for combining yeast, flour, and other dough ingredients. A large, sturdy bowl ensures even mixing and allows the dough to rise without spilling. Versatile for soups, salads, and marinating meats.
Kitchen Scale
Measures flour and other ingredients precisely, ensuring consistent dough texture and perfect rise. Ideal for baking accuracy across recipes.
Dough Hook or Stand Mixer
Speeds up kneading while achieving smooth, elastic dough. Perfect for any yeast-based bread or pizza dough in your kitchen arsenal.
Baking Sheet with Silicone Liner or Parchment Paper
Prevents sticking and ensures even browning. Multi-purpose for cookies, roasted veggies, and sheet pan dinners.
Sharp Knife or Pizza Wheel
Cleanly slices dough strips without tearing, crucial for uniform garlic knots. Also great for cutting pizza, flatbreads, or pastries.
Soft Homemade Garlic Knots
Equipment
- 1 Large Mixing Bowl
- 1 Kitchen scale
- 1 Dough Hook / Stand Mixer (optional)
- 2 Baking Sheets
- Silicone Liner or Parchment Paper
- Sharp Knife or Pizza Wheel
Ingredients
For the dough (homemade option):
- 1 package 2 1/4 tsp active dry yeast
- 1 tsp sugar
- 7/8 cup 207 ml warm water (105–115°F)
- 2 1/4 cups 300 g bread flour, plus extra for dusting
- 1 tsp salt
- 1 tbsp extra virgin olive oil plus more for greasing and brushing
For the dough (store-bought option):
- 14 oz pizza dough
For the garlic butter coating:
- 5 tbsp unsalted butter
- 4 cloves garlic minced
- 1/4 cup parsley minced
- 1 tsp salt
Instructions
- Activate the Yeast (Proofing Stage): Start by preparing your yeast for the dough. In a small bowl, combine the active dry yeast with 1 teaspoon of sugar and 7/8 cup (207 ml) of warm water, making sure the water temperature is between 105°F and 115°F. Stir gently to dissolve the yeast and sugar, then let it sit for 3 to 5 minutes. You should see a frothy layer forming on the surface. This foaming indicates that the yeast is alive and ready to work. If the mixture does not foam, your yeast may be expired, and you should start with a fresh package. Proofing ensures a light, airy dough with a proper rise.
- Combine Dry Ingredients: While the yeast is proofing, prepare your flour mixture. In a large mixing bowl, whisk together 2 1/4 cups (300 g) of bread flour and 1 teaspoon of salt. Bread flour is preferred for a slightly crisper crust, but all-purpose flour works if that’s what you have on hand. Creating a well in the center of your flour mixture allows the wet ingredients to be incorporated gradually, which promotes a smooth, elastic dough.
- Mix the Dough: Pour the frothy yeast mixture and 1 tablespoon of extra virgin olive oil into the well you created in the flour. Stir gently at first to incorporate, then knead by hand on a floured surface for 5–10 minutes until the dough becomes soft, smooth, and slightly tacky.If using a stand mixer, attach the dough hook and knead on medium speed for about 5 minutes. If the dough feels too dry, add 1–2 tablespoons of water, a little at a time, until it reaches the desired consistency. This kneading step develops the gluten, giving your garlic knots their airy, chewy texture.
- First Rise (Bulk Fermentation): Once kneaded, shape the dough into a ball and lightly coat it with a thin layer of olive oil. Place it in a large mixing bowl and cover it with plastic wrap or a clean kitchen towel. Set the bowl in a warm, draft-free area to rise until the dough has doubled in size. This usually takes about 90 minutes but can extend up to 3 hours depending on the room temperature. Alternatively, for deeper flavor, refrigerate the dough overnight or up to 24 hours for a slow rise. This step is crucial for a fluffy, flavorful dough.
- Portion the Dough: After the dough has doubled, gently punch it down to release any trapped air. Transfer it to a floured surface and cut it into four equal portions. Working with one portion at a time, flatten each piece into a rough rectangle approximately 4 x 5 inches.This ensures even-sized garlic knots for uniform cooking.If you wish to make the dough ahead, wrap each portion in plastic wrap and freeze. Defrost in the refrigerator overnight before shaping.
- Slice the Dough Strips: Using a sharp knife or a pizza wheel, cut each rectangle into four long strips, roughly 1 x 5 inches. Then, slice each strip in half lengthwise to create eight smaller strips per rectangle. Properly sized strips ensure the knots cook evenly and retain their shape.
- Shape the Garlic Knots: Take each dough strip and tie it gently into a loose knot. Tucking the ends underneath helps the knots hold their shape during baking. Place the shaped knots on a prepared baking sheet lined with a silicone mat or parchment paper, leaving a little space between them to allow expansion.Repeat until all dough portions are tied into knots.
- Second Rise (Proofing the Knots): Cover the shaped knots lightly with a kitchen towel and let them rise for an additional 30–45 minutes. This second rise helps the knots become even lighter and fluffier during baking, producing a soft interior with a tender bite.
- Preheat the Oven: While the knots are rising, preheat your oven to 375°F (190°C). Ensure the oven rack is positioned in the middle for even heat circulation. Preheating properly ensures the knots bake uniformly and achieve a golden-brown crust.
- Prepare the Garlic Butter: In a small saucepan, melt 5 tablespoons of unsalted butter over low heat. Add 4 cloves of minced garlic, 1 teaspoon salt, and 1/4 cup minced parsley. Stir continuously for 1–2 minutes until the garlic is fragrant but not browned. This aromatic mixture will be brushed over the knots immediately after baking, infusing them with rich, savory flavor.
- Bake the Knots: Place the baking sheets in the preheated oven and bake for 12–14 minutes, or until the knots turn golden brown on the top and slightly crisp at the edges. Avoid overbaking to maintain the soft interior.
- Brush with Garlic Butter: Remove the baked knots from the oven and immediately brush them generously with the prepared garlic butter. The residual heat helps the butter soak into the crust while coating each knot with flavor. For an extra touch, sprinkle a little extra parsley on top for freshness and visual appeal.
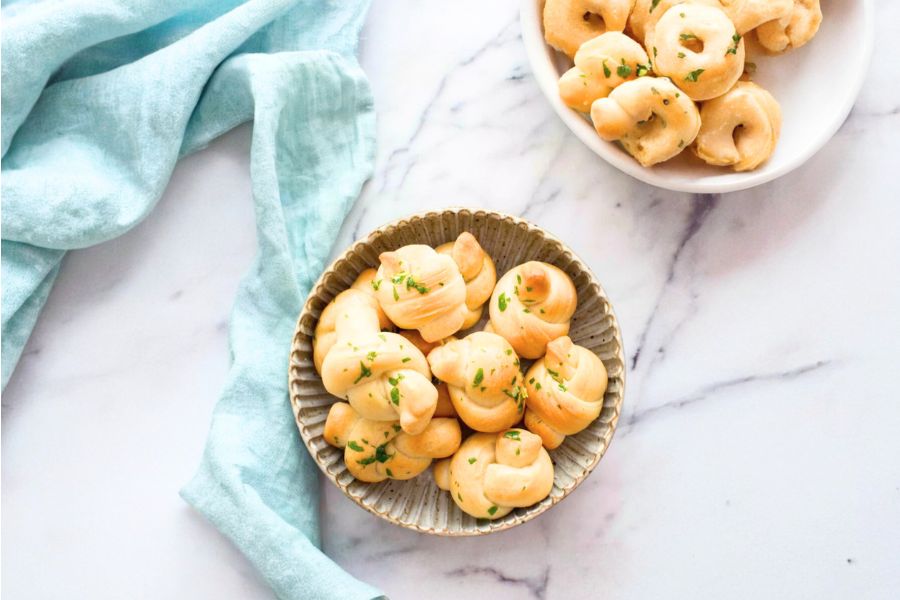
- Serve and Enjoy: Serve your garlic knots warm as a side dish with pasta, soup, or salad, or enjoy them on their own as a savory snack. They can also be stored in an airtight container at room temperature for up to two days, or reheated in the oven for a fresh, soft texture.
Notes
- Store-bought pizza dough can be used to save time without sacrificing flavor.
- Bread flour produces a slightly crispier crust; all-purpose flour works fine if unavailable.
- Ensure yeast water is warm but not hot; above 120°F can kill the yeast.
- Don’t over-knead the dough; it should be soft, elastic, and slightly tacky.
- Garlic butter should be brushed immediately after baking for maximum flavor absorption.
- Knots can be frozen before baking; thaw overnight in the refrigerator for best results.
- Adjust garlic and parsley amounts to suit your flavor preference.
Chef’s Secrets For Maximum Flavor
The secret to truly irresistible garlic knots starts with proper yeast activation.
Make sure your yeast is fresh and the water temperature is precise—this ensures a perfect rise and fluffy texture.
Using bread flour adds a slight crunch to the exterior while keeping the center tender.
Allowing the dough to rise slowly, even overnight in the refrigerator, develops deeper flavor and a more complex, airy crumb.
When shaping the knots, avoid tight knots; a looser tie allows heat to penetrate evenly, creating uniform golden-brown results.
Finally, brushing the knots with garlic butter immediately after baking ensures the butter seeps into every crevice, enhancing aroma and taste.
Serving Suggestions For Best Pairings
Garlic knots shine as a versatile accompaniment to meals.
Serve them alongside classic Italian dishes like spaghetti, lasagna, or creamy Alfredo pasta.
They also make a perfect side for soups, stews, or fresh salads, adding a comforting, aromatic element to the plate.
For entertaining, create a dipping station with marinara sauce, pesto, or even a cheesy spinach dip.
They’re ideal for snack platters, lunchboxes, or casual family dinners.
For a fun twist, sprinkle grated Parmesan or red pepper flakes over the garlic butter to elevate the flavor profile.
Storage Tips For Fresh Knots
To store leftover garlic knots, place them in an airtight container at room temperature for up to two days.
For longer storage, freeze unbaked knots by wrapping them individually in plastic wrap and then placing them in a freezer-safe bag; thaw in the refrigerator overnight before baking.
Baked knots can also be frozen, though reheating in the oven is recommended to restore their crisp exterior.
Avoid microwaving for long periods, as it can make the crust chewy or soggy.
Reheating at 350°F for 5–7 minutes usually brings back the perfect texture and flavor.
Common Questions About Garlic Knots
1. Can I make garlic knots ahead?
Yes! Dough can be prepared and frozen before shaping or after forming the knots. Thaw in the refrigerator overnight and bake as usual for fresh results.
2. Can I use whole wheat flour?
Absolutely. Whole wheat flour adds a nuttier flavor and more fiber, but you may need to adjust water slightly to maintain soft, elastic dough.
3. Can I skip the second rise?
Technically yes, but the second rise gives the knots a lighter, fluffier texture. Skipping it may result in denser knots.
4. Can I make garlic knots vegan?
Yes. Replace butter with vegan margarine or olive oil and ensure the dough does not contain dairy. The flavor will remain rich and aromatic.
5. How do I prevent knots from sticking to the pan?
Always line your baking sheet with parchment paper or a silicone mat and lightly flour your work surface and hands. This ensures easy removal without tearing the knots.
This recipe has been adapted and simplified from the original version by simplyrecipes. We’ve refined the steps for a smoother cooking experience and added helpful notes, nutrition insights, and essential kitchen tools to make it even easier for home cooks.