
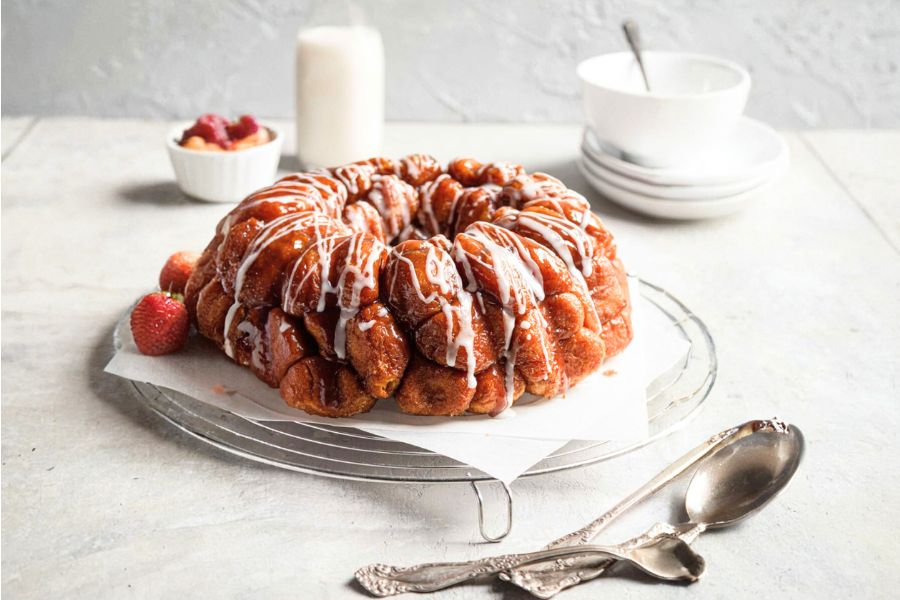
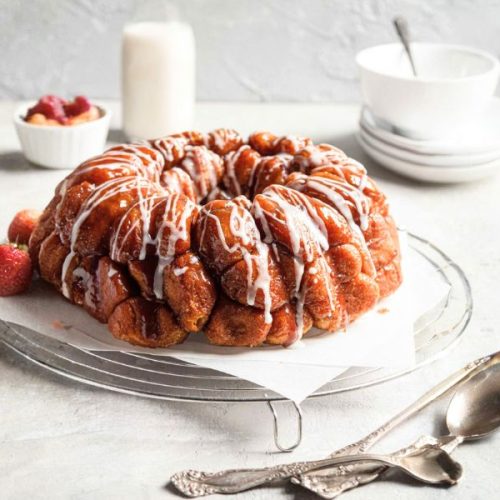
This homemade monkey bread stands out for its irresistible combination of soft, pillowy dough and rich, caramelized brown sugar coating.
Unlike store-bought versions, this recipe is made entirely from scratch, giving you control over ingredients and quality.
The dough contains wholesome all-purpose flour and milk, providing moderate protein and fiber, while the use of butter in moderation adds heart-pleasing good fats.
Sweetened with light brown sugar and enhanced with cinnamon, each bite delivers a comforting, aromatic flavor perfect for weekend breakfasts or brunch gatherings.
Beyond taste, this recipe is satisfying and shareable, yet flexible enough for meal prep: dough can be prepared ahead, refrigerated overnight, or even frozen for later indulgence.
Its warm, gooey texture and ease of assembly make it a standout option for both novice and seasoned bakers.
Must-Have Tools for Perfect Results
12-Cup Bundt Pan
Essential for shaping the monkey bread and allowing even baking. Its nonstick surface ensures easy release, making it a versatile tool for cakes, breads, and molded desserts.
Stand Mixer with Dough Hook
Perfect for kneading the dough to a smooth, elastic consistency quickly and efficiently. A great investment for any baker who frequently prepares bread, pizza, or other yeast-based recipes.
Measuring Cups and Spoons
Accurate measurement ensures perfect dough texture and balanced sweetness every time. Vital for baking precision and consistent results across a variety of recipes.
Bench Scraper or Pizza Cutter
Ideal for cutting dough into uniform pieces, ensuring even baking and consistent portion sizes. Also doubles as a handy tool for transferring or lifting dough on floured surfaces.
Whisk
Perfect for blending the glaze until smooth and lump-free. A simple yet indispensable tool for mixing, emulsifying, and creating delicate sauces or dressings in everyday cooking.
Delicious Monkey Bread
Equipment
- 12-Cup Bundt Pan
- Stand Mixer with Dough Hook
- Measuring cups and spoons
- Bench Scraper or Pizza Cutter
- Whisk
Ingredients
For Greasing the Pan
- 2 tablespoons unsalted butter softened
For the Dough
- 1 cup warm milk 240 ml, ~110°F
- ⅓ cup warm water 80 ml, ~110°F
- ¼ cup granulated sugar 50 g
- 2 tablespoons unsalted butter melted (28 g)
- 2¼ teaspoons instant yeast
- 3¼ cups all-purpose flour 390 g, plus extra for work surface
- 2 teaspoons salt
For the Brown Sugar Coating
- 1 cup light brown sugar 198 g
- 2 teaspoons ground cinnamon
- ½ cup unsalted butter melted (113 g)
For the Glaze
- 1 cup powdered sugar 113 g
- 2 tablespoons milk 30 ml
Instructions
- Prepare the Bundt Pan: Begin by greasing a standard 12-cup Bundt pan. Use 2 tablespoons of softened butter, spreading it evenly over the interior, including the bottom and sides. This ensures the monkey bread won’t stick and will release smoothly once baked. For extra insurance, lightly dust the pan with flour or use nonstick cooking spray—especially helpful for sticky caramelized layers. Set the pan aside while you prepare the dough.
- Warm the Liquids: In a large measuring cup or small bowl, combine 1 cup of milk and ⅓ cup of water. Warm gently to around 110°F (43°C), ensuring the mixture is comfortably warm to the touch but not hot. Overheating can kill the yeast. Add ¼ cup granulated sugar and 2 tablespoons melted butter, stirring until fully incorporated. Sprinkle 2¼ teaspoons of instant yeast over the surface.Let it sit for 5 minutes until the yeast starts to bloom, forming small bubbles—this signals that it’s active and ready.
- Combine Dry Ingredients: In a large mixing bowl, or the bowl of a stand mixer fitted with a dough hook, combine 3¼ cups all-purpose flour with 2 teaspoons salt. Mix briefly to evenly distribute the salt throughout the flour.
- Form the Dough: Turn your stand mixer to low speed. Gradually pour the warm milk mixture into the flour while mixing continuously. Once the dough begins to come together into a shaggy ball, increase the mixer speed to medium and knead for 6 to 7 minutes until the dough is smooth, shiny, and elastic. If making by hand, form a well in the center of the flour mixture, pour in the milk mixture, and stir with a wooden spoon until a rough dough forms.Then knead on a lightly floured surface until soft and satiny.
- First Rise: Lightly coat a large bowl with nonstick cooking spray. Place the dough in the bowl and turn it so the top is lightly coated as well. Cover with plastic wrap or a damp kitchen towel, and place in a draft-free, warm area.Allow the dough to rise until doubled in size, about 50–60 minutes. Properly risen dough will be puffy and soft to the touch.
- Prepare the Brown Sugar Coating: While the dough rises, mix together 1 cup light brown sugar and 2 teaspoons ground cinnamon in a medium bowl. In a separate small bowl, melt ½ cup unsalted butter. Set both bowls aside for the assembly step.
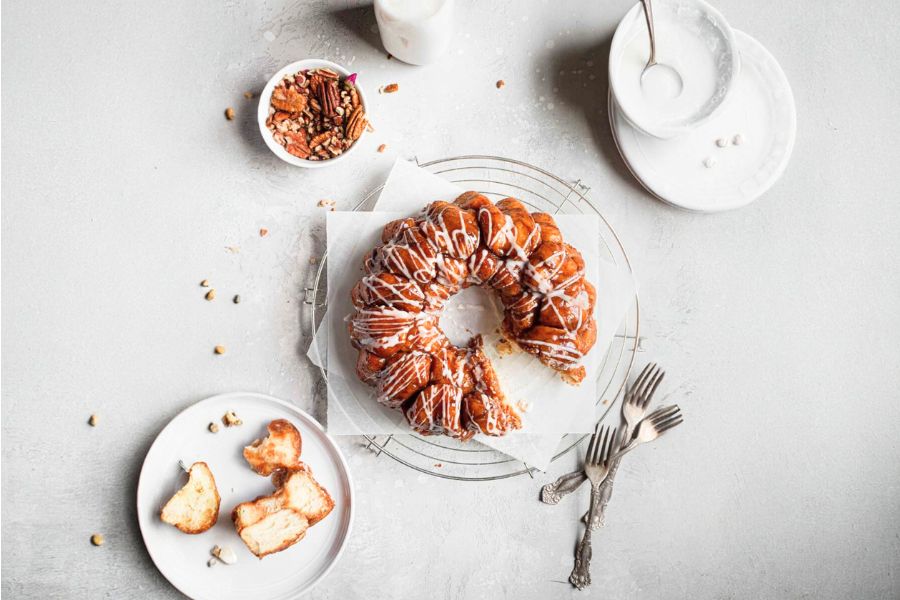
- Shape the Dough Balls: Gently deflate the risen dough and turn it onto a lightly floured surface. Pat into an approximate 8-inch square. Using a bench scraper, sharp knife, or pizza cutter, cut the dough into 64 evenly sized pieces.Roll each piece between your hands into smooth, round balls. This ensures even baking and a uniform pull-apart texture.
- Coat the Dough Balls: Take each dough ball and dip it briefly into the melted butter, letting any excess drip back into the bowl. Then roll it in the cinnamon-brown sugar mixture until fully coated. Layer the coated dough balls in the prepared Bundt pan, slightly staggering seams and creating layers to maximize caramelization. This layering also ensures even baking and a visually appealing pull-apart effect.
- Second Rise: Cover the Bundt pan tightly with plastic wrap and allow the dough balls to rise again in a draft-free spot until puffy and almost reaching the top of the pan, about 50–70 minutes. This second rise is critical for the soft, airy texture of the final bread.
- Bake the Monkey Bread: Preheat the oven to 350°F (177°C). Remove the plastic wrap from the Bundt pan.Bake the monkey bread for 30–35 minutes, or until the top is deep golden brown and the caramel begins to bubble around the edges. If the top browns too quickly, lightly tent with aluminum foil. Once baked, allow the bread to cool in the pan for just 5 minutes to prevent the sticky glaze from solidifying.
- Turn Out and Cool: Carefully invert the Bundt pan onto a serving platter. Gently lift the pan away, ensuring the caramelized dough releases cleanly. Let the monkey bread rest for about 10 minutes, giving it time to cool slightly while retaining its warm, gooey texture.
- Prepare the Glaze: In a small bowl, whisk together 1 cup powdered sugar and 2 tablespoons milk until smooth and lump-free. Drizzle the glaze generously over the warm monkey bread, letting it cascade down the sides for a glossy, sweet finish. Serve immediately for the best taste and texture.
- Serving and Storage Tips: Serve warm, pulling apart pieces by hand.Monkey bread is best enjoyed fresh but can be stored tightly covered at room temperature or in the fridge for up to 3 days. For meal prep, the dough can be prepared ahead, refrigerated for an overnight first rise, and baked the following day. You can also freeze individual portions or the whole loaf for later enjoyment.
Notes
- Grease thoroughly: Ensure the Bundt pan is well-greased to prevent sticking and achieve a smooth release.
- Temperature matters: Milk and water should be warm (~110°F) to activate yeast without killing it.
- Even dough pieces: Cutting uniform dough balls ensures consistent baking and a visually appealing pull-apart bread.
- Timing the second rise: Allow the second rise to reach just below the top of the pan for optimal fluffiness.
- Glaze gently: Drizzle glaze while the bread is warm, but not piping hot, to achieve a glossy finish.
- Make ahead: Dough can rise overnight in the refrigerator for convenience.
- Flavor variations: Try adding nuts, chocolate chips, or drizzles of caramel for creative twists.
Chef’s Secrets For Perfect Texture
The secret to this monkey bread’s soft, pillowy texture lies in careful yeast activation and thorough kneading.
Always ensure your liquid ingredients are warm but not hot, allowing the yeast to bloom fully.
Kneading the dough until it is elastic and smooth ensures air is incorporated, creating a light, fluffy crumb.
Layering the dough balls and staggering seams allows the sugar-butter coating to caramelize evenly, producing a beautiful, glossy finish.
Using a second, shorter rise in the pan enhances softness and ensures the bread pulls apart effortlessly.
Small details, such as gently rolling each dough ball and letting excess butter drip off, also prevent soggy spots and maximize flavor in every bite.
Serving Suggestions For Maximum Enjoyment
Serve this monkey bread warm, fresh from the oven, as the centerpiece of a brunch or holiday breakfast.
Pair it with hot beverages such as coffee, tea, or a creamy latte to complement the sweetness of the brown sugar and cinnamon.
For a decadent treat, drizzle additional caramel or chocolate over the top.
It also works beautifully alongside fresh fruit, yogurt, or a light cream cheese spread for a balanced indulgence.
Individual portions can be served in mini Bundt pans or muffin tins for parties, making it easy to grab and share.
Storage Tips For Freshness Longevity
Monkey bread is best enjoyed the day it’s baked for maximum softness and gooeyness.
For leftovers, store it tightly covered with plastic wrap at room temperature for up to 2 days, or in the refrigerator for up to 3 days.
You can freeze individual portions or the whole loaf for up to 3 months.
Thaw frozen portions in the refrigerator overnight, or leave small portions at room temperature for an hour.
To refresh slightly stale bread, warm in the oven at 300°F for 5–10 minutes to restore softness.
Frequently Asked Questions Answered Clearly
1. Can I make this vegan-friendly?
Yes! Substitute dairy milk with unsweetened plant-based milk such as oat or soy, and replace butter with a vegan butter alternative. The dough will rise and bake beautifully with minimal flavor compromise.
2. What type of flour is best?
All-purpose flour provides the right structure for soft, tender bread. You can also experiment with bread flour for a slightly chewier texture. Avoid whole wheat as it may make the bread dense.
3. Can I use canned biscuits instead of scratch dough?
Absolutely! Canned biscuit dough saves time and still delivers a sweet, pull-apart effect, though the flavor and texture will be slightly different from homemade dough.
4. How do I prevent sticky bread after baking?
Avoid letting the bread cool too long in the pan. After 5 minutes, invert onto a platter while still warm. This prevents the caramel from hardening and sticking.
5. Can I add mix-ins like chocolate or nuts?
Yes, you can add mini chocolate chips, chopped nuts, or dried fruit to the coating or inside the dough balls. Add them sparingly to maintain the proper texture and ensure even baking.
This recipe has been adapted and simplified from the original version by browneyedbaker. We’ve refined the steps for a smoother cooking experience and added helpful notes, nutrition insights, and essential kitchen tools to make it even easier for home cooks.