
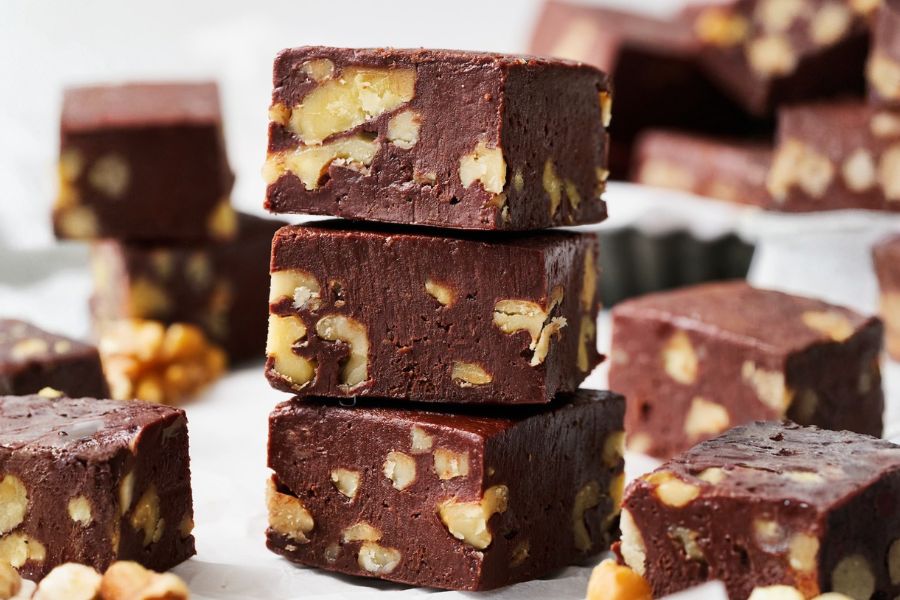
This rich and creamy chocolate fudge is a treat that balances indulgence with simplicity.
Unlike traditional candy that requires precise temperature control, this fudge uses a straightforward double-boiler method, making it foolproof for any home cook.
Sweetened condensed milk provides natural sweetness and creaminess, while butter and semi-sweet chocolate deliver satisfying good fats.
Adding optional mix-ins such as nuts or crushed candy canes not only introduces texture but also boosts fiber and plant-based protein.
Perfectly portioned for sharing or gifting, this fudge sets in just a couple of hours, making it a quick, satisfying option for everyday dessert cravings or holiday prep.
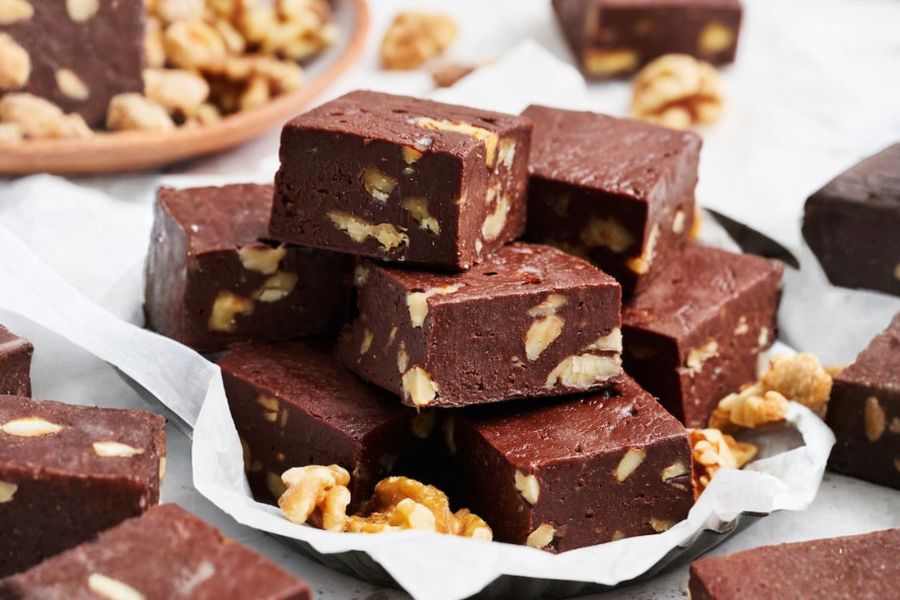
It’s indulgent yet approachable, ideal for those who want a decadent treat without complicated steps.
Must-Have Tools for Perfect Results
8×8-Inch Baking Pan
Essential for shaping your fudge; ensures even thickness and easy slicing. Versatile for brownies, bars, and other desserts.
Parchment Paper
Prevents sticking and allows effortless removal from the pan. A kitchen staple for baking and roasting.
Heatproof Mixing Bowl
Ideal for double-boiler melting, ensuring chocolate and butter melt evenly without burning. Also perfect for whipping sauces or batters.
Rubber Spatula
Crucial for gentle folding and scraping every bit of fudge from the bowl. Useful for mixing, folding, and scraping in countless recipes.
Saucepan (for double boiler)
Provides gentle, indirect heat to prevent chocolate from seizing. Multipurpose for melting, steaming, or simmering delicate sauces.
20-Munite Foolproof Chocolate Fudge
Equipment
- 1 8×8-inch baking pan,
- 1 Heatproof mixing bowl
- 1 Saucepan
- 1 Rubber spatula
- Parchment Paper
Ingredients
- 1 can 14 oz sweetened condensed milk
- 1 tsp pure vanilla extract
- 20 oz semi-sweet chocolate roughly chopped
- 3 tbsp unsalted butter cut into ½-inch pieces, at room temperature
- Flaky sea salt optional
- ½ cup chopped nuts or crushed candy canes optional
Instructions
- Prepare the Pan: Lightly grease an 8×8-inch baking pan with butter or nonstick spray, then line it with parchment paper or aluminum foil, allowing the excess to hang over the sides; this ensures easy removal of the fudge once set and keeps edges clean and neat.
- Combine Ingredients: In a large heatproof mixing bowl, add the sweetened condensed milk, vanilla extract, chopped semi-sweet chocolate, and butter pieces. Stir gently to combine the ingredients, creating a layered mixture ready for gentle melting without scorching.
- Set Up the Double Boiler: Fill a medium saucepan with about ¼ of water and bring it to a gentle simmer over medium-low heat. Place the heatproof bowl with your chocolate mixture on top of the saucepan, ensuring the bottom of the bowl does not touch the water, allowing indirect heat to melt the chocolate evenly.
- Melt the Chocolate: Using a rubber spatula, stir continuously for about 4 minutes until the chocolate is almost melted but still has a few small solid pieces. This careful melting prevents separation and ensures a smooth, creamy texture in the final fudge.
- Smooth the Mixture: Remove the bowl from the heat and continue stirring for an additional 2 minutes until the chocolate and butter are fully melted, producing a glossy, smooth mixture. At this stage, fold in any optional mix-ins such as nuts or crushed candy canes for added flavor and texture.
- Spread into Pan: Scrape the fudge into the prepared pan, using the spatula to evenly spread it to all edges. Smooth the top gently to create a uniform surface, which helps the fudge set evenly and makes slicing clean and easy.
- Refrigerate to Set: Place the pan in the refrigerator for approximately 2 hours, allowing the fudge to firm completely. The chilling process locks in the creamy texture and makes it easy to cut into neat, bite-sized squares.
- Slice and Serve: Gently run a butter knife around the edges of the pan to loosen the fudge. Lift it out using the parchment overhang, peel away the paper, and cut into squares with a sharp knife. Serve immediately or store in an airtight container in the fridge for up to one month, or freeze for longer storage.
Notes
- Use sweetened condensed milk only; evaporated milk will alter the texture.
- Room-temperature butter ensures smooth melting and prevents grainy fudge.
- For extra texture, try adding chopped nuts, crushed candy canes, or peanut butter chips.
- Always remove the bowl from the heat before chocolate fully melts to avoid separation.
- Store fudge in an airtight container to maintain freshness and prevent moisture absorption.
- Slice fudge with a sharp knife for clean edges; warming the blade slightly helps.
Chef’s Secrets For Chocolate Fudge
The key to perfectly smooth fudge lies in gentle, indirect heat.
Using a double boiler ensures that the chocolate melts evenly without burning or separating, which can result in a greasy or grainy texture.
Stirring continuously during melting encourages a uniform consistency and a glossy finish.
Allowing small pieces of chocolate to remain slightly unmelted before removing from heat prevents overcooking and guarantees creamy, luscious fudge.
Experimenting with mix-ins is another secret: roasted nuts, candy, or a sprinkle of sea salt on top elevates flavor complexity and adds visual appeal.
Patience during cooling is essential—rushing the process can compromise texture and slicing.
Serving Suggestions For Sweet Treats
This chocolate fudge is incredibly versatile and pairs beautifully with both hot and cold beverages.
Serve alongside freshly brewed coffee, rich hot chocolate, or a glass of cold milk for a classic indulgence.
For festive occasions, arrange fudge squares on a decorative plate with fresh berries or edible flowers for added elegance.
You can also layer them between parchment paper and present them as thoughtful homemade gifts.
For a playful twist, drizzle with caramel or melted white chocolate, or pair with a scoop of vanilla ice cream to turn it into a decadent dessert experience.
Storage Tips To Maintain Freshness
Fudge stores best in an airtight container at cool temperatures.
In the refrigerator, it stays fresh for up to one month, retaining its creamy texture and flavor.
For longer storage, freeze the fudge in an airtight, freezer-safe container for up to two months.
Thaw in the refrigerator before serving to prevent condensation from forming on the surface.
To prevent sticking, separate layers with parchment paper or wax paper.
Avoid storing in warm areas, as heat can cause the chocolate to soften excessively or bloom, affecting texture and appearance.
Frequently Asked Questions Answered Clearly
1. Can I use milk chocolate instead?
Yes, milk chocolate can be substituted, but it will yield a sweeter, less intense chocolate flavor. Adjust sweetness accordingly, and ensure it melts gently to avoid grainy fudge.
2. Do I need a candy thermometer?
No, this recipe is foolproof and doesn’t require a candy thermometer. The double-boiler method and careful stirring ensure smooth, creamy fudge without precise temperature measurements.
3. Can I make it vegan?
To make a vegan version, substitute sweetened condensed coconut milk and a plant-based butter alternative. The texture may vary slightly, but the result remains creamy and rich.
4. How long should I chill the fudge?
Approximately two hours in the refrigerator is ideal. For faster results, chilling in the freezer for 45–60 minutes works, but monitor closely to prevent over-hardening.
5. Can I add flavorings or spices?
Absolutely! A pinch of cinnamon, espresso powder, or a few drops of peppermint extract can enhance flavor. Stir in gently after melting to maintain a smooth texture.
This recipe has been adapted and simplified from the original version by bakerbynature. We’ve refined the steps for a smoother cooking experience and added helpful notes, nutrition insights, and essential kitchen tools to make it even easier for home cooks.