
These Stuffed Mini Peppers are a vibrant, flavorful appetizer that combines creamy goat cheese and parmesan with a gentle kick of jalapeño — offering all the comfort of a cheesy bite without the heaviness.
They’re naturally low in carbs and rich in protein and healthy fats, making them a more nutritious alternative to traditional party snacks.
Mini peppers provide fiber and vitamin C, while goat cheese adds a tangy dose of calcium with less saturated fat than many other cheeses.
Quick to assemble and ready in under 40 minutes, this recipe is both weeknight-friendly and perfect for entertaining.
It’s easy to scale, stores well for meal prep, and feels gourmet with minimal effort — making it a go-to option for healthy, satisfying snacking or party platters.
Must-Have Tools for Perfect Results
Half Sheet Baking Pan
Provides even heat distribution and space to spread out peppers for perfect roasting. A kitchen essential for everything from vegetables to cookies.
Mixing Bowls (Medium to Large)
Ideal for blending the cheese filling evenly. Versatile for salads, baking, and meal prep.
Paring Knife
Perfect for slicing and de-seeding mini peppers with precision. Handy for everyday tasks like peeling fruit or trimming veggies.
Silicone Spatula or Spoon
Helps fold and mix the filling smoothly and scrape every last bit from the bowl — great for sauces, batters, and spreads.
Measuring Spoons & Cups
Ensures consistent flavor and seasoning. A basic kitchen staple for both cooking and baking accuracy.
Creamy Stuffed Mini Peppers
Equipment
- 1 Baking Sheet
- 1 Mixing Bowl
- 1 Small Knife (for slicing peppers)
- Measuring Spoons
- Measuring cups
- Spoon or Small Spatula
Ingredients
- 1 lb mini sweet peppers
- 2 tbsp extra virgin olive oil
- ¼ tsp salt plus more to taste
- 10 oz goat cheese softened
- ⅔ cup grated parmesan 40g
- 1 tbsp minced garlic
- 2 jalapeños seeded and finely chopped (about ⅓ cup)
- ¼ tsp freshly ground black pepper
Instructions
- Preheat and Prepare the Workspace: Start by preheating your oven to 425°F (218°C). While the oven heats up, prepare a clean workspace by laying out your peppers, utensils, and mixing bowls. Line a baking sheet with parchment paper or lightly grease it with oil to prevent sticking.
- Prep the Mini Peppers: Rinse the mini sweet peppers under cool running water and pat them completely dry with a paper towel.If you want to keep the stems on for presentation, simply slice each pepper lengthwise from top to tip without removing the stem. Otherwise, remove the stems before slicing. Scoop out any seeds or membranes using the tip of a paring knife or your fingers. Place all the pepper halves into a large mixing bowl.
- Season the Peppers: Drizzle the peppers with 2 tablespoons of extra virgin olive oil and sprinkle with ¼ teaspoon of salt. Toss thoroughly using your hands or a spoon so every pepper is evenly coated with oil and seasoning. This helps them roast evenly and develop a beautiful, slightly caramelized surface in the oven.
- Make the Cheese Filling: In a separate large bowl, add the softened goat cheese, grated parmesan, minced garlic, finely chopped jalapeños, and ¼ teaspoon of black pepper. Using a silicone spatula or sturdy spoon, mix everything together until the filling is smooth, creamy, and well combined. The mixture should be thick but spreadable, with little bits of jalapeño distributed throughout.
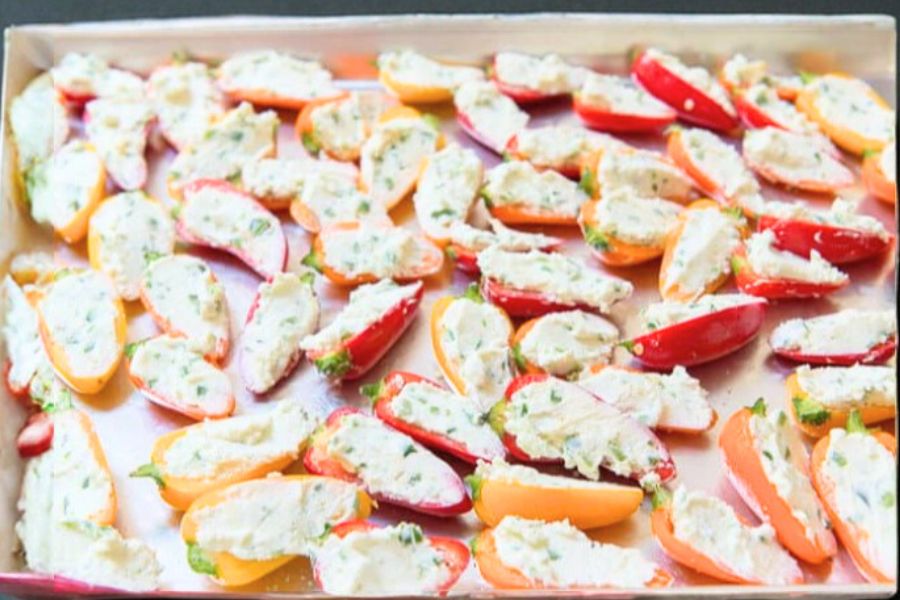
- Fill the Peppers: Using a small spoon, mini spatula, or even a piping bag if you prefer precision, spoon generous portions of the cheese mixture into each pepper half. Fill them so the mixture comes slightly above the edges, creating a dome-like top. Try to divide the filling evenly so each pepper is uniformly stuffed.
- Arrange for Baking: Place the stuffed peppers in a single layer on the prepared baking sheet.Space them out slightly so hot air can circulate around each piece. This promotes better browning along the edges and prevents them from steaming.
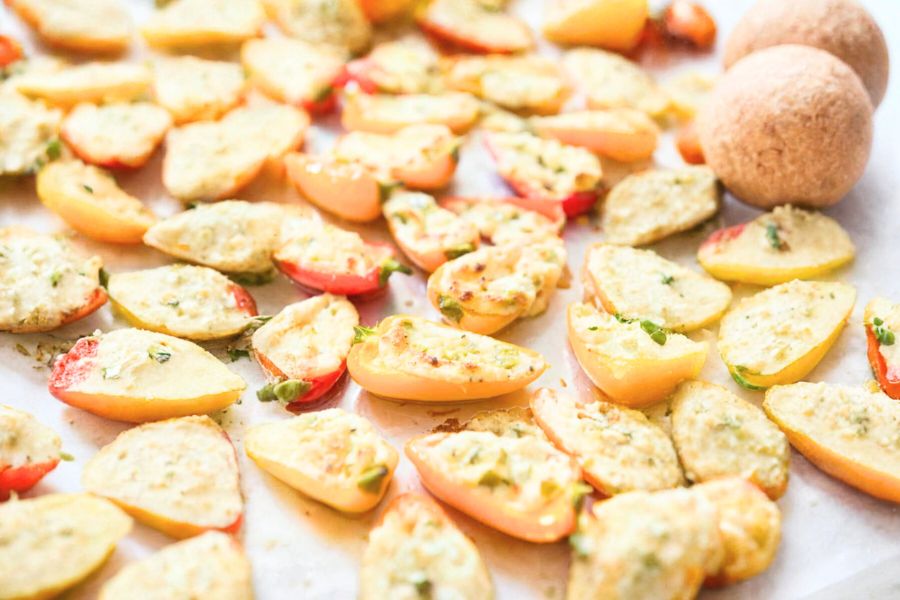
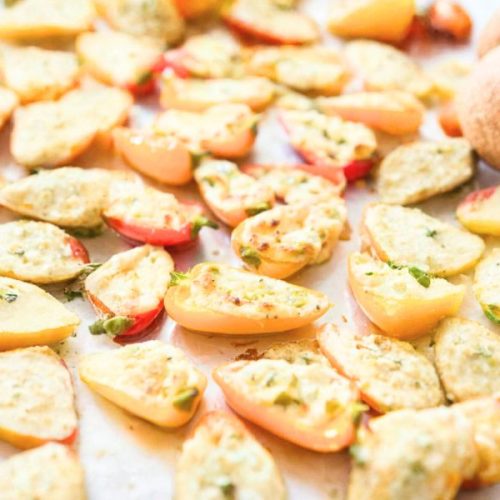
- Roast to Perfection: Transfer the baking sheet to the preheated oven and roast the peppers for 20 to 25 minutes. Bake until the peppers are soft and tender, and the cheese starts turning lightly golden and bubbly on top. The edges of the filling should look slightly toasted — that’s when you know they’re done.
- Serve and Enjoy: Remove the pan from the oven and allow the peppers to cool for a couple of minutes before serving. They can be enjoyed warm or at room temperature. The flavor intensifies as they cool slightly, so they’re perfect for parties, meal prep, or casual snacking.
Notes
- You can leave stems on the peppers for a more elegant, appetizer-style presentation.
- Feel free to adjust the jalapeños based on your spice tolerance (or omit them entirely for a mild version).
- Make sure the goat cheese is softened to room temperature — it makes mixing much easier.
- The filling can be prepared up to a day in advance and refrigerated.
- This recipe scales easily, so you can double it for parties or halve it for everyday snacking.
Chef’s Secrets for Best Flavor
To get the most flavor out of this recipe, use high-quality goat cheese and freshly grated parmesan rather than pre-shredded.
Freshly minced garlic (instead of jarred) provides a more robust and aromatic taste.
Let the peppers dry fully after rinsing to ensure they roast instead of steaming.
For even more depth, try charring the peppers slightly under a broiler during the last minute of roasting — just watch closely to prevent burning.
Serving Suggestions and Ideas
These stuffed mini peppers are incredibly versatile and pair well with light salads, grilled meats, or even as a low-carb side dish.
Serve them on a platter with fresh herbs sprinkled on top for a vibrant presentation.
They make a great starter for dinner parties, potlucks, game day, or holiday gatherings.
You can also serve them alongside hummus, roasted nuts, or cured meats to create a colorful appetizer board.
Storage Tips and Reuse
Store leftovers in an airtight container and refrigerate for up to five days.
They reheat beautifully in the oven, making them great for meal prep and snack boxes.
If freezing, lay them in a single layer before transferring to a freezer-safe container to prevent sticking.
Reheat directly from frozen in a low oven until hot throughout. These make a great addition to lunchboxes or quick weeknight sides when reheated.
Frequently Asked Questions
1. Can I use cream cheese instead of goat cheese?
Yes, you can substitute cream cheese if you prefer a milder flavor, though it will be slightly richer and less tangy.
2. How spicy are these with jalapeños?
They have a mild kick, but removing the seeds keeps the heat under control. You can omit jalapeños completely for a zero-heat version.
3. Can I prep these ahead of time?
Absolutely! You can stuff the peppers and refrigerate them up to one day in advance, then bake just before serving.
4. What other cheese can I add?
Ricotta, feta, or a bit of shredded mozzarella can be mixed into the filling. Just keep the goat cheese as a base for creaminess.
5. Are these suitable for keto or low-carb diets?
Yes, mini sweet peppers are low in carbs compared to other snacks, and the cheese filling is naturally keto-friendly.
This recipe has been adapted and simplified from the original version by fifteenspatulas. We’ve refined the steps for a smoother cooking experience and added helpful notes, nutrition insights, and essential kitchen tools to make it even easier for home cooks.