

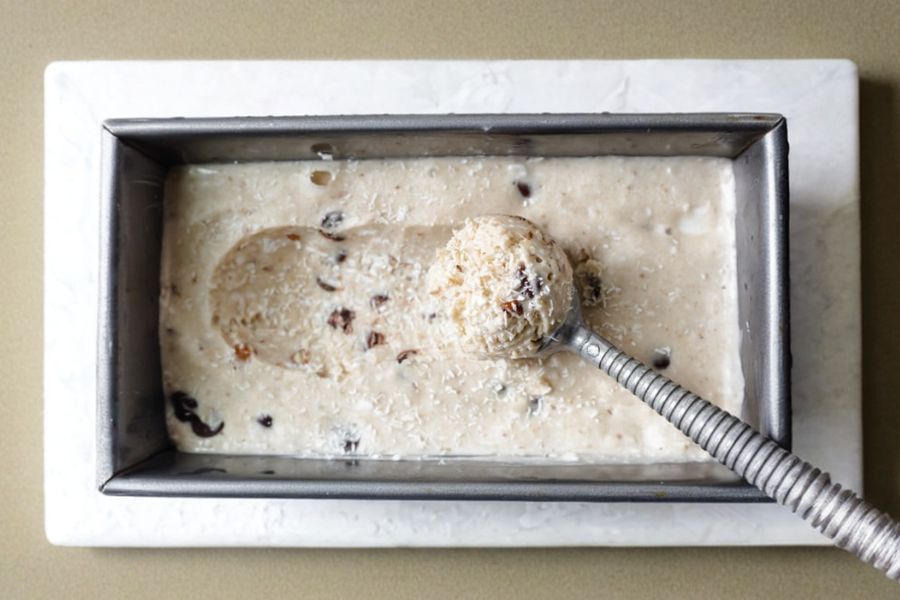
This Almond Joy Ice Cream is a decadent yet wholesome treat that’s completely vegan and effortlessly satisfying.
Using frozen bananas as a base creates a creamy, naturally sweet texture without the need for heavy cream or refined sugars.
The addition of coconut cream and almond extract gives it a rich, tropical flavor, while coconut flakes, almonds, and vegan chocolate chips add a delightful crunch and chocolatey indulgence.
Nutritionally, this dessert is high in fiber from bananas and nuts, provides plant-based protein, and contains good fats from coconut and almonds, making it a healthier alternative to traditional ice creams.
It’s also low in saturated fat compared to dairy-based versions.
This recipe is a perfect choice for everyday enjoyment: it’s quick, requires minimal ingredients, no churning, and can be made ahead and stored in the freezer.
Whether served as a refreshing snack, dessert, or post-workout treat, it combines taste, nutrition, and convenience seamlessly.
Must-Have Tools for Perfect Results
High-Powered Blender
Perfect for pureeing frozen bananas into a smooth, creamy base. Beyond this recipe, it’s ideal for smoothies, sauces, and soups.
Food Processor
Efficiently incorporates mix-ins like nuts, chocolate chips, and coconut flakes without over-mixing. A versatile tool for dough, dips, and spreads.
Ice Cream Scoop
Ensures perfectly portioned, uniform servings and makes scooping frozen desserts effortless. Also useful for cookie dough and melon balls.
Freezer-Safe Container
Essential for freezing the ice cream without absorbing odors or freezer burn. Great for storing prepped meals, leftovers, and frozen treats.
Spatula
Helps scrape down blender or processor sides and fold in mix-ins evenly. A kitchen staple for baking, mixing, and spreading.

Quick Almond Joy Ice Cream
Equipment
- 1 High-Powered Blender
- 1 Food Processor
- Ice Cream Scoop
- Freezer-Safe Container
- 1 Spatula
Ingredients
- 3 large bananas sliced and frozen
- 1/2 cup coconut cream or plant-based milk
- 2 tablespoons maple syrup
- 1 teaspoon almond extract
- 1/2 cup unsweetened coconut flakes
- 1/4 cup unsalted almonds roughly chopped
- 1/2 cup vegan chocolate chips
Instructions
- Prepare Frozen Bananas: Begin by slicing the bananas into even pieces and placing them in the freezer for several hours or until fully frozen. Freezing the bananas first ensures a creamy, smooth texture when blended, creating a naturally sweet and thick ice cream base without added dairy.
- Blend Base Ingredients: Transfer the frozen banana slices into a high-powered blender or food processor. Add the coconut cream or plant-based milk, maple syrup, and almond extract. Blend on high speed, pausing to scrape down the sides as needed, until the mixture is smooth, creamy, and uniform in consistency, forming the foundation for the ice cream.
- Incorporate Mix-Ins: Gently fold in the unsweetened coconut flakes, chopped almonds, and vegan chocolate chips using a spatula. Stir until the mix-ins are evenly distributed throughout the creamy banana base, ensuring every bite has a balance of crunch, chocolate, and tropical flavor.
- Transfer to Freezer Container: Pour the blended ice cream mixture into a freezer-safe, airtight container. Smooth the top with a spatula and cover securely to prevent freezer burn. This step locks in flavor and keeps the texture consistent while the ice cream solidifies.
- Freeze and Serve: Place the container in the freezer for 3–4 hours or until fully set. Before serving, remove from the freezer and let the ice cream thaw for 5–10 minutes to soften slightly, making it easy to scoop. Use an ice cream scoop to portion into bowls or cones and enjoy a rich, creamy, vegan dessert.
Notes
- Use fully frozen bananas to achieve a creamy, ice-cream-like texture without churning.
- Coconut cream adds richness, but cold plant-based milk can be a lighter alternative.
- Maple syrup balances the natural banana sweetness, but you can substitute agave or honey.
- Adjust mix-ins (coconut flakes, almonds, chocolate chips) to taste for crunch and flavor.
- Let ice cream thaw 5–10 minutes before scooping to ensure easy serving.
- Store in an airtight container to maintain texture and prevent freezer burn.
- This recipe is naturally vegan, dairy-free, and gluten-free.
Chef’s Secrets For Creamy Ice Cream
The key to this ice cream’s smooth, creamy texture is fully frozen bananas and high-powered blending.
Use ripe bananas for maximum natural sweetness, and pulse slowly to avoid over-blending the nuts and chocolate chips.
Incorporating coconut cream instead of plant-based milk creates a rich, indulgent base, while almond extract enhances the flavor depth.
Folding in mix-ins gently prevents them from breaking up and keeps every bite textured.
Using a freezer-safe, airtight container ensures the ice cream maintains its consistency without absorbing unwanted freezer odors.
Patience during freezing and thawing also guarantees scoopable, restaurant-quality results every time.
Serving Suggestions For Maximum Enjoyment
This vegan Almond Joy Ice Cream shines as a standalone dessert or as part of a creative treat.
Serve scoops in bowls or waffle cones, topped with extra chocolate chips, shredded coconut, or toasted almonds.
Pair it with fresh berries, caramel drizzle, or vegan fudge sauce for an elevated dessert experience.
It also works wonderfully as an ice cream sandwich filling or a topping for warm brownies.
Its creamy yet firm texture makes it ideal for parties, family treats, or post-dinner indulgence, satisfying both kids and adults alike.
Storage Tips To Maintain Freshness
Store the ice cream in a tightly sealed, freezer-safe container to prevent freezer burn and preserve flavor. It will keep well for up to seven days.
For best scooping consistency, remove the ice cream from the freezer 5–10 minutes before serving.
Avoid thawing at room temperature for too long, as it can become overly soft and lose texture.
For extended storage, consider portioning the ice cream into smaller containers for single servings, which minimizes repeated exposure to air and maintains freshness longer.
Frequently Asked Questions About Recipe
1. Can I make this ice cream without a food processor?
Yes! A high-powered blender works perfectly. You may need to scrape down the sides more frequently to achieve a smooth base.
2. Is it possible to use other nuts?
Absolutely. Walnuts, pecans, or cashews can replace almonds for a different flavor profile while maintaining a satisfying crunch.
3. How do I make it sweeter or less sweet?
Adjust the maple syrup amount to taste. You can also use agave or skip the sweetener entirely if your bananas are very ripe.
4. Can I prepare this ice cream in advance?
Yes, it’s a perfect make-ahead dessert. Freeze in an airtight container for up to seven days, then allow it to thaw slightly before scooping.
5. How can I add more flavor variations?
Consider adding cinnamon, cocoa powder, or espresso powder to the banana base. You can also drizzle caramel or peanut butter on top before serving.
This recipe has been adapted and simplified from the original version by feelgoodfoodie. We’ve refined the steps for a smoother cooking experience and added helpful notes, nutrition insights, and essential kitchen tools to make it even easier for home cooks.