
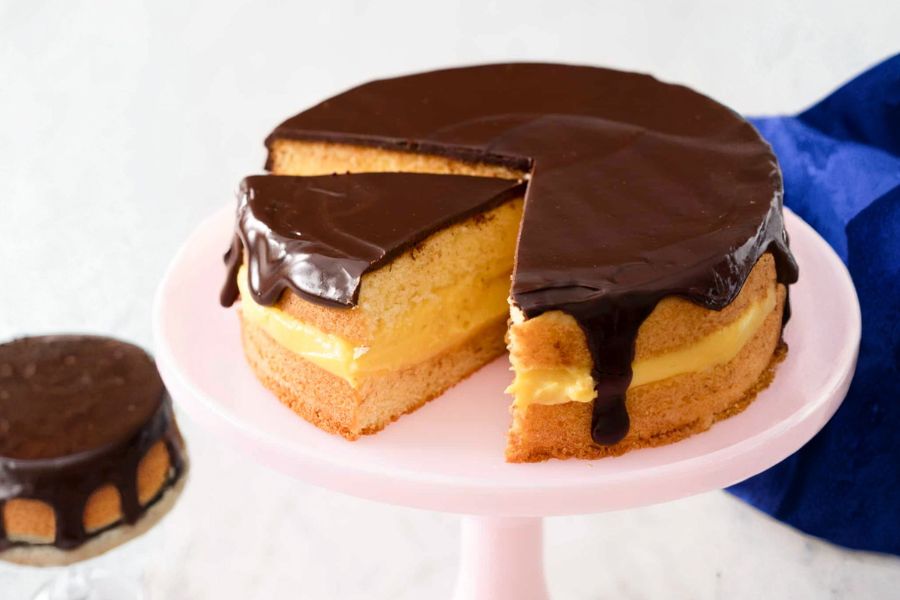
Boston Cream Pie is an iconic American dessert that combines a light, fluffy vanilla sponge with rich pastry cream and a decadent chocolate ganache topping.
Its appeal lies in the harmony of textures—the airy cake, smooth creamy filling, and glossy chocolate finish create a dessert that is both visually stunning and satisfyingly indulgent.
Despite its richness, the recipe provides moderate protein from eggs and dairy, while the sponge offers a small amount of fiber from flour.
This balance makes it a slightly more wholesome treat compared to other heavy desserts.
Boston Cream Pie is also versatile and convenient for everyday cooking, as both the cake and filling can be prepared in advance.
Its relatively straightforward assembly and elegant presentation make it perfect for dinner parties, holiday celebrations, or a special family dessert.
Must-Have Tools for Perfect Results
8-Inch Cake Pan
Provides the ideal size for a uniform sponge. Also perfect for baking layered cakes, cheesecakes, and other single-layer desserts.
Whisk
Essential for blending eggs, sugar, and cornstarch smoothly for the pastry cream. Whisks are versatile for sauces, dressings, and baking batters.
Medium Saucepan
Used to heat milk and cook the pastry cream gently. Great for sauces, custards, or melting chocolate evenly.
Mixing Bowls
Needed for preparing cake batter and combining ingredients. Useful for marinating, mixing, and prepping ingredients in any kitchen.
Wire Cooling Rack
Ensures the sponge cools evenly and prevents soggy bottoms. Also ideal for cooling cookies, breads, or glaze-drizzled desserts.
Fluffy Boston Cream Pie
Equipment
- 1 8 Inch Cake Pan
- 1 whisk
- 1 Medium saucepan
- 2 mixing bowls
- 1 Wire cooling rack
Ingredients
For the Cake:
- 2 large eggs room temperature
- 1 cup cane sugar 200 g
- 1/2 cup whole milk 120 mL
- 5 Tbsp unsalted butter 70 g
- 1 cup all-purpose flour + 2 Tbsp 140 g
- 1 1/4 tsp baking powder
- 1/4 tsp kosher salt
- 2 tsp vanilla extract
For the Pastry Cream:
- 6 egg yolks room temperature
- 2/3 cup sugar
- 1/4 cup corn starch
- 1 tbsp vanilla extract
- 2 cups whole milk 480 mL
- 1 tbsp butter 15 g
- For the Ganache:
- 1/4 cup heavy cream 60 mL
- 4 oz bittersweet chocolate chopped
Instructions
- Prepare Pastry Cream Base: Pour the milk into a medium saucepan and heat until just boiling, then remove from heat. In a large bowl, whisk the egg yolks and sugar until pale and thickened, creating a smooth, airy mixture. Sift in the cornstarch and whisk thoroughly to remove lumps, ensuring a silky texture for the custard.
- Temper the Eggs: Slowly whisk a small portion (about 1/4 cup) of the hot milk into the egg mixture to temper the yolks, preventing curdling.Gradually incorporate the remaining hot milk while whisking continuously to achieve a smooth, lump-free custard base.
- Cook the Pastry Cream: Pour the tempered mixture back into the saucepan and cook over medium heat, stirring constantly with a whisk. Allow the cream to reach a gentle boil and continue whisking for an additional 1–2 minutes to thicken fully. Remove from heat and stir in butter and vanilla for a rich, glossy finish. Cover with plastic wrap pressed directly onto the surface to prevent a skin from forming and chill in the refrigerator until set.
- Prepare Cake Batter: Preheat the oven to 350°F (175°C) and grease an 8-inch cake pan with butter and flour, lining the bottom with parchment paper for easy removal. In a mixing bowl or stand mixer, beat the eggs and sugar on medium speed until pale, thick, and fluffy, forming a ribbon when lifted with the whisk.
- Incorporate Dry and Wet Ingredients: In a separate bowl, combine flour, baking powder, and salt. Gradually add the flour mixture to the eggs and sugar, mixing on low until just combined. In a glass measuring cup, melt butter with milk, then stir in vanilla. Slowly fold the hot milk mixture into the batter, scraping the bowl sides to ensure an even, smooth batter ready to bake.
- Bake the Sponge Cake: Pour the batter into the prepared pan and smooth the top. Bake for approximately 33 minutes or until a toothpick inserted in the center comes out clean and the edges pull slightly away from the pan. Allow the cake to cool in the pan briefly before inverting onto a wire rack to cool completely.
- Assemble and Finish Cake: Once cooled, slice the cake horizontally using a serrated knife or guided toothpick marks. Place the bottom layer on a serving plate, spread the chilled pastry cream evenly leaving a one-inch border, and top with the second layer. Chill for at least 2 hours to set. Prepare the ganache by microwaving cream until steaming, adding chocolate, and letting it sit 5 minutes before stirring smooth. Pour ganache over the top, spreading to edges, and serve at room temperature for the perfect Boston Cream Pie.
Notes
- Cake Slicing Tip: Use a serrated knife for clean horizontal cuts. Toothpicks placed around the cake’s equator help guide even slicing.
- Room Temperature Eggs: Using eggs at room temperature helps the sponge whip up fluffier and allows the pastry cream to thicken evenly.
- Chocolate Selection: Bittersweet or dark chocolate bars give a shiny, rich ganache. Baking bars or chips also work well.
- Ganache Shine: Adding a tablespoon of corn syrup to the ganache enhances its glossy, professional finish.
- Serving Slices: Warm a non-serrated knife before slicing for smooth, clean portions.
- Chilling: Chill the assembled cake for at least 2 hours, or overnight for easier slicing and better flavor development.
Chef’s Insider Tips For Success
Achieving the perfect Boston Cream Pie requires attention to temperature and technique.
Room-temperature eggs ensure maximum volume in the sponge, while gentle, constant whisking during pastry cream preparation prevents lumps.
Tempering the eggs with warm milk avoids curdling and ensures a smooth, velvety custard.
Cooling the sponge completely before layering prevents the cream from melting, while chilling the assembled cake allows flavors to meld and ganache to set beautifully.
Small details, like adding corn syrup to the chocolate or using toothpicks as slicing guides, elevate the presentation and texture, giving your homemade dessert a professional finish.
Serving Suggestions To Impress Guests
Boston Cream Pie is versatile and elegant for any occasion.
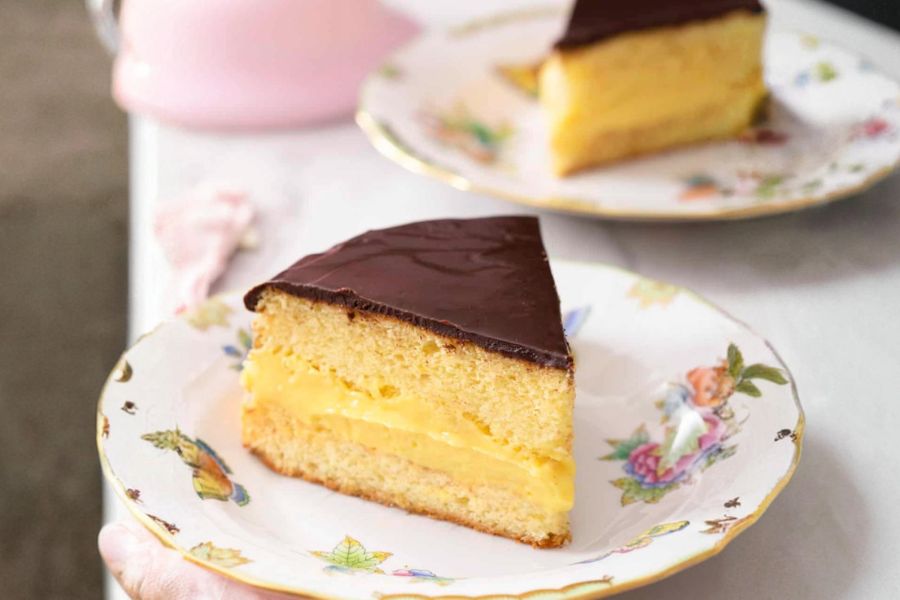
Serve slices at room temperature to highlight the creamy custard and glossy ganache.
Pair with a cup of coffee, espresso, or a dessert wine for a sophisticated dessert experience.
For celebrations, garnish with fresh berries or a dusting of powdered sugar.
Individual portions can be plated with a drizzle of chocolate sauce or whipped cream for an elevated presentation, making it perfect for birthdays, dinner parties, or holiday gatherings.
Storage Tips For Optimal Freshness
Store the Boston Cream Pie in an airtight container in the refrigerator for up to 3 days. Keep it chilled until serving to maintain the custard’s structure.
Avoid freezing the assembled cake, as the pastry cream can separate and alter the texture.
If preparing ahead, the sponge and pastry cream can be made separately, then assembled just before serving.
Always slice with a warm knife to maintain smooth, clean edges.
Chilling the cake after assembly enhances flavor melding and ensures the ganache remains glossy and firm.
Frequently Asked Boston Cream Questions
1. Can I make this cake ahead of time?
Yes! Bake the sponge and prepare the pastry cream in advance. Assemble the cake and chill for at least 2 hours or overnight for best results.
2. What chocolate works best for ganache?
Bittersweet or dark chocolate bars produce a rich, shiny ganache. Chocolate chips or baking bars can also be used if high-quality bars aren’t available.
3. How do I prevent pastry cream lumps?
Whisk constantly over medium heat and temper the egg yolks with hot milk slowly. Straining the mixture through a sieve also ensures smooth custard.
4. Can I freeze Boston Cream Pie?
It’s not recommended to freeze the assembled cake, as the custard can separate. The sponge and ganache can be frozen separately, then assembled later.
5. How do I slice the cake neatly?
Use a serrated knife with toothpicks as guides, and warm the knife slightly before slicing. This creates clean, even layers without damaging the custard.
This recipe has been adapted and simplified from the original version by preppykitchen. We’ve refined the steps for a smoother cooking experience and added helpful notes, nutrition insights, and essential kitchen tools to make it even easier for home cooks.