
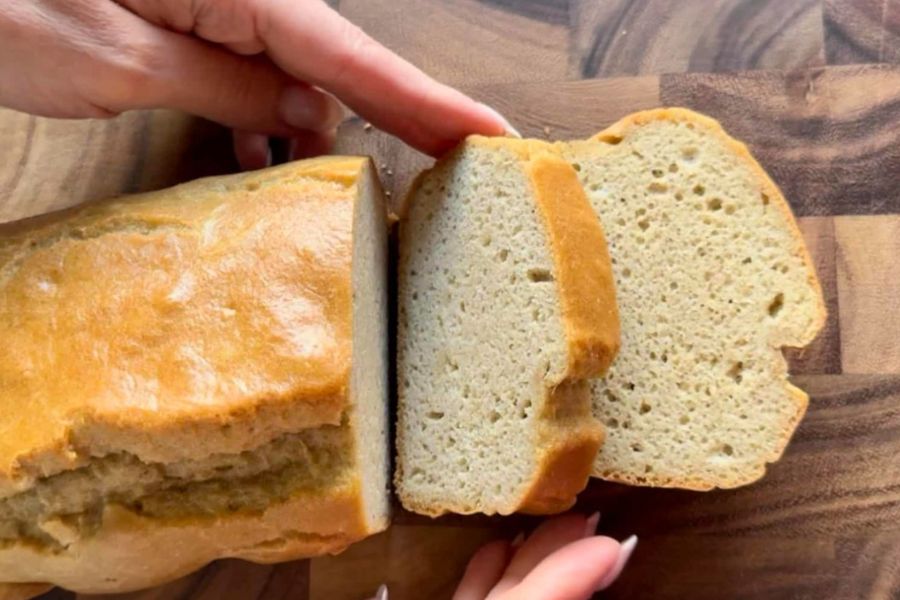
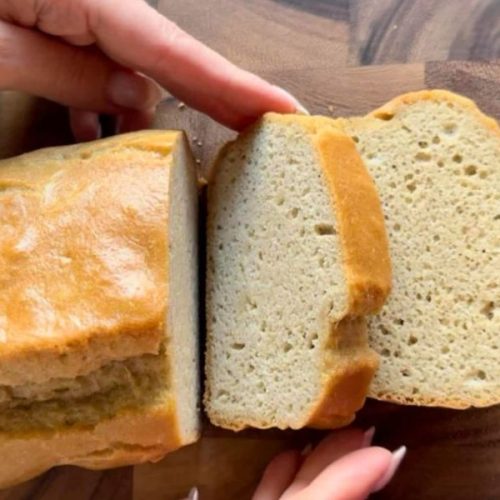
Almond Flour Bread is a standout recipe for anyone embracing low-carb or keto-friendly eating without sacrificing taste.
This bread is naturally grain-free and rich in plant-based protein and healthy fats, making it a nourishing option for breakfast, sandwiches, or snacks.
Its high fiber content promotes digestive health while keeping you full longer, and the low-carb nature supports blood sugar stability.
Beyond health benefits, this recipe is remarkably quick and simple, requiring minimal prep time and basic ingredients, which makes it ideal for busy weekdays or meal prep.
Soft, slightly nutty, and perfectly golden, it’s a versatile staple that can easily be customized with herbs, seeds, or spices to suit your taste.
Must-Have Tools for Perfect Results
8×4 Inch Loaf Pan
Essential for shaping and baking the bread evenly. This pan ensures consistent texture and browning and doubles as a versatile tool for cakes, meatloaf, and other baked goods.
Large Mixing Bowl
Provides ample space for thoroughly combining ingredients without spills. Perfect for baking, tossing salads, or marinating proteins.
Measuring Cups and Spoons
Accurate measurement of almond flour, eggs, and other ingredients is crucial for a perfect loaf. These tools are indispensable for any precise baking or cooking project.
Rubber Spatula
Ideal for scraping down the bowl and folding ingredients gently. Beyond baking, it’s useful for sauces, batters, and even mixing delicate ingredients.
Wire Cooling Rack
Helps the bread cool evenly and prevents sogginess. Great for all baked goods, including cookies, muffins, and cakes.
Quick Almond Flour Bread
Equipment
- 8×4 inch loaf pan
- Large Mixing Bowl
- Measuring cups and spoons
- Rubber spatula
- Wire cooling rack
Ingredients
- 2 cups almond flour
- 1 tsp baking powder
- ¼ tsp salt
- 4 large eggs
- ¼ cup melted coconut oil or butter
- ¼ cup unsweetened almond milk
Instructions
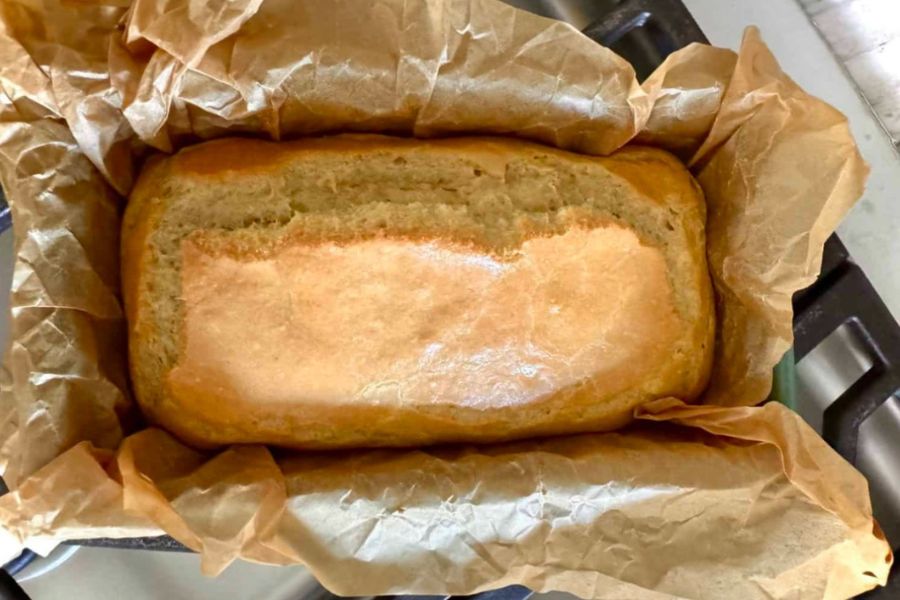
- Preheat & Prepare: Preheat your oven to 350°F (175°C) and line or grease an 8×4-inch loaf pan. Ensuring the pan is properly prepared prevents sticking and helps your bread release cleanly after baking.
- Mix Dry Ingredients: In a large mixing bowl, combine 2 cups of almond flour, 1 teaspoon of baking powder, and ¼ teaspoon of salt. Whisk thoroughly to ensure even distribution of the leavening agents, which will help the bread rise evenly.
- Combine Wet Ingredients: In a separate bowl, beat together 4 large eggs, ¼ cup melted coconut oil (or butter), and ¼ cup unsweetened almond milk. Mixing these ingredients first helps create a smooth, consistent batter when combined with the dry mixture.
- Fold Batter Together: Gradually add the wet mixture to the dry ingredients, folding gently with a rubber spatula. Scrape the sides of the bowl to ensure no pockets of almond flour remain, producing a silky, uniform batter.
- Transfer to Pan & Smooth: Pour the batter into the prepared loaf pan, using the spatula to spread it evenly. Smooth the top to ensure a uniform rise, which will give your bread a professional, bakery-style appearance.
- Bake & Cool: Bake for 35 minutes or until the top is golden brown and a toothpick inserted in the center comes out clean. Remove from the oven, let it cool in the pan for 10 minutes, then transfer to a wire cooling rack to cool completely before slicing.
Notes
- Use blanched almond flour for a smoother texture and consistent rise.
- Ensure eggs are at room temperature to create a fluffier, more cohesive batter.
- Don’t overmix the batter; folding gently preserves the light texture.
- Let the bread cool completely before slicing to prevent crumbling.
- Optional: add herbs, seeds, or spices for flavor variations.
Chef’s Secrets: Achieve Perfect Loaf
For the softest, fluffiest almond flour bread, always preheat your oven fully and measure ingredients precisely.
Sifting the almond flour is optional but helps reduce lumps and ensures even mixing.
Folding wet and dry ingredients gently rather than vigorously prevents the bread from becoming dense.
Using a mix of melted coconut oil and almond milk adds moisture without adding unnecessary carbs.
If you want a slightly sweeter or more flavorful loaf, consider lightly toasting the almond flour before mixing.
Serving Suggestions: Delicious Pairing Ideas
This almond flour bread pairs beautifully with both sweet and savory toppings. For breakfast, try almond butter, cream cheese, or mashed avocado.
For sandwiches, layer with deli meats, fresh vegetables, or keto-friendly spreads.
Toasted slices work perfectly as a side for soups or stews, while slightly warmed slices make excellent mini bread bites for brunch or snacks.
Its mild, nutty flavor allows for endless creative options in everyday meals.
Storage Tips: Keep Bread Fresh
Store your almond flour bread in an airtight container at room temperature for up to three days.
For longer storage, wrap tightly in plastic wrap or aluminum foil and refrigerate for up to a week.
For extended use, slice and freeze the bread in freezer-safe bags for up to three months.
Thaw slices at room temperature or lightly toast them before serving to restore the original texture and taste.
Frequently Asked Questions: Quick Answers Here
1. Can I use other flours?
Almond flour is key for the low-carb, keto-friendly texture. Coconut flour can partially substitute, but adjustments to eggs and liquids are necessary to prevent dryness.
2. Is this bread gluten-free?
Yes! This recipe is entirely gluten-free, making it ideal for anyone with gluten sensitivities or those following paleo or keto diets.
3. How do I prevent crumbling?
Allow the bread to cool completely before slicing. Using room-temperature eggs and gently folding the batter also helps maintain structure.
4. Can I add flavor variations?
Absolutely! Mix in herbs, garlic powder, cinnamon, or seeds like chia and flax to enhance flavor without affecting the low-carb profile.
5. Can I make it ahead for meal prep?
Yes, this bread is excellent for meal prep. Bake in advance, slice, and store or freeze for easy, grab-and-go breakfasts or snacks throughout the week.
This recipe has been adapted and simplified from the original version by hungryhappens. We’ve refined the steps for a smoother cooking experience and added helpful notes, nutrition insights, and essential kitchen tools to make it even easier for home cooks.