

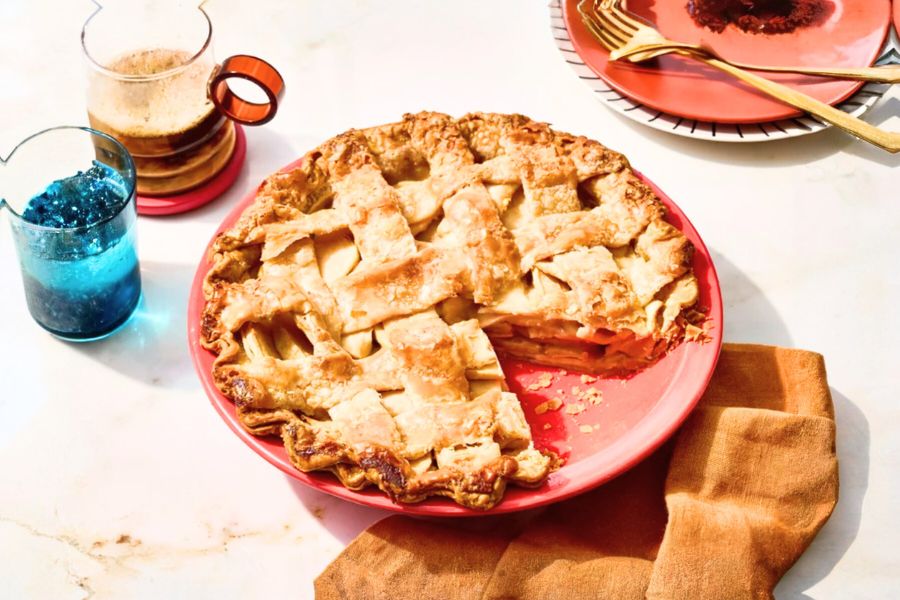
This classic apple pie recipe stands out for its rich caramel-infused filling and flaky lattice crust that elevates a timeless dessert to indulgent perfection.
Granny Smith apples not only bring a tart balance to the sweetness but also provide dietary fiber that supports digestion and helps maintain steady blood sugar levels.
While apple pie is naturally higher in carbs, this recipe offers a moderate calorie count of 373 per serving, making it a satisfying treat that fits into balanced eating.
Butter supplies a source of good fats, while apples deliver antioxidants like vitamin C to boost immunity.
Its straightforward process, minimal prep, and comforting flavor make it ideal for everyday baking, special occasions, or even make-ahead desserts for family gatherings.
Must-Have Tools for Perfect Results
OXO Good Grips Apple Corer and Slicer
Makes peeling and coring apples quick and uniform, saving you prep time while creating even slices for consistent baking. A must-have for all fruit-based desserts.
All-Clad Stainless Steel Saucepan
Essential for melting butter and creating the caramel-like sugar mixture. This pan ensures even heat distribution, preventing burning and delivering silky-smooth sauces for any dish.
Pyrex 9-Inch Glass Pie Pan
The perfect base for this pie, allowing even baking and a golden-brown crust. Its durability and versatility make it great for both savory and sweet pies.
Joseph Joseph Adjustable Rolling Pin
Helps roll pastry to precise thickness, ensuring an evenly baked, flaky crust. Ideal for all baking enthusiasts, from pies to cookies.
Williams Sonoma Silicone Pastry Brush
Perfect for gently coating the lattice crust with butter-sugar glaze. It’s heat-resistant and easy to clean, useful for marinades, baking, and basting.

Homemade Apple Pie
Equipment
- 1 OXO Good Grips Apple Corer and Slicer
- 1 All-Clad Stainless Steel Saucepan
- 1 Pyrex 9-Inch Glass Pie Pan
- 1 Joseph Joseph Adjustable Rolling Pin
- 1 Williams Sonoma Silicone Pastry Brush
Ingredients
- 8 small Granny Smith apples – peeled cored, and thinly sliced
- ½ cup 1 stick unsalted butter
- 3 tablespoons all-purpose flour
- ½ cup granulated sugar
- ½ cup packed light brown sugar
- ¼ cup water
- 1 9-inch double pie crust pastry, thawed and ready to use
Instructions
- Prepare the Oven and Apples: Preheat your oven to 425°F (220°C). Wash, peel, core, and thinly slice the apples. Place them in a large mixing bowl and set aside. Preparing the apples first ensures they’re ready to go once your caramel mixture is hot and bubbling.
- Make the Caramel Filling: In a medium saucepan, melt the butter over medium heat until fully liquefied. Whisk in the flour to create a smooth paste, cooking for about 1–2 minutes until it turns slightly golden and aromatic. Stir in the granulated sugar, brown sugar, and water, whisking constantly. Allow the mixture to reach a gentle boil, then reduce the heat to low and let it simmer for 3–5 minutes, forming a glossy caramel-like sauce. Remove from heat.
- Prepare the Pie Crust Base: Line a 9-inch pie dish with one of the pastry sheets, gently pressing it into the bottom and up the sides. Roll out the second sheet of pastry slightly larger than the pie dish and cut it into eight even strips, approximately 1 inch wide, to create the lattice topping later.
- Assemble the Filling: Evenly arrange the apple slices in the prepared bottom crust, slightly mounding them toward the center. The layers of apples should be snug, with minimal gaps for the best texture and flavor.
- Create the Lattice Top: Lay four pastry strips vertically over the apples, spacing them evenly. Fold back every other strip halfway, place one of the remaining strips horizontally across, then fold the vertical strips back over. Repeat this weaving process until all strips form a classic lattice pattern. Trim any overhanging dough, then pinch and crimp the edges to seal.
- Add the Caramel Glaze: Slowly pour the warm sugar-butter mixture over the lattice crust, ensuring it seeps down into the apples and lightly coats the top. Use a pastry brush to spread the glaze evenly, avoiding spills on the pan edges to prevent burning.
- Bake to Perfection: Place the pie in the preheated oven and bake for 15 minutes. Lower the oven temperature to 350°F (175°C) and continue baking for 35–45 minutes, or until the apples are tender and the crust is golden brown. Allow the pie to cool slightly before serving to let the filling set.
Notes
- Best Apple Choice: Tart apples like Granny Smith balance the sweetness perfectly, but you can mix varieties (like Honeycrisp or Fuji) for more complex flavor.
- Thicker Sauce: For a richer caramel, let the sugar mixture simmer a minute longer before pouring it over the pie.
- Prevent Soggy Bottoms: Sprinkle a teaspoon of flour or crushed graham crackers over the bottom crust before adding apples to absorb excess juices.
- Serving Suggestion: Pair with vanilla ice cream, whipped cream, or even a thin slice of sharp cheddar cheese for a traditional touch.
- Storage Tip: Store leftovers in an airtight container at room temperature for up to 2 days or refrigerate for 4–5 days
Chef’s Secrets for Flawless Apple Pie
A truly memorable apple pie comes down to a few expert touches.
First, always choose firm, tart apples like Granny Smith, as they hold their shape during baking and balance the sweetness of the caramel glaze.
When making the sugar-butter mixture, avoid high heat to prevent scorching—gentle simmering creates a smooth, glossy caramel that enhances the filling’s flavor.
For a perfectly flaky crust, keep your pastry dough chilled until ready to use; cold butter creates steam pockets as it bakes, leading to that desirable, layered texture.
Finally, don’t rush cooling time—allowing the pie to rest ensures the filling sets properly, making slicing clean and effortless.
These small but impactful techniques elevate your pie from homemade to bakery-quality.
Serving Suggestions to Impress Guests
This caramel-glazed apple pie is delicious on its own, but the right accompaniments can transform it into a showstopping dessert.
Serve warm with a scoop of classic vanilla bean ice cream for a timeless pairing, or drizzle extra caramel sauce on top for a decadent finish.
For a more traditional twist, enjoy it with a thin slice of sharp cheddar cheese, which beautifully contrasts the pie’s sweetness.
A dollop of cinnamon-spiced whipped cream can also add warmth and depth to each bite.
If serving at a dinner party, present slices on dessert plates with a dusting of powdered sugar for a bakery-worthy look.
Pairing this pie with a hot cup of coffee, tea, or even mulled cider makes it even more comforting and memorable.
Storage Tips for Longer Freshness
Proper storage keeps your apple pie tasting fresh and flavorful for days after baking.
Once cooled, loosely cover the pie with foil or plastic wrap and leave it at room temperature for up to two days.
For longer storage, transfer it to an airtight container and refrigerate for 4–5 days.
To enjoy leftovers warm, reheat individual slices in the oven or toaster oven at 300°F for 10–15 minutes, which revives the crispness of the crust.
Freezing is another option: wrap the entire pie or slices tightly in plastic wrap, then foil, and freeze for up to three months.
Thaw overnight in the fridge before gently reheating. Avoid microwaving, as it can make the crust soggy and chewy.
Frequently Asked Questions About Apple Pie
1. Can I make this pie ahead of time?
Absolutely! You can prepare the pie a day in advance and store it covered at room temperature or refrigerate it. Reheat gently before serving to revive the flaky texture of the crust.
2. Which apples work best besides Granny Smith?
While Granny Smith is ideal for its tartness and firmness, you can mix in Honeycrisp, Braeburn, or Fuji apples for added sweetness and complexity of flavor. Avoid overly soft apples, as they can become mushy when baked.
3. How can I prevent the bottom crust from getting soggy?
Sprinkling a thin layer of flour, crushed graham crackers, or even a light coating of sugar on the bottom crust before adding the apples helps absorb excess juices, preventing sogginess.
4. Can I use store-bought pie crust?
Yes, store-bought pie crusts work well and save time. To make them taste more homemade, brush the edges with an egg wash before baking for a golden, bakery-style finish.
5. Why does my caramel mixture sometimes crystallize?
Crystallization can happen if sugar is cooked at too high a temperature or stirred excessively after it begins to boil. Keep the heat moderate, whisk until smooth, and let the mixture simmer gently for the best results.
This recipe has been adapted and simplified from the original version by allrecipes. We’ve refined the steps for a smoother cooking experience and added helpful notes, nutrition insights, and essential kitchen tools to make it even easier for home cooks.