
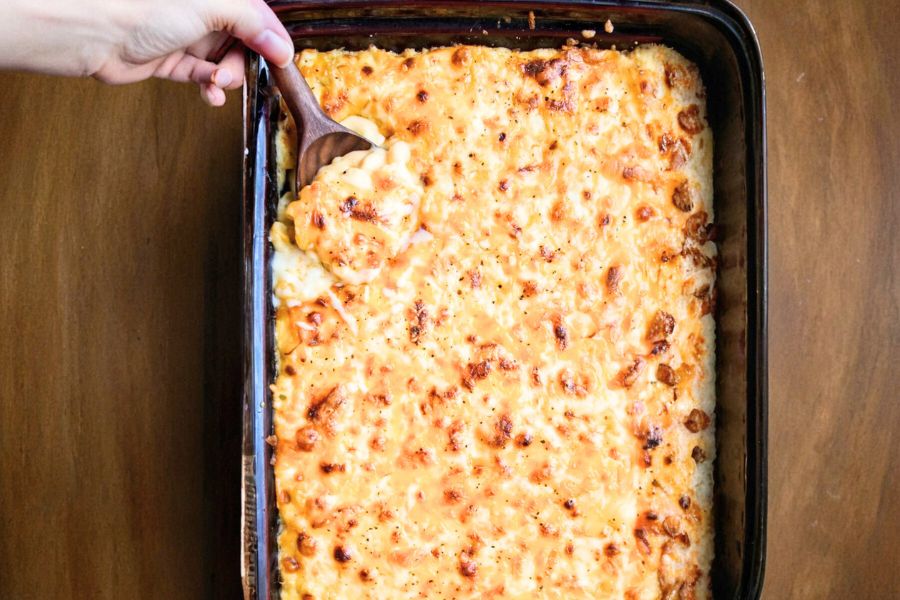
This homemade baked mac and cheese elevates a classic comfort dish into a rich, creamy, and satisfying meal that appeals to all ages.
What makes this recipe stand out is its multi-layered cheese blend and luscious sauce, creating a perfect balance of gooey texture and savory flavor.
Beyond indulgence, the dish offers a good source of protein from the combination of cheddar and Gruyere cheeses, supporting muscle health and satiety.
Using whole milk and half-and-half provides wholesome fats, contributing to a creamy mouthfeel without relying on heavy creams, while the use of elbow pasta adds energy-boosting complex carbs.
It’s an excellent option for everyday cooking due to its straightforward preparation and quick bake time, making it meal-prep friendly and a reliable crowd-pleaser for family dinners or holiday gatherings.
Must-Have Tools for Perfect Results
Large Saucepan
Essential for making the smooth cheese sauce; a heavy-bottomed pan ensures even heat distribution, preventing the sauce from burning. A versatile piece for soups, sauces, and more.
Whisk
Vital for blending butter and flour into a roux and for whisking in milk and cheeses to create a velvety sauce without lumps. An indispensable tool for any kitchen, aiding in smooth mixing.
Colander
Used to drain pasta efficiently while retaining heat and preventing clumping. A kitchen staple for all pasta and vegetable rinsing needs.
9×13” Baking Dish
Perfect size for layering pasta and cheese, allowing even baking and browning on top. A versatile dish useful for casseroles, lasagnas, and baked desserts.

Easy Baked Macaroni and Cheese You’ll Love
Equipment
- 1 Large Saucepan
- 1 Whisk
- 1 Colander
- 1 9×13” Baking Dish
Ingredients
- 1 lb elbow pasta dried
- 1/2 cup unsalted butter
- 1/2 cup all-purpose flour
- 1 1/2 cups whole milk
- 2 1/2 cups half-and-half
- 4 cups shredded medium cheddar cheese
- 2 cups shredded Gruyere cheese
- 1/2 tablespoon salt
- 1/2 teaspoon black pepper
- 1/4 teaspoon smoked paprika
Instructions
- Preheat and Prepare Your Baking Dish: Begin by setting your oven to 325°F (163°C) so it can reach the perfect temperature while you prepare the dish. Lightly grease a 9×13-inch (3-quart) baking dish with butter or non-stick spray to prevent sticking and ensure easy serving later. Set the dish aside, ready for assembling the mac and cheese layers.
- Cook the Pasta to Al Dente Perfection: Fill a large pot with water, adding a generous pinch of salt to season the pasta during cooking. Bring the water to a vigorous boil over high heat. Once boiling, add 1 pound of dried elbow pasta.Cook the pasta just until it is nearly al dente—about one minute less than the package instructions recommend—to ensure it doesn’t become mushy during baking.Stir occasionally to prevent sticking. When ready, drain the pasta using a colander and immediately toss it with a small drizzle of olive oil to keep the noodles separate.
- Shred and Divide the Cheeses: While the pasta cooks, prepare your cheeses. Shred 4 cups of medium cheddar and 2 cups of Gruyere cheese using a box grater or food processor. Mix the shredded cheeses gently to blend flavors. Then, divide the cheese into three portions: 3 cups for the cheese sauce, 1 ½ cups for layering inside the macaroni, and 1 ½ cups reserved for the crunchy topping.
- Create the Roux – The Foundation of Your Cheese Sauce: In a large saucepan over medium heat, melt ½ cup of unsalted butter. Once fully melted, gradually sprinkle in ½ cup of all-purpose flour, whisking constantly. The mixture should take on a grainy texture, resembling wet sand. Continue whisking and cooking for about 1 minute to remove the raw flour taste, but don’t let it brown.
- Gradually Incorporate Dairy for a Smooth Sauce: Slowly pour about 2 cups of half-and-half into the roux while whisking vigorously to avoid lumps. Once combined and smooth, continue adding the remaining ½ cup of half-and-half plus 1 ½ cups of whole milk in small increments, whisking constantly to maintain a velvety texture. Keep the heat at medium and stir frequently as the sauce thickens. You’re aiming for a consistency similar to a slightly thinned condensed soup — thick enough to coat the back of a spoon.
- Season and Melt the Cheese into the Sauce: Remove the saucepan from the heat and stir in ½ tablespoon salt, ½ teaspoon black pepper, and ¼ teaspoon smoked paprika for a subtle smoky depth. Add 1 ½ cups of the shredded cheese portion to the warm sauce, stirring until melted and smooth. Next, add another 1 ½ cups of cheese, mixing thoroughly until completely incorporated, silky, and rich.
- Combine Pasta and Cheese Sauce Thoroughly: Transfer the drained pasta into a large mixing bowl. Pour the hot cheese sauce over the pasta, gently folding and stirring until every piece of pasta is fully coated with creamy, cheesy goodness. This ensures that each bite will be flavorful and indulgent.
- Assemble the Mac and Cheese Layers: Pour half of the cheesy pasta mixture into the prepared baking dish, spreading it evenly. Sprinkle 1 ½ cups of shredded cheese evenly over this layer to create a gooey, cheesy middle. Then, carefully spoon the remaining pasta mixture on top, spreading it out smoothly.
- Add the Final Cheese Topping: Finish the dish by sprinkling the last 1 ½ cups of shredded cheese evenly across the top. This will create a golden, bubbly crust during baking that’s irresistibly cheesy and adds texture contrast.
- Bake Until Bubbly and Golden: Place the baking dish in the preheated oven. Bake for about 15 minutes, or until the cheese on top is melted, bubbling, and lightly golden brown. For a more browned crust, you can broil for an additional 1-2 minutes—watch carefully to avoid burning.
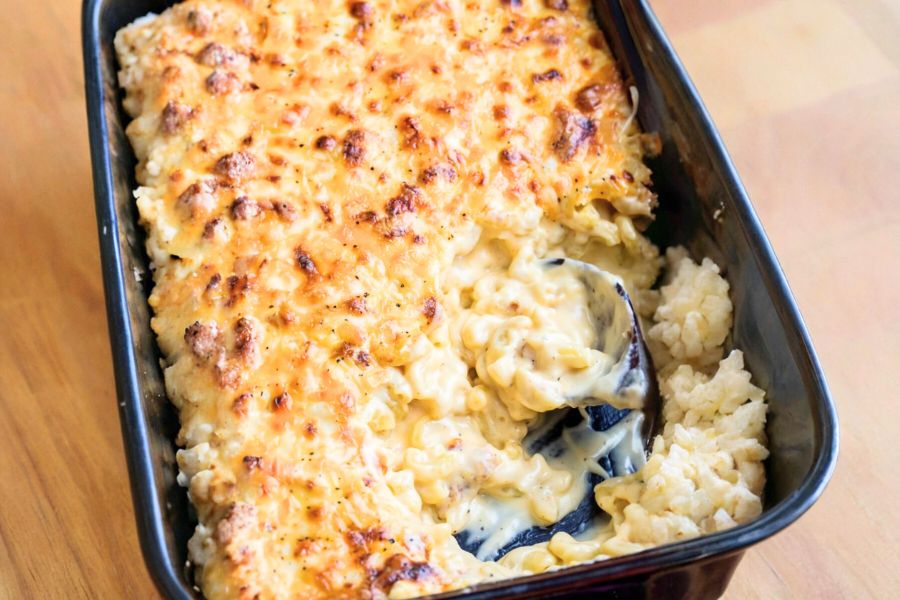
- Rest and Serve for Optimal Flavor: Once baked, remove the mac and cheese from the oven and let it rest for 5 minutes before serving. This resting time allows the sauce to thicken slightly and helps the dish set, making it easier to cut and serve.Enjoy warm and creamy, perfect as a comforting meal or side dish.
Notes
- Use freshly shredded cheese for the best melt and flavor; pre-shredded cheese often contains anti-caking agents that can affect texture.
- If you can’t find Gruyere, Emmental or Swiss cheese make great substitutes with a similar nutty taste.
- To avoid clumping, toss drained pasta with a light drizzle of olive oil before mixing with the sauce.
- Adjust seasoning to your preference by adding garlic powder, onion powder, or a pinch of cayenne for heat.
- For a gluten-free version, substitute all-purpose flour with gluten-free flour or cornstarch and ensure your pasta is gluten-free.
Chef’s Secrets For Ultimate Creaminess
Achieving a perfectly creamy baked mac and cheese comes down to mastering the sauce.
The key is making a smooth roux — the butter and flour mixture — cooked just long enough to remove the raw flour taste but not so much that it browns.
Slowly incorporating the dairy while whisking prevents lumps and ensures a velvety texture. Using a blend of sharp cheddar and Gruyere adds depth with its rich, nutty flavors and melts beautifully.
Also, layering the cheese throughout the dish rather than mixing it all at once enhances the gooey, cheesy experience.
Lastly, don’t overcook the pasta; slightly undercooked noodles absorb sauce better and stay tender after baking.
Serving Suggestions To Impress Everyone
This baked mac and cheese pairs wonderfully with a variety of dishes.
Serve it alongside roasted or grilled vegetables like asparagus, broccoli, or Brussels sprouts to balance richness with fresh flavors.
For protein, consider crispy fried chicken, BBQ ribs, or baked salmon for a hearty, satisfying meal.
Add a fresh green salad with a tangy vinaigrette to cut through the creamy texture. For a comforting twist, top with crispy bacon bits or caramelized onions.
This dish also shines as a decadent side for holiday feasts or casual family dinners alike.
Storage Tips To Keep It Fresh
Leftover baked mac and cheese stores well in the refrigerator for up to 3-4 days when covered tightly with foil or plastic wrap.
To reheat, cover the dish with foil and bake at 325°F (163°C) for 20-25 minutes or microwave individual portions until warmed through.
For longer storage, freeze in an airtight container for up to 2 months. Thaw overnight in the fridge before reheating to retain its creamy texture.
Avoid freezing the dish after baking if you prefer a crispy topping, as it can become soggy upon reheating.
Frequently Asked Questions Answered
1. Can I make this recipe ahead of time?
Absolutely! You can prepare the entire dish through step 8, then cover and refrigerate for 1-2 days before baking. Allow it to come to room temperature for about 30 minutes before baking as usual.
2. What’s the difference between using half-and-half and heavy cream?
Half-and-half provides a creamy texture with fewer calories and less saturated fat than heavy cream, making the sauce rich but not overly heavy.
3. How can I make this recipe vegetarian?
This recipe is already vegetarian-friendly as it contains no meat. Just ensure your cheese is made without animal rennet if you want to be strict vegetarian.
4. Can I substitute different types of pasta?
Yes! While elbow macaroni is traditional, you can use shells, cavatappi, or penne. Just adjust cooking time so pasta is al dente before baking.
5. How do I get a crispy cheese topping?
For a golden crust, sprinkle extra cheese evenly on top and bake uncovered. For extra crunch, add a mix of breadcrumbs and melted butter before baking.
This recipe has been adapted and simplified from the original version by thechunkychef. We’ve refined the steps for a smoother cooking experience and added helpful notes, nutrition insights, and essential kitchen tools to make it even easier for home cooks.