

This breakfast quesadilla brings the perfect balance of simplicity, flavor, and nutrition.
With just three core ingredients and 15 minutes from start to finish, it’s ideal for busy mornings or quick weekday meals.
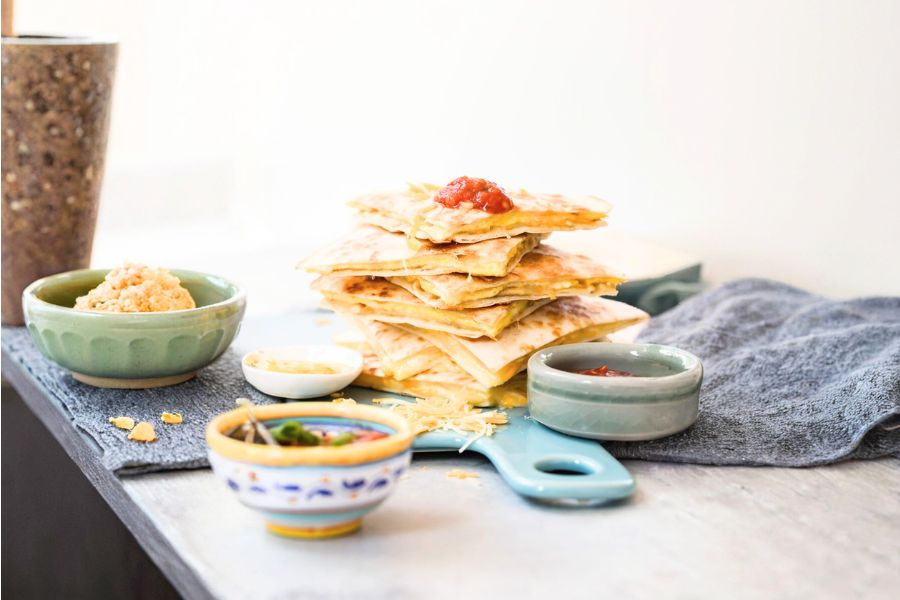
The combination of fluffy eggs and melty cheese tucked between warm tortillas makes it both satisfying and family-friendly—without relying on processed ingredients.
It’s rich in protein from the eggs and cheese, while using whole wheat tortillas boosts fiber intake and provides longer-lasting energy.
With moderate carbs and healthy fats, this meal offers a nourishing start to your day.
Whether you’re feeding kids before school or making yourself a hearty breakfast, this recipe proves you don’t need a long ingredient list to eat well.
It’s also easily customizable, making it perfect for meal prep or clean-out-the-fridge breakfasts.
Must-Have Tools for Perfect Results
Nonstick Skillet (9-inch)
Ensures your eggs cook evenly and flip cleanly without sticking — also great for pancakes, omelets, and grilled sandwiches.
Heat-Resistant Spatula
Perfect for loosening the omelette edges and pressing the quesadilla; a kitchen essential for sautés, scrambles, and flipping delicate foods.
Mixing Bowl
Ideal for whisking eggs smoothly before cooking — doubles as a prep bowl for countless recipes.
Chef’s Knife or Pizza Cutter
For slicing the finished quesadilla into wedges; also useful for chopping ingredients or slicing baked goods.
Medium Plate (for flipping)
Useful for the “plate trick” flip; also handy for serving or staging ingredients while cooking.

15-Minute Breakfast Quesadilla
Equipment
- 1 Nonstick skillet (9-inch)
- 1 Mixing Bowl
- 1 Whisk
- 1 Spatula
- 1 Plate (for flipping)
Ingredients
- 2 large eggs
- ¼ teaspoon kosher salt
- 1 teaspoon oil any neutral cooking oil
- 1 cup shredded Mexican blend cheese or cheddar, Monterey Jack, or mozzarella
- 2 whole wheat or spelt tortillas about 8 inches
Instructions
- Prepare the Egg Mixture: In a medium mixing bowl, crack the eggs and add the kosher salt. Use a whisk and beat the eggs for a solid 30 seconds, making sure the yolks and whites are completely combined and slightly frothy. This helps incorporate air so the eggs cook up light and tender.
- Heat and Grease the Skillet: Place a 9-inch nonstick skillet over medium heat. Add the teaspoon of oil and swirl or brush it around so the entire bottom surface is coated. Allow the oil to warm for 30 seconds until it has a light shimmer — this prevents the eggs from sticking and helps them cook evenly.
- Cook the Egg Base (Omelette Layer): Pour the whisked eggs into the center of the hot skillet. Immediately tilt and rotate the pan so the eggs spread out into a thin, even layer, covering the entire surface. Let the eggs cook undisturbed for about 30 seconds. As the edges begin to set, use a spatula to gently lift the perimeter of the omelette, loosening it from the pan while allowing any uncooked egg to flow underneath.
- Add Cheese and First Tortilla: Sprinkle half of the shredded cheese evenly across the surface of the partially cooked eggs. Let it sit for a few seconds so the cheese starts to melt and adhere to the omelette. Then carefully place one tortilla directly on top of the cheese-covered eggs. Gently press the tortilla onto the cheese so it sticks.
- Flip the Omelette (Using the Plate Trick): Carefully remove the skillet from the burner. Place a medium plate upside down over the skillet. Holding the plate firmly against the pan, flip the skillet over so the tortilla side of the omelette transfers onto the plate. The egg side should now be facing up. Slowly slide the tortilla back into the skillet so the tortilla side is face-down and crisping in the pan.
- Add Remaining Cheese and Top Tortilla: Sprinkle the remaining cheese evenly over the egg side now facing up in the pan. Immediately place the second tortilla on top, gently pressing so that the tortilla sticks to the melting cheese. This creates the quesadilla’s two-layer structure.
- Cook and Melt Everything Together: Allow the quesadilla to cook for about 1 minute. Use a spatula to press down gently on the top tortilla to encourage the cheese to fully melt and the tortillas to bond with the eggs.Once the bottom tortilla is golden-brown, carefully flip the entire quesadilla.Cook the other side for another 30 seconds to 1 minute, or until the second tortilla is crisp and golden and the cheese is completely melted.
- Slice and Serve: Transfer the finished quesadilla to a cutting board or plate. Let it sit for about 30 seconds to firm up slightly — this makes cutting easier and prevents the cheese from spilling out. Use a sharp knife or pizza cutter to slice the quesadilla into wedges. Serve immediately while hot and enjoy your warm, cheesy, protein-packed breakfast!
Notes
- Use whole wheat tortillas for added fiber and a heartier texture.
- Stick to a 9-inch skillet or larger so the tortilla fits evenly in the pan.
- For easier flipping, always use the plate trick if you’re not comfortable flipping directly in the pan.
- Cheddar, Monterey Jack, mozzarella, or any cheese that melts well can be used as a substitute.
- To keep multiple quesadillas warm, place finished ones on a baking sheet in a 200°F oven.
- If using smaller tortillas, reduce eggs and cheese to prevent overfilling.
Chef’s Secrets for Success
For a silky, tender omelette base, always whisk the eggs thoroughly to incorporate air — this makes them fluffier when cooked.
Use medium heat so the eggs cook gently without browning or becoming rubbery.
Don’t rush the flip: allow the cheese to melt slightly before placing the first tortilla so it adheres well and holds everything together during flipping.
Lastly, a good-quality nonstick skillet makes the process effortless and keeps cleanup simple.
Serving Suggestions and Pairings
This breakfast quesadilla is satisfying on its own, but you can elevate the meal with a few simple sides.
Serve it with fresh salsa, sliced avocado, or Greek yogurt for a balanced breakfast.
For extra color and nutrients, add a side of mixed berries or a light fruit salad.
It also pairs beautifully with a morning smoothie, fresh-squeezed juice, or even a cup of coffee for a complete, energizing start to the day.
Storage Tips and Reheating
If you have leftovers, allow the quesadilla to cool completely, then store slices in an airtight container or wrap them individually in foil.
They will keep in the refrigerator for up to 2 days.
To reheat, warm them in a skillet over low heat to restore crispness, or pop them in a toaster oven or air fryer until hot and melty again.
Microwaving works in a pinch, but the tortilla may soften.
Frequently Asked Questions
1. Can I add vegetables to this quesadilla?
Absolutely! You can fold in sautéed spinach, bell peppers, onions, or mushrooms into the egg mixture before adding the cheese. Just avoid overly wet vegetables to keep the tortilla from getting soggy.
2. What type of cheese works best?
Any melty cheese will work well. A Mexican blend adds a nice mix of flavors, but cheddar, Monterey Jack, or mozzarella are all delicious options depending on what you have on hand.
3. How do I prevent the tortilla from burning?
Cook on medium heat and don’t leave the pan unattended. If the tortilla browns too quickly, lower the heat slightly to ensure everything melts without burning.
4. Can I make this dairy-free?
Yes! Use your favorite non-dairy cheese shreds and cook the eggs in olive oil or avocado oil. The result is still satisfying and flavorful.
5. Is this recipe freezer-friendly?
While it can be frozen, the texture is best when fresh. If freezing, wrap tightly and reheat in a toaster oven or skillet to revive the crispness before serving.
This recipe has been adapted and simplified from the original version by weelicious. We’ve refined the steps for a smoother cooking experience and added helpful notes, nutrition insights, and essential kitchen tools to make it even easier for home cooks.