
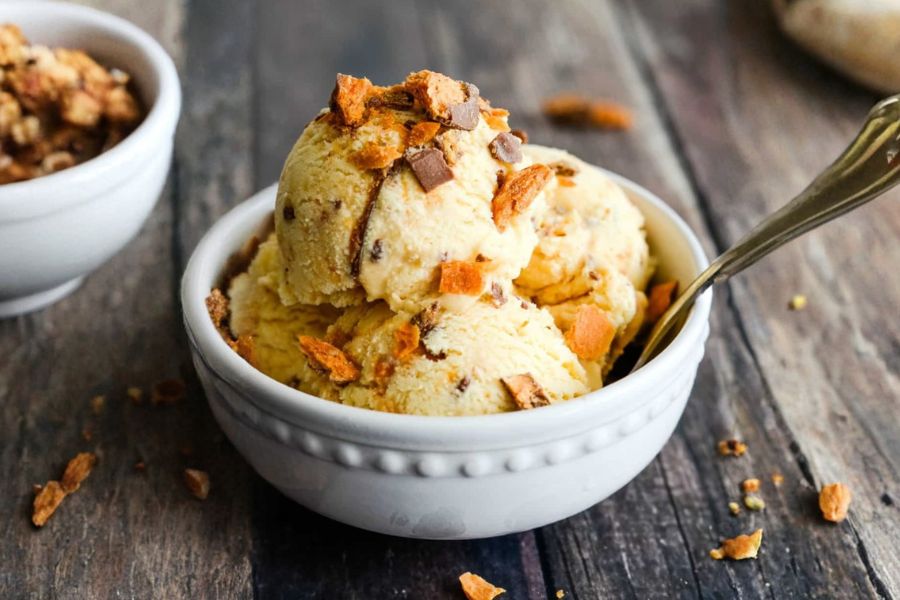
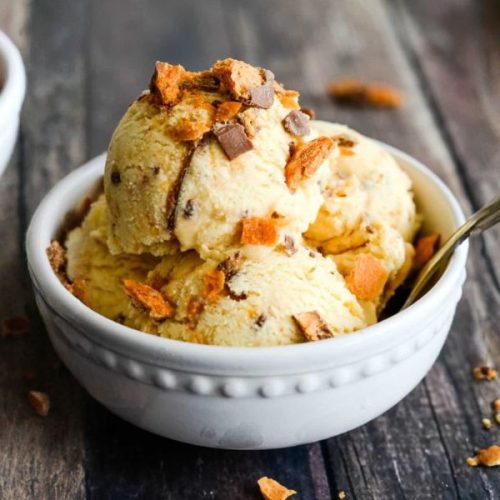
This Butterfinger ice cream is a decadent, crowd-pleasing dessert that combines a rich, creamy vanilla base with crunchy, candy-bar goodness.
The blend of heavy cream, whole milk, and sweetened condensed milk delivers smooth, satisfying texture, while the crushed Butterfinger pieces provide a fun, crunchy contrast.
With moderate protein from milk and cream, and a controlled sweetness balanced by vanilla, it’s a dessert that feels indulgent yet approachable.
Quick to assemble and simple to churn, this recipe is perfect for everyday treats, parties, or family gatherings.
It requires minimal prep, can be made ahead, and offers the satisfaction of homemade ice cream without the need for baking, making it an ideal addition to any home dessert repertoire.
Must-Have Tools for Perfect Results
Ice Cream Maker
Churns the mixture into creamy perfection while incorporating candy pieces evenly. A must-have for homemade ice cream, gelato, and sorbets.
Large Mixing Bowl
Combines all liquid and dry ingredients smoothly and efficiently. Perfect for mixing batters, whipping cream, or tossing salads.
Whisk
Ensures even blending of milk, cream, sugar, and pudding mix, creating a lump-free, smooth ice cream base. Essential for sauces, dressings, and baking.
Measuring Cups & Spoons
Provide precise measurement for dairy, sugar, and flavorings, ensuring consistent texture and taste. A must-have for reliable home cooking and baking.
Airtight Freezer Container
Stores churned ice cream safely, preserving flavor and texture while preventing ice crystals. Useful for leftovers or meal prep storage.
Homemade Butterfinger Ice Cream
Equipment
- 1 Ice Cream Maker
- 1 Large mixing bowl
- 1 whisk
- Measuring Cups & Spoons
- 1 Airtight Freezer Container
Ingredients
- 1 pint Heavy Cream
- 1 12 oz can Evaporated Milk
- 1 14 oz can Sweetened Condensed Milk
- 4 cups Whole Milk
- 1 3.4 oz box Vanilla Instant Pudding Mix
- ¾ cup Sugar
- 4 Tbsp Vanilla Extract
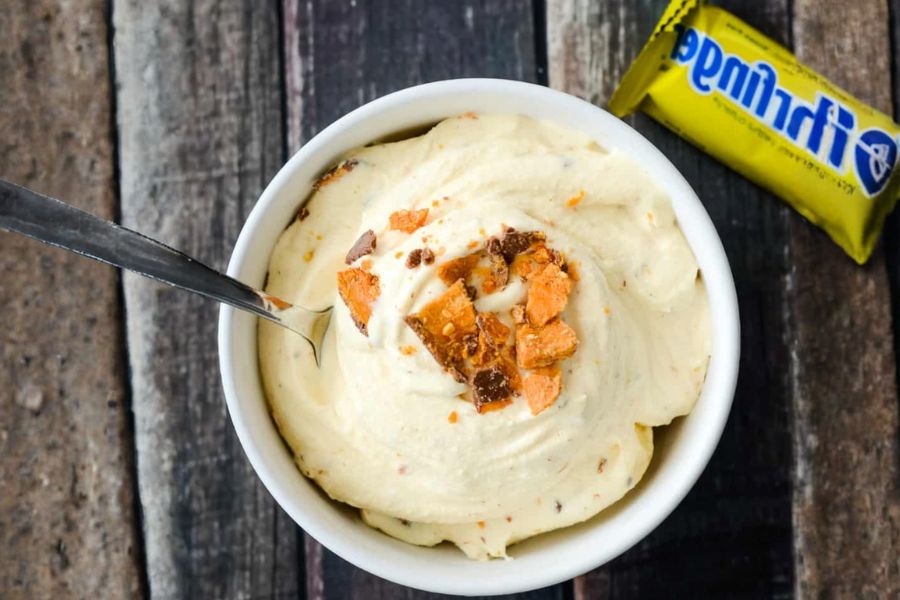
- 5 1.9 oz Butterfinger Bars, crushed
Instructions
- Combine All Ingredients: In a large mixing bowl, pour in the heavy cream, evaporated milk, sweetened condensed milk, whole milk, and vanilla instant pudding mix. Add sugar and vanilla extract. Use a whisk to blend thoroughly until smooth, ensuring all ingredients are fully incorporated with no lumps.
- Chill the Mixture: Cover the bowl with plastic wrap and place it in the refrigerator for 2–3 hours, or until the mixture is very cold. Chilling helps the ice cream churn evenly and creates a creamy, rich texture without ice crystals.
- Prepare the Ice Cream Maker: Set up your ice cream maker according to the manufacturer’s instructions. Make sure the freezing bowl is fully chilled if using a pre-frozen bowl to ensure proper consistency and smooth churning.
- Pour Into Ice Cream Maker: Slowly transfer the chilled mixture into the prepared ice cream maker. Ensure the mixture spreads evenly and that the lid is securely fastened to prevent spills while churning.
- Churn the Ice Cream: Turn on the ice cream maker and let it churn according to the machine’s instructions, typically 20–30 minutes. The mixture should thicken and achieve a soft, creamy consistency, ready to incorporate mix-ins.
- Add Butterfinger Pieces: During the last 5 minutes of churning, gradually fold in the crushed Butterfinger bars. This ensures even distribution throughout the ice cream, creating delightful crunchy bites in every scoop.
- Freeze and Serve: Transfer the ice cream to an airtight freezer-safe container. Cover with a lid or plastic wrap and freeze for at least 2 hours to firm up. Serve immediately or keep frozen for later enjoyment. Optionally, reserve some Butterfinger pieces to sprinkle on top when serving.
Notes
- Makes approximately 16 servings.
- Reserve some Butterfinger pieces to sprinkle on top when serving.
- Ensure the ice cream mixture is very cold before churning for optimal texture.
- Churning times may vary depending on your ice cream maker model.
- Use airtight containers for storage to maintain creaminess and prevent ice crystals.
Chef’s Secrets For Perfect Butterfinger Ice Cream
The key to creamy, scoopable Butterfinger ice cream is thoroughly chilling the mixture before churning.
Combining heavy cream, whole milk, and sweetened condensed milk provides a rich base, while evaporated milk balances the sweetness and improves texture.
For the candy pieces, crush Butterfinger bars evenly to ensure they mix uniformly throughout the ice cream.
Avoid adding them too early during churning, as they may melt or soften excessively.
Using high-quality vanilla instant pudding mix enhances the creaminess and adds subtle flavor depth.
These small techniques help transform simple ingredients into a decadent, professional-quality dessert.
Serving Suggestions For Ultimate Indulgence
Serve Butterfinger ice cream in bowls, cones, or even atop warm brownies or chocolate cake for a decadent treat.
Add extra crushed Butterfinger on top for a visually appealing crunch.
For an elevated dessert, drizzle caramel or chocolate sauce over scoops and garnish with chopped nuts.
It’s perfect for summer parties, birthdays, or a fun weekend indulgence.
The ice cream also works beautifully in milkshakes, sundaes, or layered parfaits for a creative dessert experience.
Storage Tips For Long-Lasting Freshness
Store ice cream in an airtight, freezer-safe container to maintain flavor and creaminess.
Press a layer of plastic wrap directly on the surface to prevent ice crystals. Keep it in the back of the freezer for consistent temperature.
Homemade ice cream is best enjoyed within 2–3 weeks for optimal texture and flavor, although it can last up to a month if stored properly.
Let it sit at room temperature for a few minutes before scooping for easier serving.
Frequently Asked Questions And Answers
1. Can I use other candy bars instead?
Yes! Crunchy candy bars like Heath, Snickers, or Reese’s work well. Chop evenly and fold in at the end of churning for best results.
2. Can I make this without an ice cream maker?
Yes, pour the mixture into a freezer-safe container, stir every 30 minutes until firm. Texture may be slightly less creamy but still delicious.
3. Can I make it ahead of time?
Absolutely. Prepare the ice cream, churn, and store in an airtight container. It can be kept frozen for up to one month.
4. How can I prevent ice crystals?
Use a fully chilled mixture, an ice cream maker, and store in an airtight container. Pressing plastic wrap on the surface helps maintain creaminess.
5. Can I reduce the sugar?
Yes, but keep in mind that sugar contributes to smooth texture and scoopability. Reducing too much may make the ice cream firmer and less creamy.
This recipe has been adapted and simplified from the original version by creationsbykara. We’ve refined the steps for a smoother cooking experience and added helpful notes, nutrition insights, and essential kitchen tools to make it even easier for home cooks.