
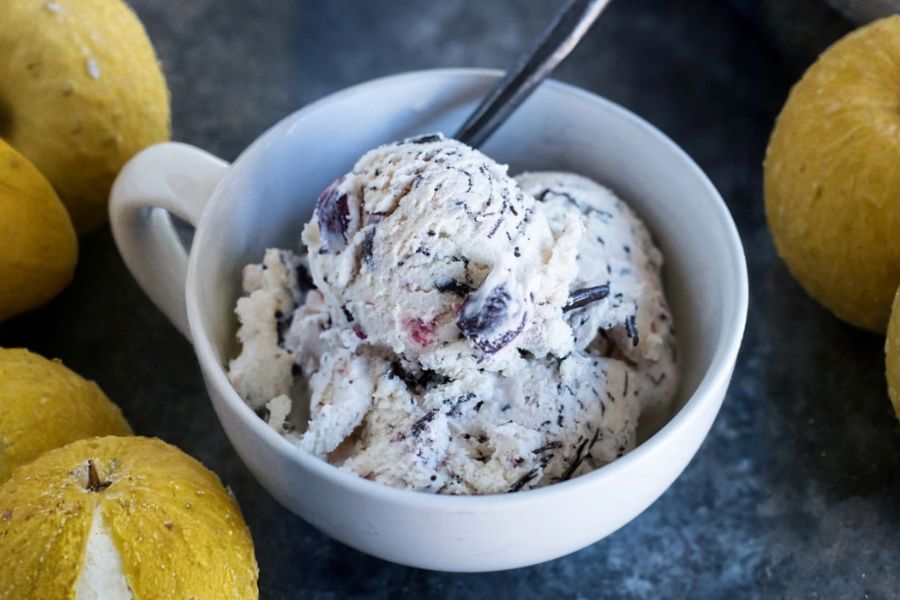
This Cherry Garcia Ice Cream is a deliciously indulgent treat made with wholesome, unrefined ingredients, offering a naturally sweetened dessert without excessive processed sugars.
The rich vanilla base, made from cream, milk, and dark maple syrup, provides a creamy texture with good fats for satisfying flavor and energy.
Fresh cherries contribute antioxidants, fiber, and natural sweetness, while dark chocolate adds richness and heart-healthy compounds.
This combination makes the ice cream not only a treat for your taste buds but also a slightly more nutritious alternative to traditional ice creams.
Its versatility allows for easy customization with different mix-ins, making it perfect for everyday indulgence, family gatherings, or meal prep.
Quick to assemble and compatible with both soft-serve and firm, scoopable textures, this recipe is both convenient and rewarding for home cooks seeking a balance of flavor, nutrition, and creativity in their desserts.
Must-Have Tools for Perfect Results
Cuisinart Ice 100 Compressor Ice Cream Maker
Ideal for churning the ice cream base to a soft-serve consistency without needing pre-frozen bowls. Perfect for consistent, smooth ice cream and versatile for homemade frozen desserts.
Whisk
Essential for combining cream, milk, maple syrup, and vanilla evenly, ensuring a smooth and uniform ice cream base. Useful for mixing, whipping, and baking tasks in the kitchen.
Kitchen Shears
Convenient for cutting frozen or thawed cherries into uniform pieces quickly. Also handy for trimming herbs, vegetables, and other food prep tasks.
Loaf Pan (9×5-inch): Perfect for freezing ice cream in a uniform shape and easy scooping. Also great for freezing cakes, breads, and layered desserts.
Heatproof Bowl
Necessary for melting chocolate safely over a double boiler or microwave. Versatile for baking, candy-making, or tempering chocolate for various recipes.
Homemade Cherry Garcia Ice Cream
Equipment
- 1 Cuisinart Ice 100 Compressor Ice Cream Maker
- Whisk
- Kitchen Shears
- 9×5-inch loaf pan
- Heatproof Bowl
Ingredients
Vanilla Ice Cream Base:
- 2 cups heavy cream
- 1 cup milk whole or skim
- 1/2 cup dark maple syrup
- 1/4 teaspoon salt
- 1 1/2 tablespoons pure vanilla extract
Mix-Ins:
- 12 oz frozen pitted cherries adjust to taste
- 1 –2 oz dark chocolate chopped
- 1 –2 oz dark chocolate melted
Instructions
- Prepare Ice Cream Base: In a large mixing bowl, whisk together heavy cream, milk, dark maple syrup, salt, and pure vanilla extract until smooth and fully combined. This ensures a uniform flavor and creamy consistency. Pour the mixture into your ice cream maker and follow the manufacturer’s instructions to churn until it reaches a soft-serve stage, typically around 40 minutes for a compressor-style machine.
- Prepare Cherries: While the ice cream churns, allow the frozen cherries to thaw slightly at room temperature until soft but not mushy. Use kitchen shears or a sharp knife to cut the cherries into quarters or your preferred size. Place them in a strainer to drain any excess liquid to prevent the ice cream from becoming watery.
- Prepare Chocolate: Chop 1–2 ounces of dark chocolate into small chunks and set aside. Melt another 1–2 ounces in a heatproof bowl using a microwave or double boiler. This melted chocolate will create decadent swirls throughout the ice cream, giving it the classic Cherry Garcia look and taste.
- Incorporate Mix-Ins: When the ice cream reaches the soft-serve stage, gently fold in the quartered cherries and chopped chocolate chunks.Use a spatula or a knife to drizzle the melted chocolate into the mixture. This step creates marbled chocolate swirls while keeping the cherries intact and evenly distributed.
- Freeze for Firmness or Serve Soft-Serve: For soft-serve style ice cream, serve immediately. For a firmer texture, transfer the ice cream into a 9×5-inch loaf pan or other freezer-safe container. Smooth the top, drizzle extra melted chocolate if desired, press plastic wrap directly onto the surface, and freeze for at least 3 hours before scooping and serving.
Notes
- Use fully thawed cherries to avoid excess liquid in the ice cream, which can make it watery.
- Dark chocolate provides a richer, lower-sugar option; feel free to adjust the amount based on taste preferences.
- Whole milk yields a creamier base, but skim milk reduces fat content while maintaining flavor.
- Soft-serve can be enjoyed immediately, or freeze for 3+ hours for firmer scoops.
- Press plastic wrap directly onto the ice cream surface to prevent ice crystals from forming.
- Customize your mix-ins: additional fruits, nuts, or chocolate variations work beautifully.
- A compressor-style ice cream maker eliminates the need to pre-freeze bowls and speeds up preparation.
Chef’s Secrets For Creamy Texture
The secret to perfectly smooth Cherry Garcia Ice Cream lies in balancing the base and mix-ins.
Whisking the cream, milk, maple syrup, and vanilla thoroughly ensures even sweetness and creaminess.
Use fully thawed but firm cherries, and drain any excess liquid to prevent a watery base.
Folding in chocolate chunks and drizzling melted chocolate at the soft-serve stage preserves texture and creates elegant swirls.
For the creamiest results, use whole milk if possible, and avoid overmixing once the cherries are added.
These careful steps guarantee a luscious, homemade ice cream that rivals store-bought versions.
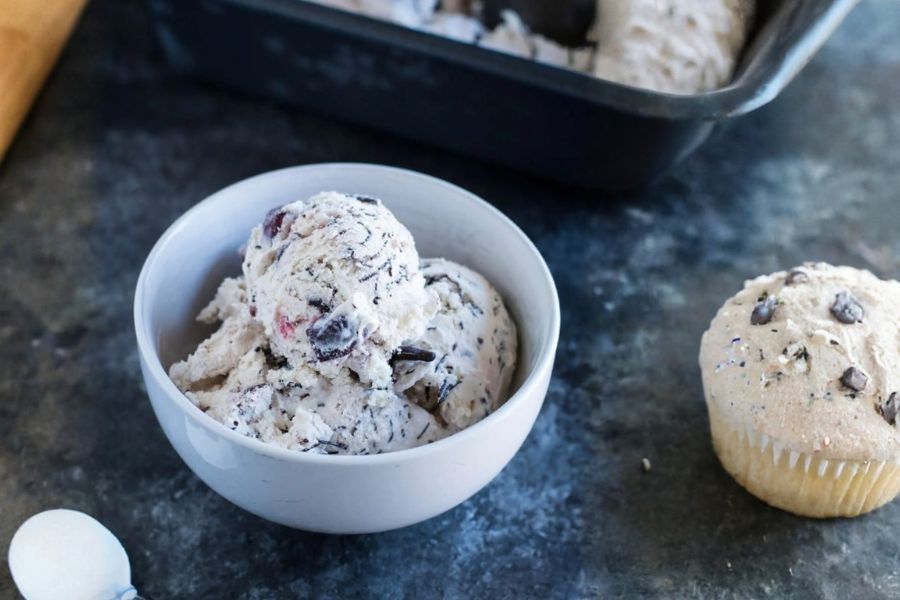
Serving Suggestions For Every Occasion
Serve this Cherry Garcia Ice Cream in bowls, cones, or layered in parfaits with granola and fresh fruit for a decadent brunch treat.
Drizzle additional melted dark chocolate or sprinkle crushed nuts on top to elevate presentation and flavor.
It pairs wonderfully with vegan brownies or warm chocolate cake for dessert.
For entertaining, slice scoops into small portions to offer as a sampler during gatherings.
Whether enjoyed as soft-serve or a firmer frozen dessert, it’s perfect for family desserts, holiday celebrations, or summer indulgences.
Storage Tips To Maintain Freshness
Store leftover ice cream in an airtight, freezer-safe container to preserve flavor and prevent ice crystals from forming.
For firm scoops, allow the ice cream to thaw for 5–10 minutes before serving.
Avoid repeated thawing and refreezing, which can affect texture.
To make portions more convenient, consider freezing in smaller containers for single servings.
Properly stored, this ice cream can maintain its rich flavor and creamy texture for up to one week.
Pressing plastic wrap directly onto the ice cream surface helps maintain smooth consistency.
Frequently Asked Questions About Recipe
1. Can I use frozen cherries directly?
Yes, but allow them to thaw slightly and drain excess liquid to avoid a watery ice cream base.
2. Can I substitute maple syrup?
You can use honey, agave, or coconut sugar as alternative natural sweeteners, adjusting to taste.
3. How do I make the chocolate swirl?
Melt chocolate and drizzle into the ice cream at the soft-serve stage. This creates marbled swirls that harden as it freezes.
4. Can I make this without an ice cream maker?
Yes! Pour the base into a freezer-safe container, stir every 30 minutes during freezing until creamy and firm.
5. Can I add other mix-ins?
Absolutely! Nuts, additional fruit, or vegan cookie pieces can be folded in to customize the flavor and texture.
This recipe has been adapted and simplified from the original version by wyldflour. We’ve refined the steps for a smoother cooking experience and added helpful notes, nutrition insights, and essential kitchen tools to make it even easier for home cooks.