
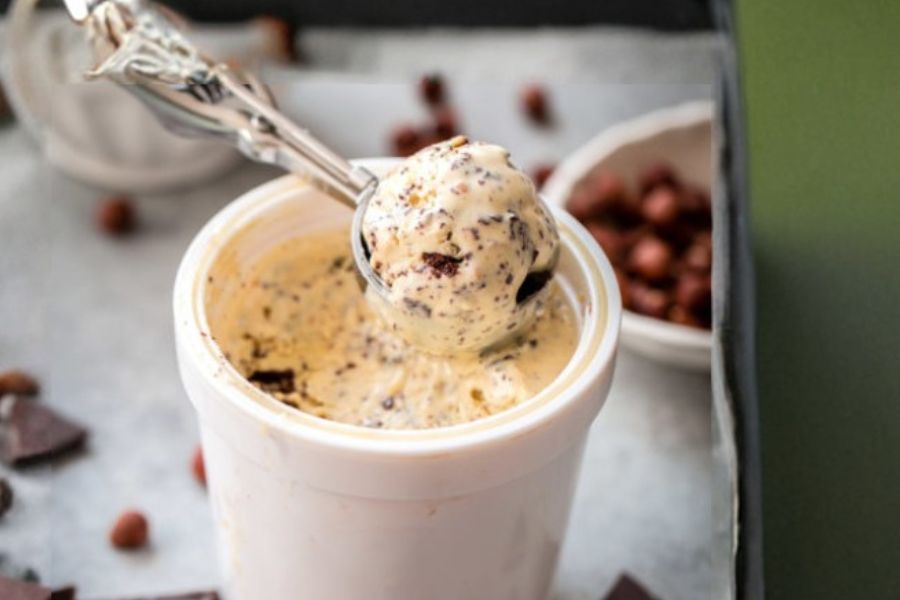
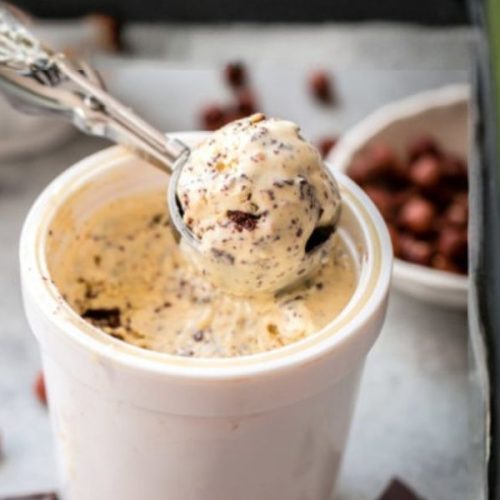
This Chocolate Hazelnut Ice Cream is a dream for anyone who loves rich, nutty flavors wrapped in creamy indulgence.
What sets it apart is the homemade hazelnut butter, which infuses the base with plant-based protein and heart-healthy fats, giving this dessert a nutritional edge over ordinary ice cream.
Hazelnuts are naturally fiber-rich and contain antioxidants, making this recipe both satisfying and wholesome in moderation.
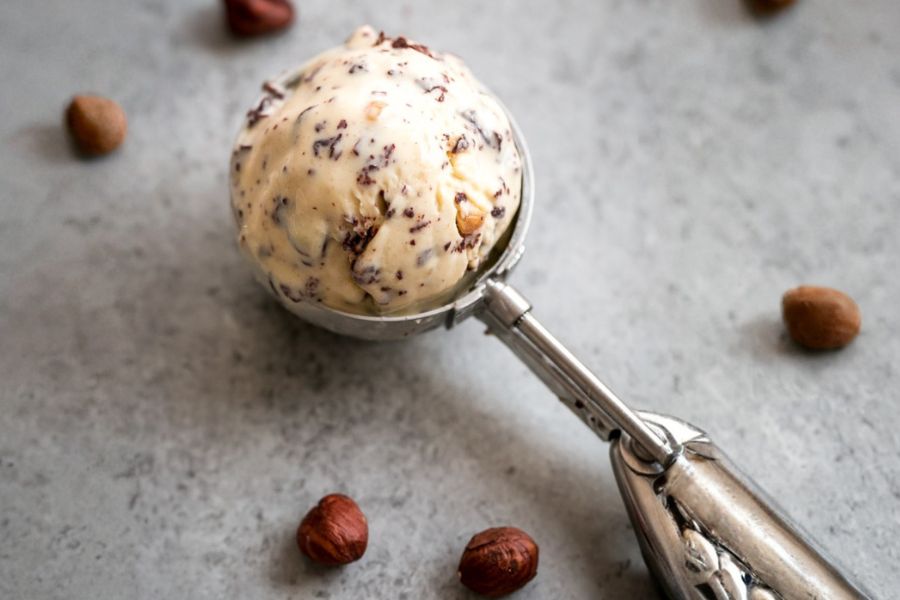
Paired with silky custard and thin streams of real chocolate that harden into delicate shards, each bite offers a balance of crunch and creaminess.
Though it feels like a special-occasion dessert, this recipe is surprisingly approachable, thanks to simple techniques and a few essential tools.
It’s a recipe worth repeating for family gatherings, celebrations, or as a weekend treat to keep stocked in your freezer.
Must-Have Tools for Perfect Results
Cuisinart Ice Cream Maker
Creates the smooth, creamy base by churning air into the custard. Beyond this recipe, it’s perfect for sorbets, frozen yogurt, and endless homemade frozen desserts.
Vitamix or Magimix Food Processor
Transforms toasted hazelnuts into a velvety butter with minimal effort. This powerhouse tool is also essential for nut butters, pesto, sauces, and even doughs.
All-Clad Stainless Steel Saucepan
Gently heats the custard base without scorching. A long-lasting, versatile pan perfect for soups, sauces, and everyday cooking.
Fine Mesh Strainer
Ensures the custard is silky smooth by removing any lumps. A kitchen essential for straining sauces, broths, or even dusting baked goods with sugar.
Pyrex Glass Mixing Bowls
Perfect for whisking egg yolks, cooling custard, and mixing melted chocolate. Their durability and clarity make them a go-to for prep, serving, and storage.
Creamy Chocolate Hazelnut Ice Cream
Equipment
- 1 Ice Cream Maker
- 1 Medium saucepan
- 1 Food Processor
- 1 Fine-mesh strainer
- 1 set of mixing bowls
- 1 Airtight Container
Ingredients
Hazelnut Butter
- 1 cup about 5¼ oz raw hazelnuts, skin-on
Ice Cream Base
- 6 large pasteurized egg yolks
- ¾ cup 150 g granulated sugar
- 1 ½ cups 360 mL whole milk
- 1 ½ cups 360 mL heavy cream
- ½ teaspoon pure vanilla extract
- 1 pinch kosher salt
- 1 batch homemade hazelnut butter from above
Chocolate Ribbon
- 2 oz semi-sweet chocolate chopped
- 1 tablespoon 15 g unsalted butter
Instructions
- Roast the Hazelnuts for Flavor: Preheat your oven to 350°F (176°C) and line a baking sheet with parchment paper or a silicone baking mat. Spread the raw hazelnuts evenly across the tray and roast for 10–15 minutes, or until they smell fragrant and their skins begin to crack. Watch carefully near the end so they don’t burn. Remove from the oven and transfer the hot nuts to the center of a clean kitchen towel. Gather the towel edges to form a pouch and let them rest for 5–10 minutes before rubbing vigorously to loosen their skins. Discard as much skin as possible to prevent bitterness, and re-toast any stubborn nuts for 3–5 minutes if needed.
- Transform Hazelnuts into Butter: Place the skinned hazelnuts in a large food processor and blend until smooth, pausing every few minutes to scrape down the sides. At first, the mixture will be dry and crumbly, but as the natural oils release, it will slowly turn creamy and glossy. Continue processing for 3–5 minutes until a silky hazelnut butter forms. Set aside while you prepare the custard base. This nut butter is the secret to giving the ice cream its rich, signature flavor.
- Prepare the Custard Base: In a medium mixing bowl, whisk together egg yolks and granulated sugar until thick, pale, and ribbon-like in texture. Slowly whisk in the whole milk and heavy cream until fully combined. Pour this mixture into a medium saucepan and set it over medium-low heat. Stir gently and constantly with a wooden spoon, adjusting the heat as needed. Cook until the custard thickens enough to coat the back of the spoon and holds a clear line when swiped with your finger. Remove from heat immediately to prevent curdling.
- Flavor and Cool the Base: Pour the hot custard into a large mixing bowl and immediately stir in the vanilla extract, kosher salt, and your prepared hazelnut butter until smooth and blended. Let the mixture cool to room temperature for 20–30 minutes. Then, strain it through a fine mesh strainer into a refrigerator-safe container to ensure a silky consistency free of any lumps. Cover tightly with plastic wrap, pressing it gently against the surface to prevent a skin from forming. Refrigerate overnight, or at least 12 hours, until fully chilled.
- Churn the Ice Cream Mixture: Once chilled, pour the custard into your ice cream maker and churn according to the manufacturer’s instructions. This process incorporates air, transforming the liquid custard into a light and creamy frozen base. The churning usually takes 20–25 minutes, and you’ll notice the mixture thicken to a soft-serve texture. Prepare your melted chocolate drizzle while the machine is finishing its work, ensuring the chocolate stays warm enough to stream smoothly.
- Create the Chocolate Ribbon: In a microwave-safe bowl, combine chopped semi-sweet chocolate and unsalted butter. Heat in 15-second intervals, stirring after each until completely melted and smooth. Pour the warm chocolate mixture into a small plastic or piping bag, squeezing out any excess air. Keep the bag warm by placing it in a bowl of hot water (sealed) until ready to use. When the ice cream is nearly finished churning, snip a tiny hole in the corner of the bag and drizzle the chocolate in a thin stream directly into the spinning ice cream. The cold base will harden the chocolate into delicate, crunchy shards.
- Freeze and Serve the Ice Cream: Transfer the finished ice cream into an airtight container, smoothing the top with a spatula. Press parchment paper or plastic wrap directly onto the surface to minimize ice crystals. Seal with a tight-fitting lid and freeze for at least 4–6 hours, or preferably overnight, until firm enough to scoop. When ready to serve, let the container rest at room temperature for 5 minutes before scooping to achieve perfect, creamy servings. Garnish with chopped hazelnuts or a drizzle of chocolate sauce for extra indulgence.
Notes
- Always toast hazelnuts before blending—this enhances their nutty depth and makes the butter smoother.
- Remove as much of the skins as possible to avoid bitterness in the final flavor.
- Straining the custard ensures the base stays velvety and lump-free.
- Keep the melted chocolate warm before drizzling into the ice cream maker to create thin, crunchy streaks.
- Chill the custard overnight for the best texture and flavor development.
Chef’s Secrets for Ice Cream Success
The beauty of this recipe lies in the small but critical steps.
Toasting hazelnuts is non-negotiable, as it unlocks oils that transform into a silky butter, creating depth in the ice cream base.
Tempering the egg yolks correctly is another essential trick—slowly whisking in warm liquid prevents scrambling and ensures a custard that thickens perfectly.
Straining the custard may feel optional, but it guarantees a flawless, scoopable texture without any tiny curdled bits.
Finally, the secret to those signature chocolate shards is temperature: drizzle warm chocolate directly into the churning base, and it will instantly harden into delicate pieces that add contrast in every bite.
Serving Suggestions for Chocolate Lovers
This ice cream is rich enough to stand on its own, but pairing it can take it to new heights.
Try scooping it onto warm brownies or chocolate lava cake for a double chocolate indulgence.
For a more elegant presentation, serve it in chilled bowls topped with finely chopped hazelnuts and a drizzle of hazelnut liqueur.
You can also sandwich it between crisp wafer cookies for an easy make-ahead dessert.
During the holidays, it pairs beautifully with a slice of panettone or chocolate hazelnut tart, making it versatile for both casual nights and special occasions
Storage Tips for Long-Lasting Freshness
Homemade ice cream is best enjoyed within two weeks, though it can keep for up to a month with proper storage.
Always use a freezer-safe airtight container to prevent freezer burn and press a piece of parchment or plastic wrap directly onto the ice cream surface before sealing.
Store it in the coldest part of your freezer, away from the door, where temperatures fluctuate the most.
If your ice cream becomes too firm, allow it to sit at room temperature for 5–10 minutes before scooping for the creamiest texture.
Avoid repeated thawing and refreezing, which can lead to ice crystals and loss of flavor.
Frequently Asked Questions
1. Can I use store-bought hazelnut butter?
Yes, you can. While homemade hazelnut butter adds the freshest, purest flavor, a high-quality store-bought version works in a pinch. Just avoid brands with added sugars or oils, which can affect texture.
2. Can I make this recipe dairy-free?
You can substitute full-fat coconut milk and a dairy-free cream alternative for the base. Use dark chocolate for the drizzle. The texture will be slightly different, but it will still be rich and delicious.
3. How can I make the chocolate bits crunchier?
For extra crunch, let the chocolate cool slightly before drizzling into the churned ice cream. The colder it is when hitting the custard, the more brittle the shards will be.
4. Why do I need to chill the custard overnight?
Chilling the base allows the fat to firm up and the flavors to meld, resulting in smoother, creamier ice cream once churned. Skipping this step can lead to graininess.
5. Can I add more mix-ins?
Absolutely! Try folding in chopped hazelnuts, chocolate chunks, or even a swirl of Nutella just before freezing. Just be careful not to overload the base, or it may lose its creamy balance.
This recipe has been adapted and simplified from the original version by abeautifulplate. We’ve refined the steps for a smoother cooking experience and added helpful notes, nutrition insights, and essential kitchen tools to make it even easier for home cooks.