
This method of cooking corn on the cob elevates a classic summer favorite by using milk and butter in the boiling process, creating incredibly tender, naturally sweet kernels.
The milk adds creaminess while the butter enhances flavor, producing a luscious texture that makes each bite rich and satisfying.
Corn is naturally high in fiber and plant-based carbohydrates, offering a healthy, filling side dish without added sugars.
With just a few simple ingredients, this recipe provides a quick, foolproof way to enjoy fresh corn at home, making it perfect for weeknight dinners, BBQs, or meal prep.
Its simplicity, minimal prep, and fast cooking time make it accessible for cooks of any skill level, delivering maximum flavor with minimal effort.
Must-Have Tools for Perfect Results
Large Stockpot
Ideal for boiling multiple ears of corn evenly. Its deep design prevents water from overflowing while providing ample room for milk and butter. Perfect for soups, pasta, and other one-pot meals.
Tongs
Essential for safely removing hot corn from boiling liquid without splashing. Tongs are versatile for flipping, tossing, and serving food throughout the kitchen.
Measuring Cup
Ensures precise amounts of milk and butter for consistent flavor and texture. Useful for baking, sauces, and everyday cooking accuracy.
Butter Knife or Spreader
Perfect for coating corn with additional butter after cooking. Also handy for spreading, slicing, and serving in the kitchen.
15-Minute Cook Corn on the Cob
Equipment
- 1 Large Stockpot
- 1 measuring cup
- 1 butter knife or spreader
- 1 Pair of tongs
Ingredients
- 6 –8 ears of corn husked and silks removed
- 1 cup milk
- 1 stick butter
Instructions
- Prepare the Corn: Start by carefully husking each ear of corn, removing all leaves and silky threads. Rinse the corn under cold running water to wash away any remaining silk and pat dry with a clean kitchen towel, ensuring the corn is ready for even cooking.
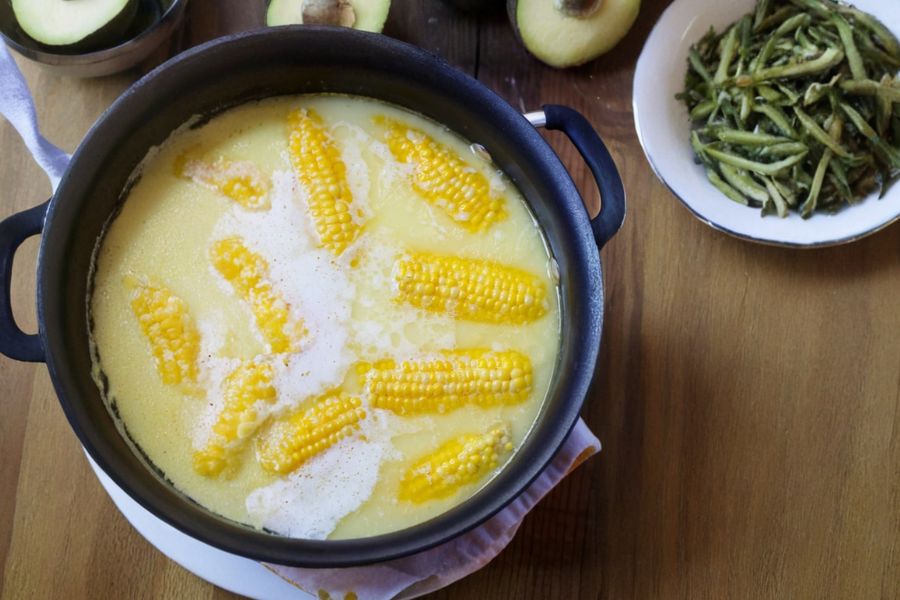
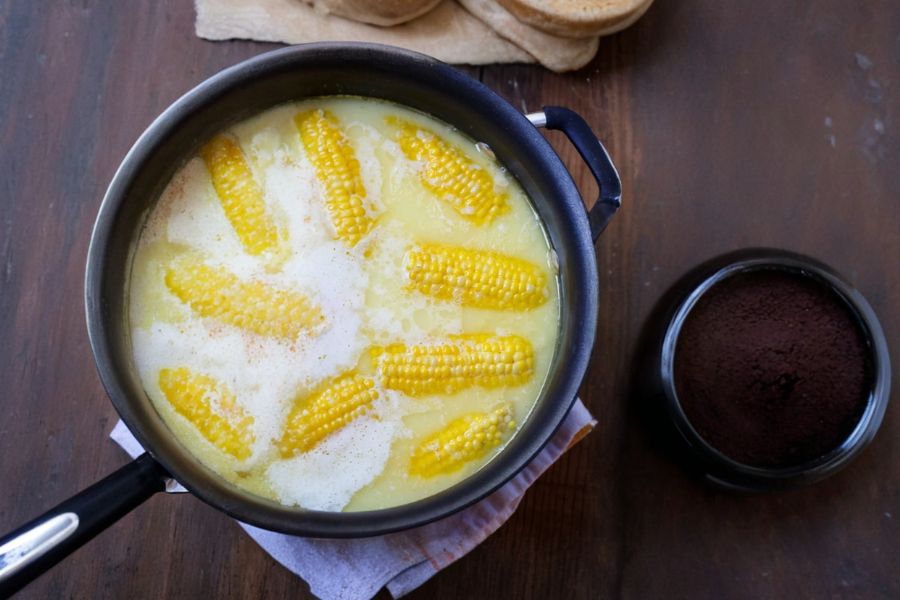
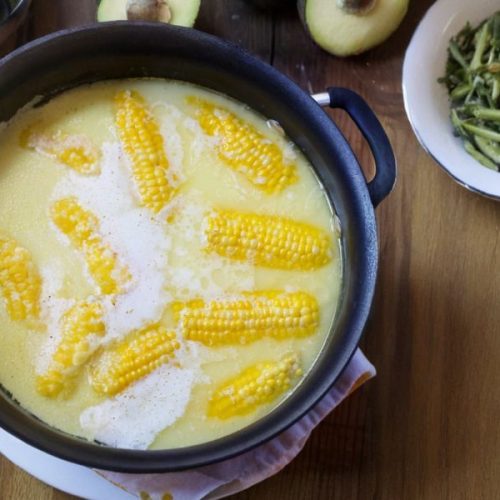
- Boiling Liquid Preparation: In a large stockpot, fill it about halfway with fresh water and place it over medium-high heat. Add one cup of milk and one stick of butter to the water, allowing the butter to melt completely while bringing the mixture to a gentle boil.
- Cooking the Corn: Gently place the prepared corn into the simmering milk and butter mixture, making sure each ear is fully submerged. Reduce the heat slightly to maintain a gentle boil, and let the corn cook for 6–8 minutes until the kernels are tender but still firm, stirring occasionally with tongs to ensure even cooking.
- Removing and Serving: Carefully lift each ear of corn from the hot liquid using tongs, allowing any excess liquid to drain back into the pot. Serve immediately while warm, optionally adding a little extra butter or a sprinkle of salt for enhanced flavor, and enjoy the rich, creamy sweetness in every bite.
Notes
- Use fresh, sweet corn for the best flavor and natural sweetness.
- Cutting corn in half is optional but can help fit smaller pots.
- Adjust cooking time slightly depending on the size and freshness of the corn; larger ears may need an extra minute or two.
- For a richer flavor, allow the corn to sit in the buttered milk for 1–2 minutes after cooking.
- Serve immediately for maximum tenderness; corn loses some flavor if left too long in the cooking liquid.
Chef’s Secrets For Perfect Corn
For the most flavorful, tender corn, always start with fresh, firm ears.
Rinsing and patting dry ensures the butter and milk coat the kernels evenly.
Avoid overcooking, as this can make the corn tough and less sweet.
Using whole milk and high-quality butter enhances richness and adds a creamy texture that elevates a simple vegetable to a standout side dish.
For a subtle flavor twist, add a pinch of smoked paprika or freshly cracked black pepper to the milk before boiling.
Serving Suggestions For Every Meal
This buttery corn on the cob pairs beautifully with grilled meats, roasted vegetables, or summer salads.
For a festive touch, sprinkle with fresh herbs like parsley or cilantro.
You can also experiment with a light dusting of Parmesan cheese or a squeeze of lime juice to add brightness.
This side works perfectly for casual weeknight dinners, backyard barbecues, or holiday spreads, providing a crowd-pleasing option that is both comforting and visually appealing.
Storage Tips To Keep Fresh
Corn on the cob is best enjoyed immediately, but if you need to store leftovers, wrap cooled ears tightly in plastic wrap or foil and refrigerate for up to 2 days.
Reheat gently in a microwave or on the stovetop with a splash of milk to restore tenderness.
Avoid freezing cooked corn, as it can become watery and lose its natural sweetness.
Always store the corn separately from any toppings to maintain texture and flavor.
Frequently Asked Questions About Corn
1. Can I use frozen corn instead?
Yes, but fresh corn delivers the best flavor and texture. If using frozen, thaw fully and reduce boiling time slightly to prevent mushiness.
2. Can I skip the milk?
You can substitute water or broth, but milk adds a creamy sweetness that makes the corn exceptionally tender and flavorful.
3. How do I know when it’s done?
The kernels should be bright, plump, and tender when pierced with a fork but not mushy. Typically, 6–8 minutes is perfect for medium-sized ears.
4. Can I add seasonings?
Absolutely! Try smoked paprika, garlic powder, or a pinch of cayenne for a flavorful twist. Herbs and cheese also enhance presentation and taste.
5. Is this recipe suitable for large gatherings?
Yes! Simply scale up the ingredients and use a larger pot. Keep corn warm in a covered dish while finishing other sides.
This recipe has been adapted and simplified from the original version by spicysouthernkitchen. We’ve refined the steps for a smoother cooking experience and added helpful notes, nutrition insights, and essential kitchen tools to make it even easier for home cooks.