
Indulge in these ultra-rich, fudgy brownies that transform a handful of simple ingredients into a decadent treat.
Beyond their irresistible chocolate flavor, they provide a satisfying dose of protein from eggs and healthy fats from butter, making them a more nourishing dessert option.
With fiber-rich cocoa and moderate sugar, they strike a balance between indulgence and nutrition.
Perfect for busy days, this recipe is quick, one-bowl friendly, and ideal for meal prep or sharing with friends.
Baking homemade brownies has never been this effortless or rewarding.
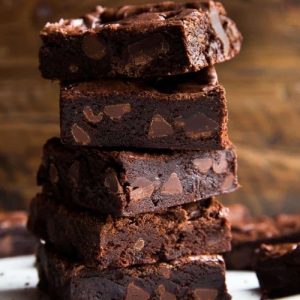
Quick Fudge Brownies
Equipment
- 1 microwave-safe bowl (medium)
- 1 9×13-inch baking pan
- Aluminum foil or parchment paper
- Silicone spatula or wooden spoon
- Whisk
- wire rack
Ingredients
- 3/4 cup 170 g unsalted butter
- 4 oz 113 g semi-sweet chocolate bar, chopped and divided
- 2 cups 400 g granulated sugar
- 3 large eggs room temperature
- 2 tsp pure vanilla extract
- 1 cup 82 g unsweetened cocoa powder (natural or Dutch-processed)
- 1 cup 125 g all-purpose flour, spooned and leveled
- 1 tsp salt
- Optional: 1 1/4 cups 225 g semi-sweet chocolate chips
Instructions
- Prepare the Baking Pan: Begin by selecting a 9×13-inch baking pan. Lightly grease the bottom and sides with butter or non-stick spray to prevent sticking. For an easier removal, line the pan with parchment paper or aluminum foil, leaving an overhang on two opposite sides. This creates a convenient “handle” to lift the brownies out after baking. Set the prepared pan aside while you make the batter—prepping your pan first ensures a smooth workflow and avoids last-minute scrambling.
- Preheat the Oven: Set your oven to 350°F (177°C) and allow it to fully preheat while you prepare the batter. A properly preheated oven ensures even baking and helps achieve that perfect fudgy texture.
- Melt Butter and Chocolate: Place 3/4 cup (170 g) of unsalted butter and half of the chopped semi-sweet chocolate (2 oz / 57 g) into a medium, microwave-safe bowl. Melt the mixture in 30-second intervals, whisking thoroughly after each interval to combine the ingredients. Continue until the butter and chocolate are fully melted and smooth, free of lumps. This step ensures your brownies have a rich, silky base, which contributes to their dense, fudgy consistency.
- Combine Sugar with Chocolate Mixture: Once the butter and chocolate are melted and smooth, whisk in 2 cups (400 g) of granulated sugar until fully incorporated. The sugar will slightly dissolve into the warm chocolate, creating a glossy batter. This stage sets the foundation for a sweet yet balanced brownie, ensuring every bite is rich and flavorful.
- Incorporate Eggs and Vanilla: Add 3 large eggs, one at a time, whisking thoroughly after each addition. The eggs provide structure while keeping the brownies tender and moist. Follow with 2 teaspoons of pure vanilla extract, mixing until the batter is uniform. At this point, the mixture will appear light brown and slightly dull, a sign that it’s ready for the dry ingredients.
- Prepare and Fold in Dry Ingredients: Sift together 1 cup (82 g) unsweetened cocoa powder, 1 cup (125 g) all-purpose flour, and 1 teaspoon salt. Gradually add this dry mixture into the chocolate batter. Use a silicone spatula or wooden spoon to gently fold the ingredients, taking care not to overmix. Overmixing can result in dense, cakier brownies instead of the desired fudgy texture.
- Add Remaining Chocolate and Optional Chips: Fold in the remaining 2 oz (57 g) chopped semi-sweet chocolate. If you like extra pockets of melty chocolate, stir in 1 1/4 cups (225 g) semi-sweet chocolate chips. These chunks will melt slightly during baking, giving every bite rich bursts of chocolate flavor. The batter will be thick and luxurious at this point, so ensure it is evenly spread in the prepared pan.
- Spread Batter Evenly in Pan: Transfer the batter to your prepared 9×13-inch pan. Use the back of a spatula or an offset spatula to smooth the top and evenly distribute the batter. Even spreading ensures uniform baking and consistent texture throughout the brownies.
- Bake Until Perfectly Fudgy: Place the pan in the preheated oven and bake for 30 minutes. Start checking at 30 minutes by inserting a toothpick into the center. The brownies are done when the toothpick comes out with only a few moist crumbs clinging to it. If wet batter remains, continue baking and check every 2 minutes until achieving the correct consistency. This careful testing ensures the brownies remain moist, rich, and fudgy without becoming dry.
- Cool Completely in Pan: Once baked, remove the pan from the oven and place it on a wire rack. Allow the brownies to cool completely in the pan. Cooling in the pan allows them to firm up slightly, making them easier to lift out and cut cleanly.
- Lift, Slice, and Serve: Use the parchment paper or foil overhang to lift the entire brownie slab from the pan. Place it on a cutting board and slice into 18 large squares using a sharp knife. For neat edges, wipe the knife clean between cuts. Serve as a decadent dessert or snack.
- Storage Tips: Store leftover brownies in an airtight container at room temperature for up to one week. For longer storage, wrap individual squares in plastic wrap and freeze for up to 3 months. This makes them perfect for meal prep or keeping on hand for a quick indulgent treat.
Notes
- For best results, use room-temperature eggs to ensure smooth incorporation and a uniform batter.
- Avoid overmixing the batter once the flour is added; this keeps the brownies fudgy rather than cakey.
- Use high-quality cocoa powder and chocolate for the richest flavor.
- Lining the pan with parchment or foil makes cleanup easier and prevents sticking.
- Chocolate chips are optional but enhance the gooey texture and add bursts of chocolate.
- Cooling completely in the pan before slicing ensures cleaner edges and prevents crumbling.
- You can slightly underbake for an extra gooey center, but check carefully to avoid wet batter.
Chef’s Secrets For Perfect Brownies
Achieving the perfect fudgy brownie is all about balance and technique.
One secret is melting butter and chocolate together carefully—never overheat or burn, as burnt chocolate will create a bitter taste.
Whisking sugar and eggs into the warm mixture slightly cooks the eggs and improves texture.
Another trick is folding in the dry ingredients gently to avoid aerating the batter too much; this preserves density and creates the classic fudgy bite.
Finally, using a mix of chopped chocolate and optional chips adds pockets of melty richness, elevating the brownie from ordinary to indulgent.
Serving Suggestions For Every Occasion
These brownies are versatile and can be served in numerous ways.
Enjoy them warm with a scoop of vanilla ice cream for a classic dessert experience.
For a simple snack, cut into small squares and serve with a glass of milk or coffee.
You can also layer them with whipped cream and fresh berries for a quick chocolate trifle.
For gift-giving or parties, wrap individual pieces in parchment or decorative boxes.
Their dense texture and rich flavor make them equally delightful on a casual afternoon or a celebratory gathering.
Storage Tips To Keep Brownies Fresh
Proper storage is essential to maintain the moist, fudgy texture of these brownies.
Store at room temperature in an airtight container for up to one week.
Avoid refrigeration, as it can dry out the edges. For longer-term storage, wrap each brownie tightly in plastic wrap or foil and freeze in a freezer-safe container for up to three months.
To enjoy, thaw at room temperature or warm briefly in the microwave.
Storing properly ensures each bite remains decadent and soft, just like freshly baked.
Frequently Asked Questions About Brownies
1. Can I use cocoa powder only instead of chocolate?
Yes, you can use cocoa powder for the bulk of chocolate flavor, but adding chopped chocolate or chips improves the fudgy texture and creates pockets of molten chocolate throughout. Using a combination is best for taste and consistency.
2. How do I make brownies extra fudgy?
To maximize fudginess, slightly underbake the brownies, fold the dry ingredients gently, and use a higher butter-to-flour ratio. Avoid overmixing and ensure eggs are at room temperature for smooth incorporation.
3. Can I substitute butter with coconut oil or margarine?
Yes, coconut oil works well and adds a subtle flavor, though it may slightly alter the texture. Margarine can be used, but choose a high-quality version with minimal water content for best results.
4. Why are my brownies too dry or crumbly?
Overbaking is the most common cause. Check the brownies with a toothpick at the minimum recommended baking time and remove when only a few moist crumbs remain. Overmixing the batter can also contribute to dryness.
5. Can I make these brownies gluten-free or vegan?
For gluten-free brownies, substitute the all-purpose flour with a 1:1 gluten-free flour blend. Vegan adaptations are possible by replacing butter with plant-based alternatives and using flax eggs or other egg replacers, though the texture may differ slightly from the classic fudgy version.