
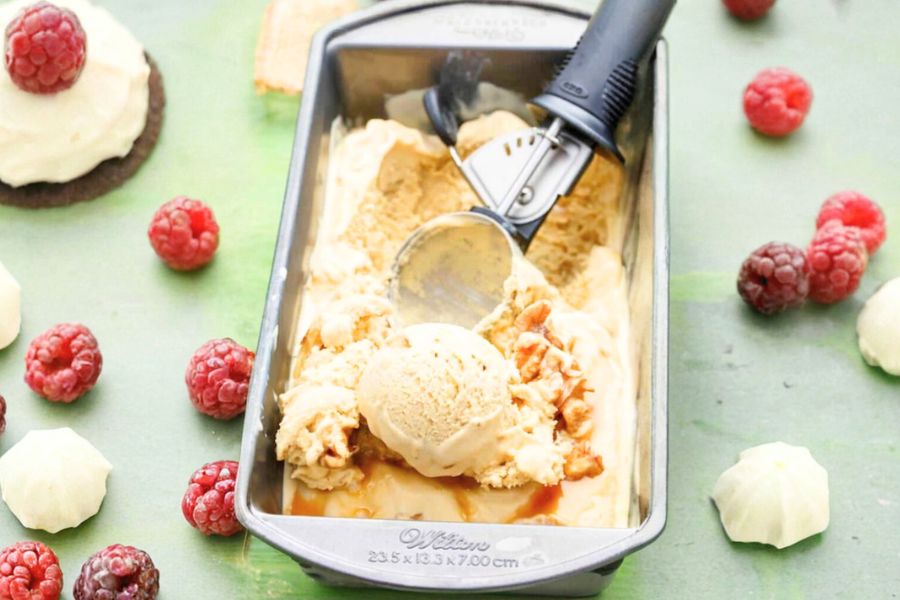
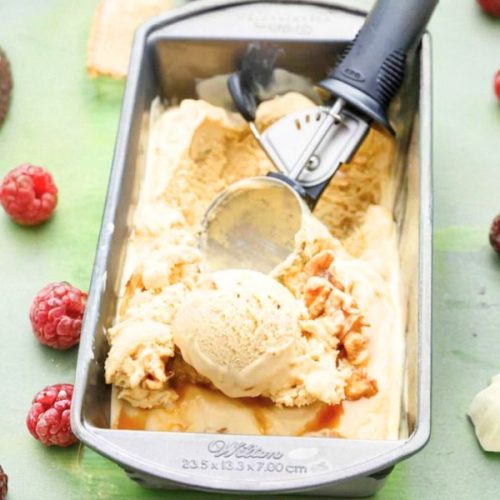
This Homemade Maple Walnut Ice Cream recipe stands out with its rich, natural sweetness from reduced maple syrup and the satisfying crunch of toasted walnuts.
It’s a delightful treat that combines indulgence with nutritional perks—walnuts provide heart-healthy unsaturated fats, fiber, and a plant-based source of protein, while the use of egg yolks adds extra protein and creaminess without processed additives.

Although indulgent, this recipe balances flavor and nutrition, making it a smart dessert option.
The method of simmering and reducing the syrup intensifies flavor naturally, avoiding artificial sweeteners.
Plus, it’s straightforward enough for everyday cooking: the hands-on steps are simple, and with an overnight refrigeration, the prep feels effortless.
This recipe is perfect for those who want a homemade, wholesome ice cream experience that’s both satisfying and nourishing.
Must-Have Tools for Perfect Results:
Ice Cream Maker
Essential for churning your ice cream to creamy perfection, this tool ensures the ideal texture by evenly freezing and aerating the mixture. Beyond this recipe, it’s perfect for homemade frozen yogurts, sorbets, and gelatos, making it a versatile gadget for dessert lovers.
Medium Saucepan
Used to gently heat and reduce maple syrup and cream, a quality saucepan allows precise temperature control, preventing scorching. This tool is indispensable for sauces, custards, and daily stovetop cooking.
Fine Mesh Sieve
This helps strain the custard base, ensuring a silky smooth texture by removing any cooked egg bits. A sieve is a must-have for soups, purees, and delicate sauces throughout your kitchen repertoire.
Baking Sheet
Perfect for toasting walnuts evenly, a sturdy baking sheet provides a flat, reliable surface that doubles for roasting vegetables or baking cookies, making it an all-around kitchen essential.
Mixing Bowl
Used for whisking egg yolks and other ingredients, a large mixing bowl offers ample space and durability for all mixing tasks, from baking batters to salad prep.
Homemade Maple Walnut Ice Cream
Equipment
- 1 Medium Saucepan
- 1 Ice Cream Maker
- 1 Fine Mesh Sieve
- 1 Baking Sheet
- 1 Large Mixing Bowl
Ingredients
- 2 cups heavy cream
- 1 cup whole milk
- 1 cup premium maple syrup
- 1 cup walnuts
- 5 large egg yolks
- 1 tablespoon cornstarch
- A pinch of salt
Instructions
- Prepare the Walnuts: Begin by preheating your oven to 350°F (175°C). Spread the walnuts evenly on a baking sheet to ensure they toast uniformly. Place the baking sheet in the oven and roast the walnuts for about 10 minutes. To prevent uneven browning or burning, gently toss or stir the walnuts every few minutes. You’ll know they’re ready when they take on a light golden-brown color and release a nutty aroma. Once toasted, remove the walnuts from the oven and allow them to cool slightly before roughly chopping them into bite-sized pieces. Setting them aside for later use in the ice cream is essential for adding delightful texture and flavor.
- Whisk the Egg Yolks: In a large mixing bowl, carefully separate 5 egg yolks from the whites, reserving only the yolks for this recipe. Using a whisk, beat the yolks vigorously until they become lighter in color and slightly thickened. This step helps incorporate air, making your custard base smooth and rich. Set the bowl aside for now, as you will slowly incorporate the heated dairy mixture next.
- Reduce the Maple Syrup: Pour 1 cup of high-quality maple syrup into a medium saucepan and place it over medium heat. Bring the syrup to a gentle boil, then reduce the heat to low and let it simmer. Allow the syrup to reduce until it reaches about ¾ cup in volume—this concentration step intensifies the maple flavor for a richer taste. You can reduce it further to around ½ cup if you prefer a more robust sweetness. Stir occasionally to prevent burning and keep the syrup smooth.
- Heat the Dairy Mixture: Once the maple syrup has reduced, add 1 cup of heavy cream, 1 cup of whole milk, and a pinch of salt to the saucepan. Increase the heat to medium and whisk gently but continuously until the mixture is hot—just below boiling point. This warming process blends the flavors and prepares the dairy for the custard base.
- Temper the Egg Yolks: Slowly and carefully, begin adding the hot maple cream mixture to the whisked egg yolks in a thin, steady stream. This gradual addition—known as tempering—prevents the eggs from scrambling by gently raising their temperature. Whisk continuously and patiently until the mixture is fully combined and smooth. For an ultra-silky texture, strain the mixture through a fine mesh sieve to remove any lumps or bits of cooked egg.
- Reheat the Custard Base: Return the strained custard mixture to the saucepan over medium-low heat. In a separate bowl, combine the remaining 1 cup of heavy cream with 1 tablespoon of cornstarch until smooth. Slowly pour this cornstarch-cream mixture into the saucepan, whisking continuously. Gently reheat the custard while stirring occasionally, taking care not to let it boil, as boiling can curdle the mixture. When the custard thickens slightly and coats the back of a spoon, remove it from heat and allow it to cool to room temperature. Stir occasionally during cooling to prevent a skin from forming.
- Chill Overnight: Once cooled, cover the custard base tightly with plastic wrap or transfer it to an airtight container. Refrigerate overnight or for at least 8 hours. This resting period helps deepen the flavors and allows the mixture to thicken, ensuring a creamy texture when churned.
- Churn the Ice Cream: Prepare your ice cream maker according to the manufacturer’s instructions. Pour the chilled custard mixture into the machine’s bowl. Start churning, allowing the machine to aerate and freeze the mixture until it reaches a soft-serve consistency, usually about 20-30 minutes depending on your machine. In the final 5 minutes of churning, slowly add the toasted, chopped walnuts to evenly distribute them without losing their crunch.
- Freeze for Firmness: Transfer the churned ice cream into a freezer-safe container. For extra indulgence, drizzle additional maple syrup over the top and sprinkle with more chopped walnuts if desired. Seal the container and place it in the freezer for at least 2-4 hours to firm up the ice cream to a scoopable consistency.
- Serve and Enjoy: Before serving, remove the ice cream from the freezer and let it sit at room temperature for about 10 minutes. This softening period makes scooping easier and enhances the creamy texture. Scoop into bowls or cones and savor the rich maple flavor paired with crunchy walnut bites—a perfect homemade dessert experience.
Notes
- Toasting the walnuts enhances their flavor and adds a delightful crunch to the ice cream. Be sure to stir them occasionally while baking to avoid burning.
- Gradually incorporating the warm cream mixture into the egg yolks prevents scrambling and ensures a smooth custard base.
- Reducing the maple syrup concentrates its natural sweetness, creating a richer taste—feel free to reduce it further for a more intense flavor.
- After churning, folding in the walnuts towards the end preserves their texture.
- For best scooping consistency, allow the ice cream to soften at room temperature for about 10 minutes before serving.
- Refrigerate the custard mixture overnight for optimal flavor development and texture.
Chef’s Secrets for Perfect Ice Cream
To create a truly exceptional maple walnut ice cream, start by choosing the highest quality ingredients—especially the maple syrup and walnuts—as their flavors define the recipe.
Toasting the walnuts not only brings out their natural oils but also adds a deep, nutty crunch that contrasts beautifully with the creamy base.
When tempering the eggs, pour the hot dairy mixture slowly into the yolks while whisking constantly to avoid scrambling; patience here makes a silky smooth custard.
Don’t rush the refrigeration step—letting the custard chill overnight improves flavor development and texture dramatically.
Finally, folding walnuts in during the last minutes of churning preserves their crunch, so timing matters.
These little details elevate homemade ice cream from good to outstanding.
Serving Suggestions to Impress Guests
Maple walnut ice cream shines when paired with simple yet complementary flavors.
Serve it alongside warm apple pie or drizzle with caramel sauce to enhance its rich maple notes.
For a sophisticated twist, sprinkle a pinch of sea salt or cinnamon atop each scoop.
Fresh seasonal fruits like sliced pears or figs also pair wonderfully, adding freshness and brightness.
For casual enjoyment, simply garnish with extra toasted walnuts and a light drizzle of maple syrup for added texture and sweetness.
Whether plated for a dinner party or enjoyed solo, these ideas bring out the best in every spoonful.
Storage Tips for Freshness and Texture
Proper storage is key to maintaining the creamy texture and vibrant flavors of your homemade ice cream.
Always use an airtight container to prevent ice crystals and freezer burn, which can ruin the smooth consistency.
Press a piece of parchment paper or plastic wrap directly onto the surface of the ice cream before sealing to minimize air exposure.
Store it in the coldest part of your freezer, ideally at 0°F (-18°C) or below, and avoid frequent temperature fluctuations by limiting how often you open the freezer.
Homemade ice cream is best enjoyed within two weeks for optimal taste and texture.
Frequently Asked Questions Answered Clearly
- Can I use a different nut instead of walnuts?
Absolutely! Pecans or almonds work well and provide similar crunch and flavor profiles. Toast them lightly for the best results. - Is it necessary to reduce the maple syrup?
Reducing the syrup intensifies its flavor and prevents the ice cream from being overly sweet. However, you can skip this step if you prefer a milder taste. - How do I avoid scrambled eggs in the custard?
Temper the eggs by slowly whisking in the hot dairy mixture bit by bit. Constant whisking and gradual heating prevent scrambling. - Can I make this ice cream without an ice cream maker?
Yes, but the texture may be less smooth. Freeze the custard in a shallow container and stir vigorously every 30 minutes until firm to mimic churning. - How long can I store homemade ice cream?
For best quality, consume within two weeks. Over time, ice crystals may form, affecting texture and flavor.
This recipe has been adapted and simplified from the original version by thecookiewriter. We’ve refined the steps for a smoother cooking experience and added helpful notes, nutrition insights, and essential kitchen tools to make it even easier for home cooks.