
This Matcha Ice Cream recipe elevates the classic frozen treat with the deep, earthy flavor of authentic Japanese green tea.
Its appeal lies in its luxurious, creamy texture and the perfectly balanced sweetness that allows the matcha’s natural bitterness to shine.
Beyond taste, matcha is rich in antioxidants and provides a gentle caffeine boost, supporting alertness without the jitters of coffee.
Using a combination of whole milk and cream delivers good fats that enhance creaminess while keeping saturated fat moderate.
The recipe is surprisingly approachable for everyday cooking—simple steps, minimal ingredients, and the ability to prepare ahead make it ideal for meal prep or entertaining.

Nutritionally, it offers a moderate protein content from dairy, and because it’s homemade, you control the sugar and quality of ingredients, making it a mindful indulgence.
Must-Have Tools for Perfect Results
Medium Saucepan
Essential for gently heating milk, cream, sugar, and salt without scorching. A versatile kitchen staple for sauces, custards, and soups.
Silicone Spatula
Perfect for creating a smooth matcha paste without lumps. Also excellent for scraping bowls clean and folding delicate mixtures.
Fine-Mesh Sieve
Ensures a silky, lump-free ice cream base by straining matcha and other solids. Ideal for custards, sauces, and purees.
Ice Cream Maker
Creates the perfect creamy texture in minutes. Beyond ice cream, it can churn frozen yogurt, gelato, or sorbet with professional results.
Airtight Freezer Container
Keeps ice cream fresh and prevents ice crystals from forming. Great for storing leftovers, prepped meals, or frozen treats.
Authentic Japanese Matcha Ice Cream
Equipment
- 1 Medium Saucepan
- 1 Silicone Spatula
- 1 Fine Mesh Sieve
- 1 Ice Cream Maker
- 1 airtight freezer container
Ingredients
- ¾ cup sugar
- ⅛ tsp Diamond Crystal kosher salt
- 5 Tbsp matcha green tea powder
- 2¼ cups whole milk for milk mixture, Option 1
- ¾ cup heavy cream for milk mixture, Option 1
Alternative Milk Mixture Options:
- Option 2: 3 cups half-and-half
- Option 3: 2 cups 2% milk + 1 cup heavy cream
- Option 4: 1½ cups whole milk + 1½ cups light cream
Instructions
- Prepare the Ice Cream Maker: Name: Ice Cream Bowl Prep: If your ice cream maker requires pre-freezing, ensure the bowl has been in the freezer for at least 24 hours. This step is crucial because a cold bowl allows the mixture to churn into creamy ice cream rather than remaining liquid. For machines that don’t require pre-freezing, like the one used here, you can skip this step—but always ensure the machine is at the correct operating temperature before use.
- Heat the Milk Mixture: Name: Milk Base Preparation: In a medium saucepan, combine your chosen milk mixture. For the classic option, mix 2¼ cups whole milk with ¾ cup heavy cream. Add ¾ cup sugar and ⅛ teaspoon kosher salt. Place the saucepan over medium-low heat, stirring occasionally until the sugar completely dissolves. Watch closely for small bubbles forming around the edges, but never allow the mixture to boil, as overheating can change the texture of the ice cream. Once the sugar is dissolved and the milk is warm, remove the pan from heat.
- Create the Matcha Paste: Name: Matcha Activation: Place 5 tablespoons of matcha powder in a medium bowl. To prevent lumps, gradually add 3–4 tablespoons of the heated milk mixture to the matcha and stir thoroughly with a silicone spatula until smooth. Repeat this process in four small additions, each time mixing until the matcha forms a thick, smooth paste. Take care to break up any dry clumps, ensuring a silky consistency. This gradual method preserves the vibrant color and deep flavor of the matcha.
- Combine Matcha and Milk Mixture: Name: Integrating the Base: Once the matcha paste is smooth, pour it back into the remaining milk mixture in the saucepan. Use a whisk to thoroughly combine until the mixture is fully uniform in color and texture. This step ensures even distribution of the matcha, preventing streaks or clumps in the finished ice cream.
- Strain the Mixture: Name: Silky Smooth Texture: Set a fine-mesh sieve over a large bowl or measuring cup that can sit in an ice bath. Pour the combined matcha and milk mixture through the sieve, pressing gently with a spatula to remove any remaining lumps. This step is critical for achieving a creamy, velvety ice cream without gritty or powdery spots.
- Chill the Mixture: Name: Refrigeration for Creaminess: Allow the strained mixture to cool briefly at room temperature. Then cover it with plastic wrap and refrigerate for at least 4 hours, or overnight if possible. Thorough chilling is essential for proper churning—it helps the mixture thicken and creates a smoother texture in the final ice cream.
- Churn the Ice Cream: Name: The Creamy Transformation: Once chilled, give the mixture a final whisk and pour it into your ice cream maker. Churn according to your machine’s instructions, usually around 25 minutes, until the mixture thickens and resembles soft-serve ice cream. Pay attention to consistency; it should hold its shape and no longer flow freely when stirred.
- Freeze for Firmness: Name: Setting the Ice Cream: Transfer the soft-churned ice cream into an airtight freezer-safe container. Seal tightly to prevent ice crystals from forming. Freeze for at least 4 hours, allowing the ice cream to firm and the flavors to fully develop. Longer freezing is fine, but for the best texture and vibrant green color, consume within two weeks.
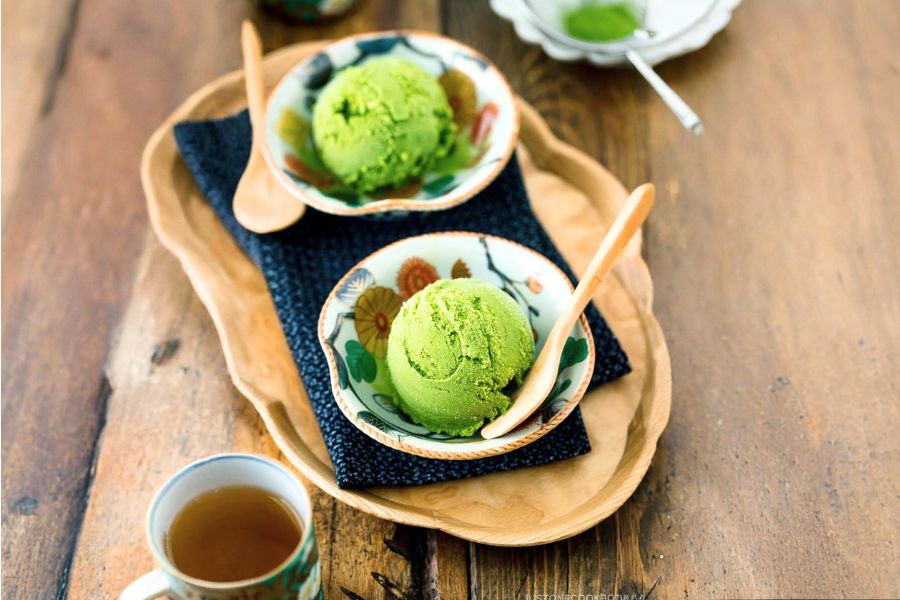
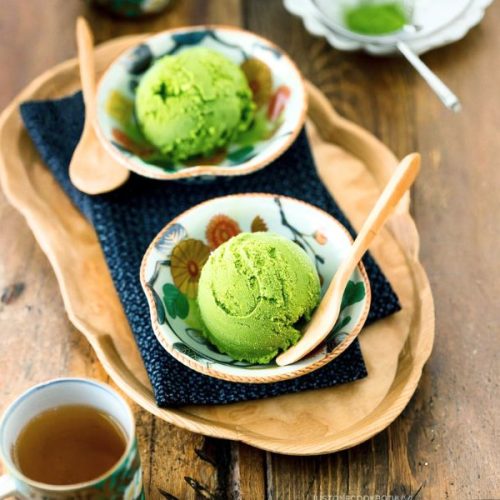
- Serve and Enjoy: Name: Presentation and Tasting: Scoop the ice cream into small bowls or dessert dishes. The creamy texture and delicate matcha flavor make it an elegant yet comforting treat. Enjoy as a standalone dessert or pair with fresh fruit, mochi, or sweet red bean for a traditional Japanese-inspired twist.
Notes
- Always use high-quality, culinary-grade matcha for the best flavor and vibrant green color.
- Gradually mixing matcha with a small amount of warm milk prevents clumps and ensures a smooth base.
- Do not boil the milk mixture; overheating can cause a grainy texture.
- Thoroughly chill the ice cream mixture before churning to achieve a creamy consistency.
- Store in an airtight container to prevent ice crystals and maintain flavor.
- Homemade ice cream tastes best within two weeks; flavor and texture can diminish over longer storage.
- Experiment with milk mixture options to adjust creaminess and fat content to your preference.
Chef’s Secrets For Perfect Ice Cream
Creating the ideal matcha ice cream involves attention to detail and a few culinary tricks.
Start by gently heating the milk mixture over medium-low heat to dissolve sugar completely while avoiding boiling.
Boiling can break down dairy proteins and affect texture.
The gradual creation of a matcha paste ensures vibrant color and prevents clumping, a step professional chefs always emphasize.
Using an ice cream maker helps achieve smooth creaminess, but if unavailable, frequent stirring during freezing can mimic the effect.
Additionally, chilling the mixture thoroughly before churning maximizes creaminess and flavor integration.
For a deeper flavor profile, some chefs suggest letting the ice cream rest overnight in the freezer before serving.
Serving Suggestions To Impress Guests
Matcha ice cream shines on its own, but it also pairs beautifully with complementary desserts.
Serve it with fresh berries, mochi, or sweet red bean paste for an authentic Japanese-inspired presentation.
A drizzle of dark chocolate or caramel adds a modern twist, while crushed nuts provide textural contrast.
For a refreshing summer dessert, place a scoop atop shaved ice or a warm fruit crumble.
The vibrant green color of matcha makes it visually striking, perfect for special occasions, dinner parties, or simply a mindful treat at home.
Storage Tips To Maintain Freshness
Proper storage preserves both flavor and texture.
Transfer the ice cream to a clean, airtight container immediately after churning.
Press a piece of parchment or plastic wrap directly on the surface before sealing to prevent ice crystals from forming.
Store in the coldest part of your freezer rather than the door, which experiences temperature fluctuations.
Homemade ice cream is best enjoyed within two weeks for peak flavor and texture.
If the ice cream hardens too much in the freezer, allow it to sit at room temperature for 5–10 minutes before scooping for easier serving.
Frequently Asked Questions Answered Clearly
1. Can I use non-dairy milk alternatives?
Yes! Unsweetened almond, oat, or soy milk can replace dairy, but the ice cream may be slightly less creamy. Using a combination with coconut cream can enhance richness.
2. How do I prevent lumps in matcha?
Always start by making a paste with a small amount of warm milk, adding it gradually. Stir constantly to fully dissolve the powder before combining with the rest of the mixture.
3. How long should I churn the ice cream?
Churn until the mixture reaches a soft-serve consistency, usually 25–30 minutes depending on your machine. It should thicken and no longer flow freely.
4. Can I prepare this recipe ahead of time?
Absolutely! The ice cream base can be chilled overnight in the refrigerator before churning, making it convenient for meal prep or parties.
5. Why is my ice cream icy or grainy?
This usually happens if the mixture wasn’t chilled thoroughly before churning or if it was stored improperly. Use an airtight container and chill the base completely for smooth results.
This recipe has been adapted and simplified from the original version by justonecookbook. We’ve refined the steps for a smoother cooking experience and added helpful notes, nutrition insights, and essential kitchen tools to make it even easier for home cooks.