
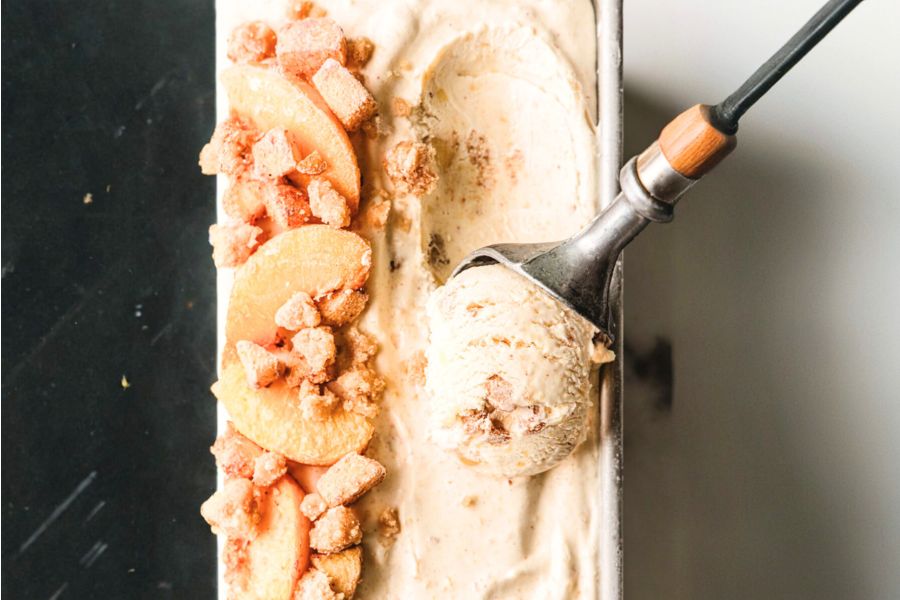
This Homemade Peach Cobbler Ice Cream (No-Churn) is a luscious fusion of roasted peaches, cinnamon-spiced crumble, and creamy ice cream, creating a dessert that’s indulgent yet approachable.
The natural sweetness of ripe peaches provides fiber and vitamins, while the whipped cream and sweetened condensed milk offer a rich, satisfying texture without the need for an ice cream maker.
The cinnamon biscuit crumble adds a delightful crunch, making every spoonful a perfect balance of creamy and textured.
Ideal for everyday cooking, this no-churn recipe is quick to assemble, requires minimal baking, and makes a generous batch suitable for sharing or meal prepping for warm-weather treats.

It’s a family-friendly dessert that delivers both comfort and elegance in a single scoop.
Must-Have Tools for Perfect Results
Loaf Pan (9″x5″)
Essential for freezing the ice cream evenly and creating perfectly shaped slices. Beyond this recipe, it’s perfect for breads, meatloaf, and layered desserts.
Mixing Bowls
Versatile bowls make whipping cream, combining crumble ingredients, and folding peach puree effortless. Durable bowls are staples for everyday meal prep and baking.
Electric Mixer
Speeds up whipping cream to stiff peaks for a smooth, airy ice cream base. Great for batters, frostings, and other desserts, saving both time and effort.
Baking Sheet or Oven-Safe Dish
Ideal for roasting peaches evenly without sticking. Also useful for cookies, roasting vegetables, and small sheet pan dinners.
Rubber Spatula
Perfect for folding the peach and crumble mixture into the ice cream base without deflating it. A must-have for scraping, stirring, and mixing delicate batters.
Creamy Peach Cobbler Ice Cream
Equipment
- 1 9"x5" Loaf Pan
- 2 Mixing Bowls
- 1 Electric Mixer
- 1 Baking Sheet or Oven-Safe Dish
- 1 Rubber spatula
Ingredients
Roasted Peaches
- 600 g peaches peeled and diced (~5–6 medium peaches)
- 3 tbsp brown sugar
- 1 tbsp granulated sugar
- 1 tsp ground cinnamon
- ½ tsp ground nutmeg
- ¼ tsp ground ginger
- 2 tsp fresh lemon juice
- 1 tbsp melted butter
Cinnamon Biscuit Crumble
- 60 g all-purpose flour
- 3 tbsp brown sugar
- ½ tsp ground cinnamon
- ¼ tsp ground nutmeg
- 4 tbsp melted butter
Ice Cream Base
- 2 cups heavy whipping cream very cold
- 1 tbsp vanilla extract or paste
- 1 tsp salt
- 395 g sweetened condensed milk 1 14-oz can
Instructions
- Prepare the Oven and Roasting Pan: Preheat your oven to 375°F (190°C) to ensure it reaches the perfect temperature for roasting peaches evenly.Choose an oven-safe dish or a baking sheet with a rim to catch any juices that bubble up during roasting. Lightly grease the pan with a small amount of butter or nonstick spray to prevent sticking, allowing your peaches to caramelize beautifully without sticking to the pan.
- Dice and Season Peaches: Peel and pit 5–6 medium peaches. Cut them into uniform ½-inch cubes for even roasting. Place the diced peaches in a mixing bowl and sprinkle them with 3 tablespoons of brown sugar, 1 tablespoon of granulated sugar, 1 teaspoon of ground cinnamon, ½ teaspoon of ground nutmeg, and ¼ teaspoon of ground ginger. Drizzle 2 teaspoons of fresh lemon juice and 1 tablespoon of melted butter over the peaches. Gently toss until each piece is coated in the sugar-spice mixture, ensuring maximum flavor absorption.
- Roast the Peaches: Transfer the seasoned peaches to your prepared baking sheet or dish, arranging them in a single layer to prevent overcrowding.Roast in the preheated oven for 14–16 minutes, or until peaches are tender yet still hold their shape. Avoid overcooking, as you want soft, flavorful fruit without turning them into mush. Once roasted, remove from the oven and allow them to cool completely at room temperature.
- Make the Cinnamon Biscuit Crumble: While the peaches are roasting, prepare the crumble.In a small bowl, combine 60 grams of all-purpose flour, 3 tablespoons of brown sugar, ½ teaspoon of ground cinnamon, and ¼ teaspoon of ground nutmeg. Pour 4 tablespoons of melted butter over the dry ingredients. Using a fork, gently mix until clumps form, creating a coarse, crumbly texture. Set aside—this will add a delightful crunch to your ice cream.
- Whip the Cream for the Ice Cream Base: Pour 2 cups of very cold heavy whipping cream into a large mixing bowl. Add 1 tablespoon of vanilla extract or paste and 1 teaspoon of salt. Using an electric mixer on high speed, whip the cream until stiff peaks form. Stiff peaks are achieved when the cream holds its shape and does not fall back into the bowl when the beaters are lifted.This airy, light base ensures your ice cream will have a creamy, soft texture.
- Prepare the Peach Purée: Reserve about one-third of the roasted peaches, leaving the juices behind in the baking dish. Place the remaining two-thirds in a blender or food processor and blend until smooth, resembling applesauce. This purée will infuse the ice cream with intense peach flavor. Stir the 395 grams (14-ounce can) of sweetened condensed milk into the purée until fully incorporated, creating a rich, velvety peach mixture.
- Combine the Peach Mixture and Whipped Cream: Pour the peach and condensed milk mixture into the whipped cream. Using a spatula or a mixer on low speed, fold the ingredients together gently to avoid deflating the whipped cream. This step ensures the ice cream base remains airy while evenly distributing the peach flavor throughout.
- Add Remaining Peaches and Crumble: Gently fold in the reserved roasted peaches (without the extra juices) and the cinnamon biscuit crumble using a rubber spatula. Mix slowly to maintain the light, fluffy texture of the ice cream while adding pockets of fruit and crunchy, spiced crumble for a delightful bite in every spoonful.
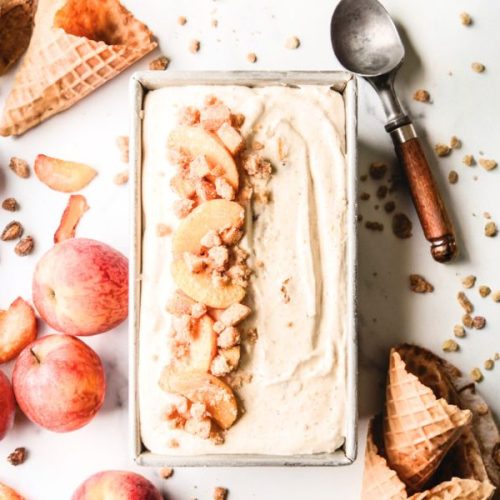
- Transfer to Freezer Pan: Spoon the ice cream mixture into a 9"x5" loaf pan. Spread evenly with a spatula to create a smooth top. Cover tightly with plastic wrap or an airtight lid to prevent ice crystals from forming during freezing.
- Freeze Until Set: Place the loaf pan in the freezer for at least 6 hours, or overnight for best results. During this time, the ice cream will firm up and the flavors will meld together, creating a creamy, rich dessert with a perfect balance of fruit and spice.
- Serve and Enjoy: Once fully frozen, remove the ice cream from the freezer and let it sit at room temperature for 5–10 minutes to soften slightly for easier scooping. Use an ice cream scoop to serve into bowls or cones. Enjoy this decadent, no-churn peach cobbler ice cream as a refreshing summer treat or a comforting dessert for any occasion.
Notes
- Ensure peaches are fully cooled before mixing into whipped cream to prevent melting the base.
- You can adjust the sugar in the roasted peaches depending on how sweet your fruit is.
- For extra flavor, lightly toast the crumble in a skillet before folding it into the ice cream.
- Use ripe, fragrant peaches for maximum natural sweetness and aroma.
- This recipe can be made a day in advance and stored in the freezer for convenience.
- A rubber spatula is essential for folding ingredients gently without deflating the whipped cream.
- For a smoother texture, pulse the peach purée in a blender until completely uniform.
Chef’s Secrets For Best Texture
To achieve the creamiest, most scoopable ice cream, always whip your cream to stiff peaks.
This incorporates air into the base, giving it a light, fluffy texture while still maintaining the richness of the condensed milk.
Roasting the peaches concentrates their natural sweetness and caramelizes their sugars, enhancing the dessert’s flavor without additional sweeteners.
Folding the crumble and reserved peaches gently ensures that the ice cream retains a soft texture while providing delightful pockets of crunch and fruit throughout.
Small details, like chilling your mixing bowls and utensils before whipping, also make a noticeable difference in consistency.
Serving Suggestions For Maximum Enjoyment
Serve this peach cobbler ice cream as a standalone summer treat, or pair it with warm desserts like a slice of pound cake, a crisp cookie, or a drizzle of caramel sauce.
For brunch or dessert gatherings, scoop into small bowls and garnish with fresh mint leaves or a sprinkle of cinnamon.
The ice cream also pairs beautifully with fresh berries or a handful of toasted nuts, adding extra texture and a subtle flavor contrast.
Its vibrant peach flavor and soft crumble make it visually appealing for entertaining guests.
Storage Tips To Maintain Freshness
Store your ice cream in an airtight container to prevent freezer burn and preserve its flavor and texture.
Keep it in the coldest part of the freezer, away from the door, to avoid temperature fluctuations.
When storing leftovers, place a sheet of plastic wrap directly on the surface before sealing the container; this minimizes ice crystal formation.
Properly stored, this homemade ice cream will stay fresh for up to 2 weeks.
For best scooping consistency, allow it to sit at room temperature for 5–10 minutes before serving.
Frequently Asked Questions Answered Clearly
1. Can I use frozen peaches?
Yes! Frozen peaches can be used if fresh ones are unavailable. Thaw and drain them first to remove excess liquid, then follow the roasting instructions to caramelize and enhance their flavor.
2. Can I make this ice cream dairy-free?
Absolutely! Substitute full-fat coconut cream for heavy cream and use a dairy-free sweetened condensed milk alternative. The texture may be slightly different but still creamy and delicious.
3. Do I need an ice cream maker?
No ice cream maker is required. This no-churn recipe achieves creamy results through whipped cream and folding, making it perfect for beginners or anyone without specialized equipment.
4. How long does it need to freeze?
Freeze the ice cream for at least 6 hours, though overnight is ideal. This ensures a firm texture and allows flavors to meld together fully.
5. Can I prepare this in advance for parties?
Yes! You can make this ice cream a day or two in advance. Keep it covered and stored in the freezer, then remove slightly before serving for easy scooping.
This recipe has been adapted and simplified from the original version by quietbakingday. We’ve refined the steps for a smoother cooking experience and added helpful notes, nutrition insights, and essential kitchen tools to make it even easier for home cooks.