
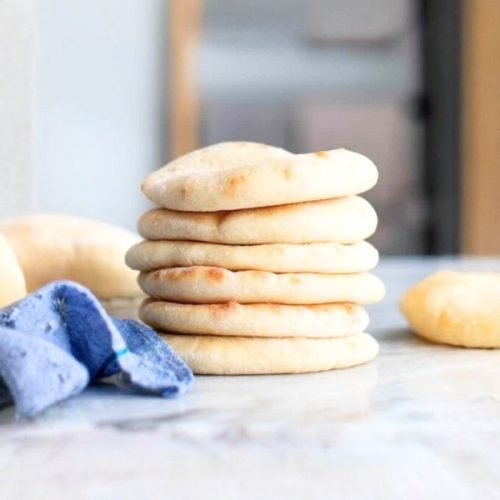
This homemade pita bread recipe is a true game-changer for bread lovers.
Unlike store-bought pita, which can often be dry or lacking flavor, this version is irresistibly soft, puffy, and packed with fresh, wholesome taste.
The combination of whole-milk Greek yogurt and extra-virgin olive oil enriches the dough, delivering a tender crumb with just the right hint of tanginess.
Not only is this recipe high in protein thanks to the Greek yogurt, but it also offers a lighter alternative to traditional bread—perfect for anyone seeking fluffiness without heaviness.
Rich in good fats from olive oil and made with simple pantry staples, these pitas are ideal for everyday cooking.
They freeze beautifully, making them meal-prep friendly for quick sandwiches, wraps, or a side for soups and dips.

Plus, the short ingredient list and easy technique make it beginner-friendly while still giving you bakery-quality results straight from your oven.
Must-Have Tools for Perfect Results
KitchenAid Stand Mixer with Dough Hook
Effortlessly kneads your pita dough to the ideal soft, elastic texture, saving time and energy while ensuring consistent results. A must-have for all bread-making and baking projects.
OXO Good Grips Mixing Bowls (3-Piece Set)
Perfect for combining yeast mixtures, flour blends, and resting dough. Non-slip bases keep the bowls steady while mixing, making baking prep smoother and less messy.
Nordic Ware Aluminum Baking Sheets (2-Pack)
Essential for baking evenly puffed pitas thanks to their excellent heat conduction. These heavy-duty sheets are versatile for cookies, veggies, and more.
Joseph Joseph Rolling Pin with Adjustable Rings
Ensures your pita circles are rolled to the perfect thickness for even puffing every time. Also great for pastries, pizza dough, and cookies.
Wilton Cooling Rack
Allows baked pitas to cool properly, preventing sogginess and keeping their light, airy texture intact. A staple for all kinds of baked goods.
Homemade Pita Bread
Equipment
- 1 KitchenAid Stand Mixer (or large mixing bowl)
- 1 Dough Hook Attachment (or hands for kneading)
- 2 Nordic Ware Aluminum Baking Sheets
- 1 Joseph Joseph Rolling Pin
- 1 Wilton Cooling Rack
- 1 Kitchen Towel or Plastic Wrap
- Parchment Paper
Ingredients
- ¾ cup 180 ml warm water (around 105°F/40°C, not hot to avoid killing yeast)
- 1 packet 2¼ teaspoons / 7g active dry yeast
- 1 teaspoon granulated sugar for activating yeast
- 1 tablespoon granulated sugar for dough sweetness and browning
- 3¾ cups 469 g bread flour (plus extra for dusting your surface)
- 1½ teaspoons fine sea salt
- 3 tablespoons extra-virgin olive oil plus more for greasing the bowl
- ¾ cup 180 g whole-milk Greek yogurt, at room temperature
Instructions
- Activate the Yeast: In a medium-sized bowl, stir the warm water, yeast, and 1 teaspoon sugar until dissolved. Let the mixture sit undisturbed for 5–10 minutes, or until it becomes foamy on top. This indicates your yeast is active and ready to use.
- Combine Dry Ingredients: In a large mixing bowl (or stand mixer bowl), whisk together the flour, salt, and remaining tablespoon of sugar. This ensures the salt and sugar are evenly distributed before adding wet ingredients.
- Form the Dough: Pour the activated yeast mixture, olive oil, and Greek yogurt into the dry ingredients. Mix with a spatula or paddle attachment until a shaggy dough forms. Switch to a dough hook or knead by hand on a floured surface for 7–10 minutes, adding a sprinkle of flour as needed until the dough feels soft, slightly tacky, and elastic.
- First Rise (Bulk Fermentation): Transfer the dough into a lightly oiled bowl, turning it once to coat all sides with oil. Cover with a clean kitchen towel or plastic wrap and let it rise in a warm, draft-free place for about 2 hours, or until it doubles in size.
- Portion and Rest: Punch down the risen dough to release air. Turn it out onto a floured surface and divide it into 12 equal pieces (a kitchen scale helps with even sizes). Shape each piece into a smooth ball. Cover loosely with a towel and let them rest for 20 minutes to relax the gluten, making rolling easier.
- Roll Out the Pitas: Using a rolling pin, flatten each dough ball into a circle about ¼ to ½ inch thick. Dust lightly with flour to prevent sticking. Try to keep the thickness even for consistent puffing during baking.
- Bake to Perfection: Preheat your oven to 500°F (260°C) and line two baking sheets with parchment paper. Arrange dough circles about an inch apart on the sheets. Bake one tray at a time for 5–8 minutes, checking after 5 minutes. Rotate the pan halfway through if needed. The pitas are ready when they puff up and turn light golden on top.
- Cool and Serve: Transfer baked pitas immediately to a wire rack to cool slightly. Serve warm or store for later use. These breads are perfect for dipping, stuffing, or enjoying plain.
Notes
- Freezer-Friendly: If you plan to freeze, bake the pitas just until they puff (before they turn golden). Cool completely, store in a freezer bag, and reheat directly in a toaster or oven until warm and lightly browned.
- Flour Variations: Bread flour creates the best chew and puff, but you can swap up to 1 cup with whole wheat flour for extra fiber and a slightly denser texture.
- Rolling Thickness: Too thin may prevent puffing, too thick may stay doughy in the center. Aim for about ¼–⅓ inch.
- No Stand Mixer? This dough is soft and easy to knead by hand—just keep your surface lightly floured and knead until smooth.
Chef’s Secrets for Perfectly Puffy Pitas
Achieving that irresistible puff and soft texture in homemade pita bread comes down to a few simple yet crucial techniques.
First, always make sure your yeast is alive and active before mixing the dough—foam on the surface is a sign that it’s ready.
The dough should feel soft and slightly tacky but never sticky; adding too much flour can make your pitas dense instead of light and fluffy.
Resting the dough twice is essential: the first rise builds flavor, and the second short rest ensures easy rolling and even puffing.
Finally, baking in a thoroughly preheated, high-temperature oven is the secret to that classic air pocket inside every pita.
A hot oven creates a quick steam burst, separating the bread layers and giving you bakery-style results at home.
Serving Suggestions for Any Meal
Homemade pita bread is wonderfully versatile and pairs beautifully with a variety of dishes.
Serve it warm with classic Middle Eastern dips like hummus, baba ghanoush, or tzatziki for a flavorful appetizer.
Slice it open to create pockets and stuff with grilled chicken, falafel, or roasted vegetables for a quick and satisfying lunch.
It also makes an excellent base for personal pizzas—simply top with tomato sauce, cheese, and your favorite toppings, then toast until bubbly.
For a simple snack, brush the pitas with olive oil, sprinkle with herbs or za’atar, and bake for crispy pita chips perfect for dipping.
Storage Tips for Freshness and Flavor
Pita bread is best enjoyed fresh, but it stores beautifully for later use.
Allow the baked pitas to cool completely before storing to prevent excess moisture from making them soggy. Keep them in an airtight container or resealable bag at room temperature for up to two days.
For longer storage, freeze the pitas individually wrapped or separated with parchment paper to avoid sticking.
When ready to enjoy, reheat directly from frozen in a toaster or warm oven for a fresh-from-the-bakery texture.
Avoid refrigeration, as it tends to dry out bread more quickly.
Frequently Asked Questions about Pita Bread
1. Why didn’t my pitas puff up?
This usually happens when the oven isn’t hot enough or the dough is rolled unevenly. Make sure your oven is fully preheated to 500°F and that your dough circles are uniform in thickness.
2. Can I make the dough ahead of time?
Yes! Prepare the dough, let it rise once, then refrigerate overnight. Allow it to come to room temperature before shaping and baking the next day.
3. Can I use whole wheat flour instead of bread flour?
You can substitute up to 1–1½ cups of whole wheat flour for added fiber and nuttiness. Keep in mind that it may make the pitas slightly denser.
4. How do I keep pitas soft after baking?
Cover warm pitas with a clean kitchen towel immediately after baking. The trapped steam keeps them moist and pliable.
5. Do I need a pizza stone for baking pitas?
While a pizza stone gives a slightly better rise, this recipe works perfectly on a standard baking sheet as long as your oven is very hot.
This recipe has been adapted and simplified from the original version by loveandlemons. We’ve refined the steps for a smoother cooking experience and added helpful notes, nutrition insights, and essential kitchen tools to make it even easier for home cooks.