
Potato Bread is the ultimate upgrade to traditional sandwich bread.
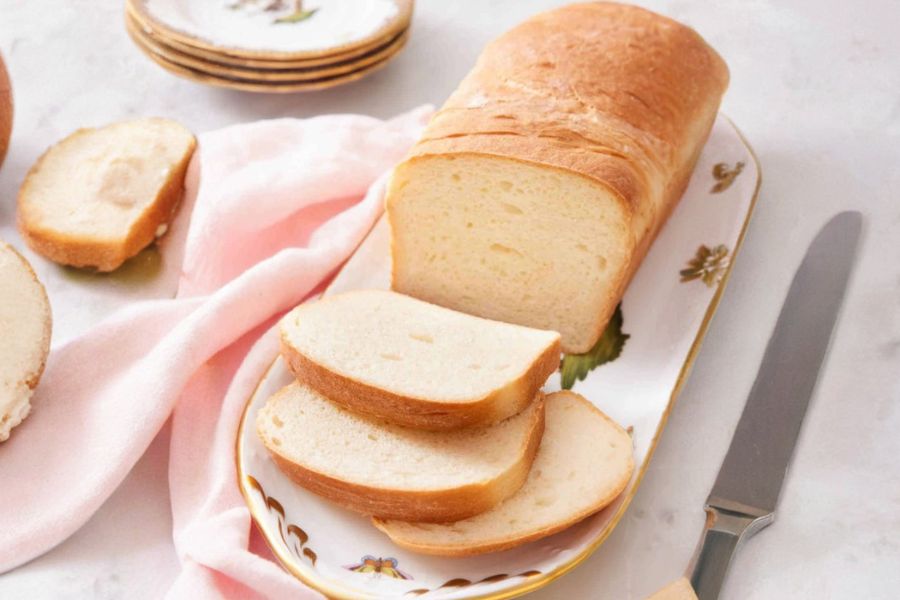
What sets this loaf apart is the addition of mashed potatoes, which create an incredibly soft, pillowy texture with a subtle sweetness.
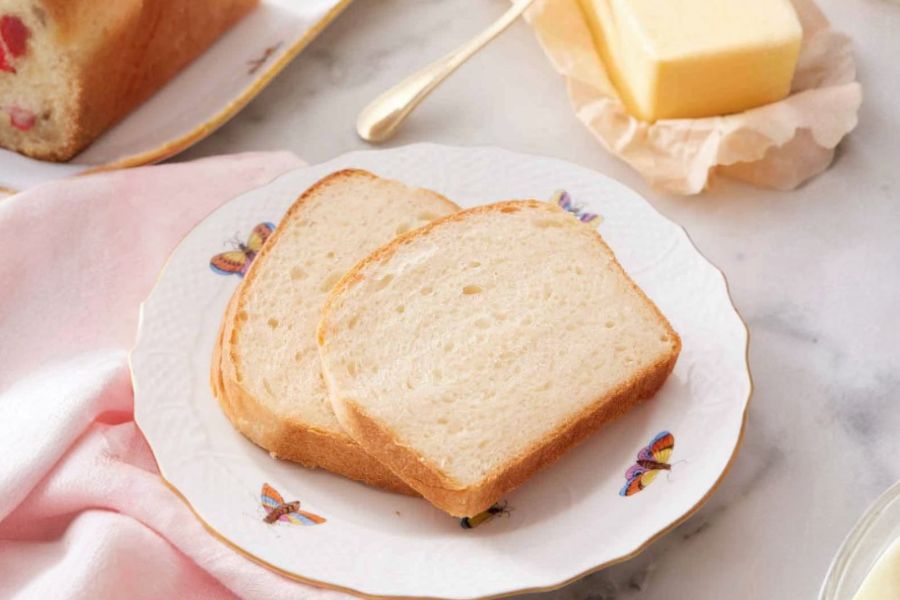
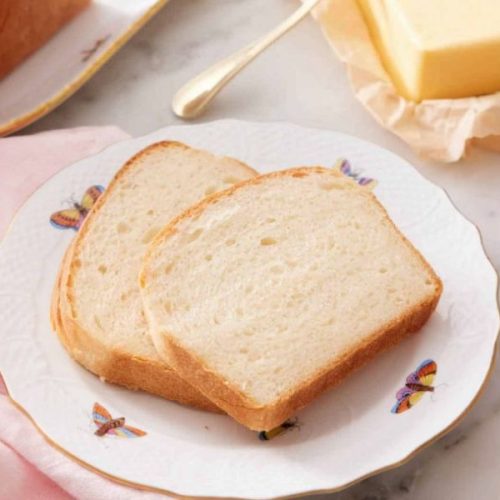
Unlike dense breads, this recipe delivers tender slices that stay moist for days—perfect for sandwiches, toast, or simply enjoyed with butter.
Nutritionally, it provides a hearty balance of carbohydrates for energy, a good dose of plant-based protein from the flour, and dietary fiber that supports digestion.
The butter contributes healthy fats, while the potatoes add potassium and vitamin C.
Despite its comforting taste, each serving is surprisingly satisfying without being overly heavy, making it a smart choice for everyday meals.
This bread is also meal-prep friendly, as it yields two loaves—one for now, and one you can freeze for later.
Easy to make, freezer-friendly, and versatile, Potato Bread is a wholesome staple for any kitchen.
Must-Have Tools for Perfect Results
KitchenAid Stand Mixer
Handles mixing and kneading effortlessly, saving you time and energy while producing a perfectly smooth dough. A powerhouse tool for bread, pizza, and cookie dough alike.
Pyrex Glass Mixing Bowls
Ideal for combining ingredients and letting dough rise. Their clear design helps track progress, and they double as storage for leftovers.
OXO Stainless Steel Potato Masher
Ensures lump-free mashed potatoes for the softest bread texture. Also great for guacamole, beans, or baby food.
USA Pan 9×5-Inch Loaf Pans
Heavy-duty nonstick pans that guarantee even baking and beautiful golden crusts. A must-have for all kinds of homemade bread or quick breads.
ThermoPro Digital Food Thermometer
Quick temperature checks ensure your milk and water are in the perfect range for yeast activation, preventing dough failures. Also useful for meats and candies.
Fluffy Potato Bread
Equipment
- 1 Medium Pot
- 1 Potato Masher
- 1 Stand Mixer with Paddle & Dough Hook
- 2 9×5-inch Loaf Pans
- 1 Large mixing bowl
- 1 Wire Rack
Ingredients
- ½ lb 225 g russet potatoes
- 1 cup 240 mL warm milk (110–115°F)
- ¼ cup 50 g granulated sugar
- 1 packet 7 g / 0.25 oz instant yeast
- 5½ cups 660 g all-purpose flour
- 2 tsp salt
- ⅓ cup 75 g unsalted butter, softened
- ½ cup 120 mL reserved potato cooking water
Instructions
- Prepare the Potatoes: Peel the russet potatoes and slice them into half-inch rounds for even cooking. Place the pieces into a medium pot, then pour in enough cold water to cover them by about an inch. Bring the pot to a boil over medium-high heat and cook until the potatoes are fork-tender, usually about 10 minutes. Before draining, carefully measure and reserve ½ cup of the starchy potato water—it adds both flavor and moisture to the bread. Drain the potatoes completely, then mash them until perfectly smooth and lump-free using a potato masher. Measure out exactly 1 cup of the mashed potatoes and let them cool slightly for 5–10 minutes to avoid overheating the yeast. Set aside any extra mashed potatoes for another use.
- Step 2: Make the Dough Base: In the bowl of a stand mixer, combine the warm mashed potatoes, potato water, milk heated to about 110–115°F, sugar, and instant yeast. Whisk gently until everything is blended and the yeast is evenly dissolved. The warmth of the mixture is key—it should feel warm but not hot to the touch, ensuring the yeast activates properly without being killed. Once the liquids look smooth, add the all-purpose flour, salt, and softened butter. Switch to the paddle attachment and mix on low speed until the ingredients come together into a rough, shaggy dough. This stage is just about combining—don’t overmix yet.
- Knead the Dough: Remove the paddle and attach the dough hook to your mixer. Start kneading on low speed, allowing the dough to develop structure and elasticity. Continue kneading for about 5–8 minutes, checking periodically with the windowpane test: pinch off a small piece and gently stretch it between your fingers. If the dough stretches thin enough to let light pass through without tearing, it’s ready. If it breaks easily, knead for another minute and test again. The finished dough should feel tacky but not sticky, smooth, and strong. This step builds the gluten network that gives the bread its soft, chewy structure.
- First Rise: Lightly oil a large mixing bowl and transfer the kneaded dough into it, turning once to coat the surface with oil. This prevents sticking and keeps the dough moist during rising. Cover the bowl loosely with plastic wrap, a damp towel, or a reusable cover. Place the bowl in a warm, draft-free spot such as an oven with the light on or near a sunny window. Let the dough rise undisturbed until it has doubled in size, which usually takes about 45 minutes. This stage allows the yeast to feed, producing gas bubbles that make the bread light and airy.
- Shape the Loaves: Once risen, gently punch down the dough to release the built-up gas without deflating it completely. Turn the dough out onto a lightly floured surface and divide it evenly into two pieces, about 700 g each for accuracy. Working with one piece at a time, flatten it into a rectangle roughly 9×6 inches. Starting from the long edge, roll the dough tightly into a log, tucking the edges slightly and pinching the seam closed at the bottom. Shape it into a neat loaf about 9 inches long, then place seam-side down in a greased 9×5-inch pan. Repeat with the second loaf.
- Second Rise: Loosely cover the loaf pans with plastic wrap or a clean kitchen towel to prevent drying. Let the shaped loaves rest in a warm spot for about 20 minutes, or until they appear well-puffed and almost doubled. This short rise allows the dough to relax and fill the pan evenly, ensuring a smooth dome-shaped top. During this stage, preheat your oven to 350°F (175°C) so it’s ready by the time the dough finishes rising. Don’t let the loaves over-proof—if they rise too much, they may collapse in the oven. The dough is ready when it springs back slowly when touched gently.
- Bake and Cool: Place the risen loaves on the center rack of the preheated oven and bake for 35–40 minutes, or until the tops are golden brown and the internal temperature reaches about 190–200°F. The bread should sound hollow when tapped lightly on the bottom. Remove the pans from the oven and let the loaves cool in their pans for 5–10 minutes to set the structure.Then carefully transfer them to a wire rack to cool completely—this prevents soggy bottoms. Slice once cooled, or store in an airtight container at room temperature for 3–5 days. For longer storage, freeze one loaf for later.
Notes
- Save the potato water: Always reserve ½ cup of the starchy boiling water before draining. It enhances flavor, keeps the bread moist, and gives it that signature tender crumb.
- Smooth mashed potatoes matter: Lumps can ruin the bread texture. Use a masher or ricer for the creamiest results before adding them to the dough.
- Check dough readiness: Use the windowpane test to make sure your dough is strong yet elastic before shaping. This ensures fluffy, well-risen bread.
- Use a food scale: Weighing the dough before shaping guarantees two evenly sized loaves that bake consistently.
- Knead by hand if needed: No stand mixer? You can knead by hand—just expect to work the dough for 8–10 minutes until smooth.
Chef’s Secrets for Fluffy Perfection
The magic of this recipe lies in balancing moisture and structure.
Potatoes bring extra starch, which holds water and keeps the bread soft for days, while butter adds richness without making the crumb heavy.
To master the texture, always ensure your potatoes are well-mashed and cooled slightly before adding yeast, as too much heat can kill the rise.
Another tip is not to rush the kneading process; strong gluten strands are the foundation of fluffy bread.
Lastly, monitor the second rise carefully—over-proofed dough can collapse in the oven, while under-proofed loaves may bake up dense.
Patience is the baker’s best tool.
Serving Suggestions for Any Occasion
Potato Bread shines in its versatility. Slice it thick for the ultimate sandwich bread—its softness makes it perfect for grilled cheese, turkey clubs, or veggie-stacked sandwiches.
Lightly toast it for breakfast and top with butter, jam, or avocado.
It pairs wonderfully with hearty soups, stews, or chili, where the tender slices soak up broth beautifully.
You can even use it for French toast or bread pudding, as its slightly sweet flavor elevates desserts.
For gatherings, serve it warm in slices with olive oil and herbs on the side as a rustic appetizer.
It’s truly a bread that adapts to every meal.
Storage Tips to Keep It Fresh
Homemade Potato Bread stays fresh longer than most breads, thanks to the potatoes’ natural moisture.
Once fully cooled, store the loaves in a sealed bread bag or airtight container at room temperature for 3–5 days.
Avoid refrigerating, as this can dry it out faster.
For longer storage, freeze one loaf by wrapping it tightly in plastic wrap, then placing it in a freezer-safe bag.
It will stay fresh for up to 3 months.
To serve, thaw at room temperature, then refresh in a 300°F oven for 5–10 minutes.
Pre-slice before freezing for easy grab-and-toast convenience.
Frequently Asked Questions About Recipe
1. Can I use leftover mashed potatoes instead of boiling new ones?
Yes! Leftover plain mashed potatoes work perfectly. Just warm them slightly before mixing to match the recipe’s texture and temperature needs. Avoid potatoes made with cream or lots of seasonings.
2. What if I don’t have instant yeast?
You can substitute active dry yeast, but bloom it in the warm milk and sugar for 5–10 minutes before adding to the other ingredients. This ensures it activates properly.
3. Can I use whole wheat flour instead of all-purpose?
Yes, but swap only half of the flour for whole wheat to maintain the light texture. Using 100% whole wheat will make the bread denser and heavier.
4. Why is my bread too dense or heavy?
Common reasons include not kneading long enough, using old yeast, or skipping the windowpane test. Also, ensure your dough had enough rising time in a warm spot.
5. How do I know when the bread is fully baked?
Check that the top is golden brown and the loaf sounds hollow when tapped underneath. For precision, use a thermometer—the internal temperature should be 190–200°F.
This recipe has been adapted and simplified from the original version by preppykitchen. We’ve refined the steps for a smoother cooking experience and added helpful notes, nutrition insights, and essential kitchen tools to make it even easier for home cooks.