
This Red Velvet Cake Ice Cream recipe transforms the classic dessert into a luxurious, creamy treat that’s both indulgent and surprisingly versatile.
What sets it apart is the combination of tangy cream cheese and rich dairy, giving the ice cream a smooth, velvety texture while incorporating real red velvet cake pieces for bursts of flavor in every bite.
Beyond taste, this recipe provides a good source of protein from cream cheese and whole milk, along with healthy fats from heavy cream, making it more satisfying than typical store-bought options.
It’s also adaptable for everyday cooking because it requires minimal ingredients, straightforward steps, and no baking beyond preparing the cake itself.
Perfect for summer desserts, family gatherings, or meal-prep freezer treats, it balances decadence with convenience.
Must-Have Tools for Perfect Results
Food Processor
Essential for blending cream cheese, milk, and cream into a perfectly smooth base. Beyond this recipe, it’s invaluable for making sauces, dips, and purees.
Ice Cream Maker
Allows the mixture to churn into creamy, scoopable ice cream. Its broader use includes frozen yogurt, sorbets, and gelato at home.
Freezer-Safe Container
Critical for layering in cake pieces and freezing the ice cream until firm. Multipurpose for meal prep, leftovers, and dessert storage.
Spatula
Perfect for folding in red velvet crumbs without deflating the ice cream. Its flexibility makes it a kitchen essential for mixing, scraping, and spreading.
Measuring Cups & Spoons
Ensure precise ingredient ratios for consistency and flavor. Beyond this recipe, they’re indispensable for baking and cooking accuracy.
Homemade Red Velvet Cake Ice Cream
Equipment
- 1 large food processor
- 1 Ice Cream Maker
- 1 large freezer-safe container
- 1 Spatula
- Measuring cups and spoons
Ingredients
- 1 8-ounce package cream cheese, at room temperature
- 1 cup whole milk
- 1 cup heavy whipping cream
- 1 scant cup granulated sugar
- 1/4 teaspoon salt
- 1 tablespoon bourbon optional
- 2 cups crumbled red velvet cake
- Sugar cones for serving
Instructions
- Prepare the Creamy Base: Begin by ensuring your cream cheese is at room temperature—this is crucial for achieving a smooth, lump-free ice cream base. In a large food processor fitted with a blade attachment, combine the cream cheese, whole milk, heavy whipping cream, granulated sugar, and salt. If you’d like a subtle depth of flavor, add the optional bourbon at this stage. Blend everything on high speed for 2–3 minutes, until the mixture is silky and uniform.A few tiny flecks of cream cheese may remain, which is perfectly fine—they will add character and texture to the final ice cream.
- Chill and Prepare the Ice Cream Maker: While the base is blending, ensure your ice cream maker is properly prepared.Most machines require the bowl to be pre-frozen for at least 12–24 hours. Having a cold bowl ensures that your ice cream churns quickly and develops a creamy, smooth texture without forming large ice crystals.
- Churn the Ice Cream: Pour the blended cream mixture into the ice cream maker. Turn the machine on and allow it to churn for 30–45 minutes, or until the consistency resembles soft-serve ice cream. During churning, the mixture will aerate, creating a light and creamy texture. Resist the temptation to add cake pieces now—they need to be folded in later to maintain their shape and texture.
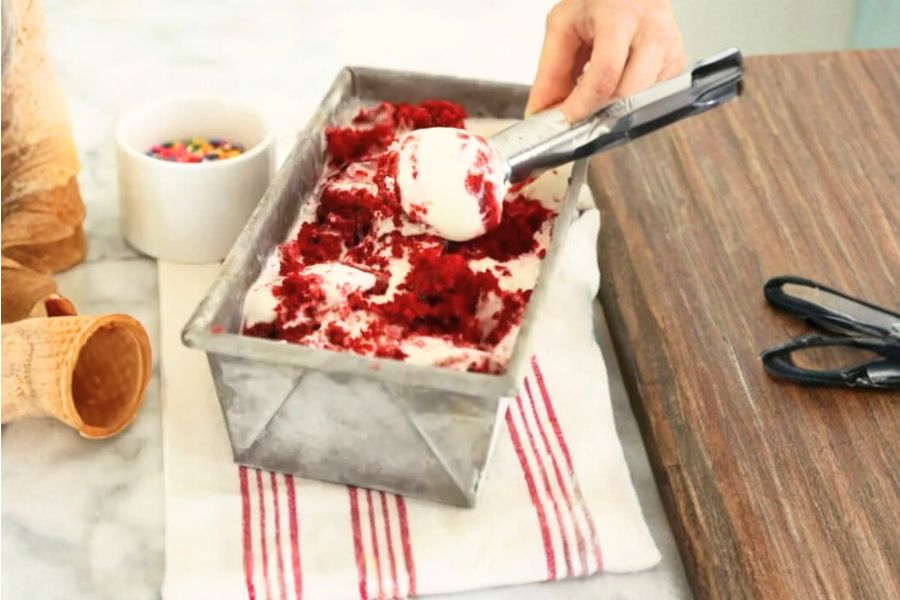
- Fold in Red Velvet Cake Crumbles: Once the ice cream reaches a soft-serve consistency, transfer it carefully to a large, freezer-safe container. Using a spatula, gently fold in the crumbled red velvet cake.Take care to distribute both large and small pieces evenly throughout the ice cream, ensuring each scoop delivers a satisfying bite of cake and creamy base.
- Freeze Until Firm: Cover the container tightly with plastic wrap or an airtight lid. Place it in the freezer and allow the ice cream to set for at least 4 hours, or until it becomes firm enough to scoop. This step ensures the ice cream develops the proper texture and flavor balance, with the cake pieces fully integrated yet still distinct.
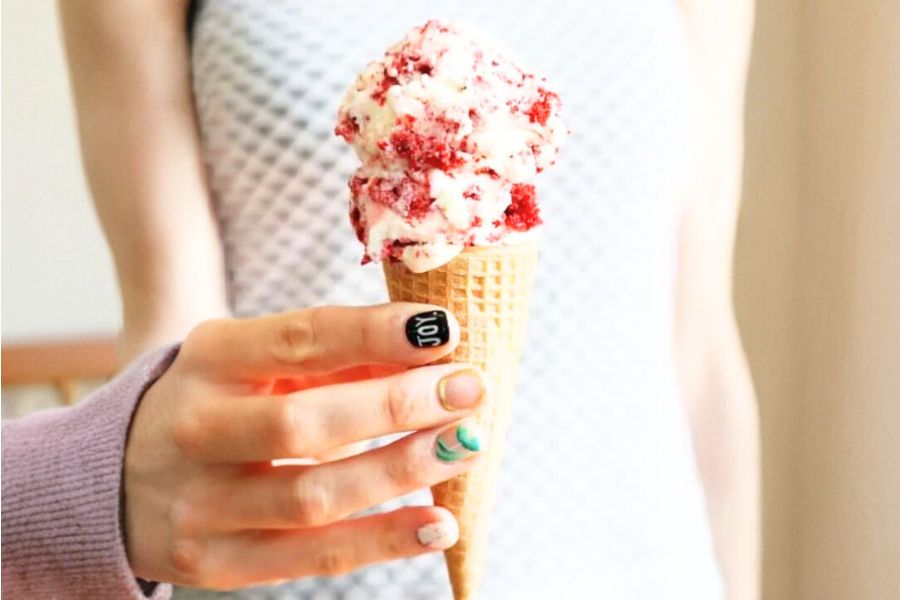
- Serve and Enjoy: When ready to serve, remove the ice cream from the freezer about 5 minutes beforehand to soften slightly for easier scooping. Scoop generous portions onto sugar cones, and enjoy the rich, creamy texture paired with bursts of tender red velvet cake in every bite.This dessert is perfect for summer afternoons, special celebrations, or whenever you crave a homemade indulgence.
Notes
- Use full-fat cream and whole milk for a rich, creamy texture; low-fat substitutes may yield icy results.
- Ensure cream cheese is fully softened to prevent lumps and achieve a smooth base.
- The bourbon is optional but adds a subtle depth of flavor—feel free to omit for a kid-friendly version.
- Gently fold in red velvet crumbs; overmixing can break them down too much and affect texture.
- Serve slightly softened for easier scooping and a more indulgent mouthfeel.
- Store ice cream in an airtight container to prevent freezer burn and maintain freshness.
Chef’s Secrets For Best Texture
Achieving the perfect ice cream texture begins with the quality and preparation of your ingredients.
Always let the cream cheese come to room temperature, as cold blocks can leave lumps that affect the creaminess.
Chilling your ice cream maker bowl in advance is crucial for rapid freezing, which minimizes ice crystals and produces a smoother texture.
Folding in the cake crumbs at the end, rather than during churning, preserves their structure and prevents them from turning mushy.
For added flair, try lightly toasting the crumbs in the oven before folding—they’ll add a subtle, caramelized crunch.
Finally, allow the ice cream to rest at room temperature for a few minutes before scooping to achieve the ideal consistency without melting too quickly.
Serving Suggestions For Every Occasion
Red Velvet Cake Ice Cream is versatile and visually stunning, making it perfect for a variety of occasions.
Serve scoops in classic sugar cones for a nostalgic touch, or plate them in dessert bowls topped with chocolate shavings or a drizzle of caramel sauce for a sophisticated presentation.
It pairs beautifully with fresh berries, whipped cream, or even a splash of espresso for a grown-up twist.
For special gatherings, layer scoops with crushed red velvet crumbs and chocolate chips to create an ice cream parfait that will impress guests.
The rich creaminess and vibrant red cake pieces make this dessert both indulgent and memorable, perfect for birthdays, holidays, or casual summer afternoons.
Storage Tips To Keep Ice Cream Perfect
Proper storage is key to preserving texture and flavor.
Always use an airtight, freezer-safe container to minimize exposure to air, which can cause freezer burn and icy crystals.
Press a piece of parchment paper directly onto the ice cream surface before sealing to further reduce ice formation.
Store the ice cream at the back of the freezer, where temperatures are most consistent.
For best flavor, consume within 2–3 weeks; while safe longer, the texture may deteriorate over time.
If the ice cream becomes too firm, allow it to soften for 5–10 minutes at room temperature before scooping to restore the perfect creamy consistency.
Frequently Asked Questions Answered Clearly
1. Can I make this ice cream without an ice cream maker?
Yes! You can create a no-churn version by blending the cream cheese, milk, cream, sugar, and salt until smooth, then folding in whipped cream for volume. Freeze the mixture in a container, stirring every 30–60 minutes to break up ice crystals until fully set.
2. Can I use store-bought cake instead of homemade red velvet?
Absolutely. Store-bought red velvet cake works well and saves time. Just crumble it into varying sizes to maintain texture, and fold it into the ice cream just before freezing.
3. Is it possible to make this dairy-free?
Yes, substitute full-fat coconut milk and a dairy-free cream cheese alternative. Keep in mind the texture may be slightly different, but it will still yield a creamy, flavorful dessert.
4. How long does homemade ice cream last?
For best taste and texture, consume within 2–3 weeks. Ice cream can last longer in the freezer, but it may develop ice crystals and lose some creaminess.
5. Can I add other mix-ins besides cake?
Certainly! Chocolate chips, cookie crumbles, or nuts can be gently folded in along with or instead of the cake crumbs. Just fold carefully to avoid breaking the ice cream’s smooth texture.
This recipe has been adapted and simplified from the original version by joythebaker. We’ve refined the steps for a smoother cooking experience and added helpful notes, nutrition insights, and essential kitchen tools to make it even easier for home cooks.