
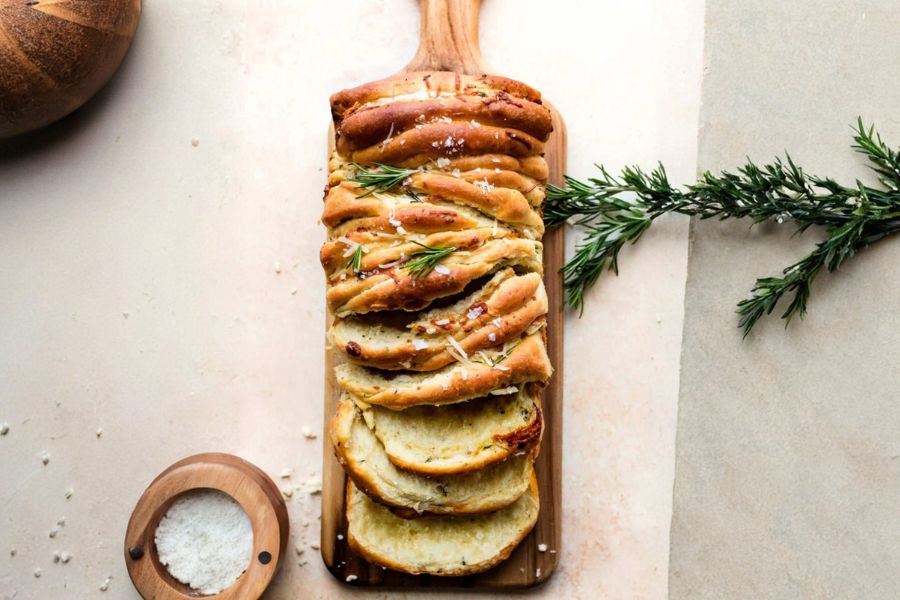
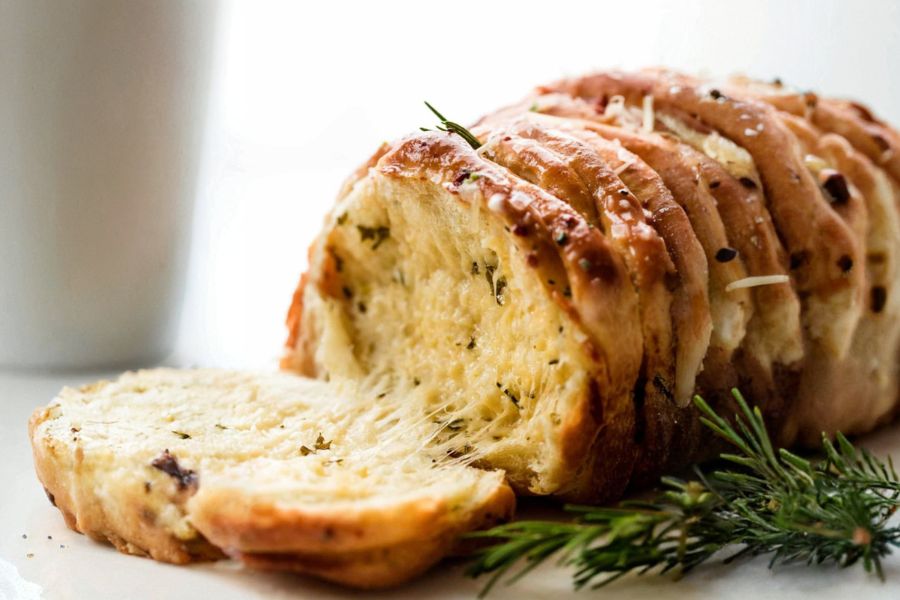
This Rosemary Garlic Pull-Apart Bread transforms a simple loaf into a flavorful, aromatic centerpiece perfect for any meal.
Infused with fresh rosemary and garlic, each pull-apart piece delivers a satisfying burst of herbaceous, savory goodness.
The addition of cheese not only enriches the flavor but also boosts protein content, making it more satiating.
With soft, tender interior and a golden, buttery crust, this bread provides a balance of healthy fats from butter and moderate carbs, making it an excellent addition to breakfast, brunch, or dinner.
Its step-by-step preparation is straightforward, offering both beginners and experienced bakers the satisfaction of creating a bakery-quality loaf at home.
Ideal for meal prep or entertaining, this bread can be enjoyed fresh, reheated, or paired with soups and salads for a wholesome, versatile option.
Must-Have Tools for Perfect Results
Stand Mixer with Dough Hook
Ideal for mixing and kneading the yeast dough efficiently, ensuring a soft, elastic texture without strenuous hand effort. Perfect for any bread-making or dough-based recipe in your kitchen.
9×5-Inch Loaf Pan
Ensures the dough bakes evenly while maintaining the classic pull-apart loaf shape. A staple for homemade bread, meatloaf, and other baked creations.
Mixing Bowls (Medium & Large)
Used for combining dough ingredients and preparing the flavorful herb-garlic filling. Versatile for baking, marinating, or tossing salads.
Spatula or Silicone Spoon
Essential for folding the butter-herb mixture into dough pieces without tearing them. Can also be used for scraping bowls and handling sticky batters.
Wire Cooling Rack
Allows baked bread to cool evenly, preserving the crust’s crispiness while preventing sogginess. Ideal for cookies, cakes, and roasted items.
Flavorful Rosemary Garlic Pull Apart Bread
Equipment
- 1 Stand Mixer with Dough Hook
- 1 Medium mixing bowl
- 1 Large Mixing Bowl
- 1 Spatula or silicone spoon
- 1 9×5-inch loaf pan
- 1 Wire cooling rack
Ingredients
Dough:
- 2 tsp Platinum Yeast
- 1 tbsp granulated sugar
- 3/4 cup whole milk
- 3 tbsp unsalted butter softened
- 1 large egg
- 2 1/3 cups all-purpose flour plus extra as needed
- 1 tsp salt
- 1 tsp garlic powder
- 1 tbsp fresh rosemary finely chopped (or 2 tsp dried)
Filling:
- 5 tbsp unsalted butter extra soft
- 1 tbsp fresh rosemary finely chopped (or 2 tsp dried)
- 1 tbsp fresh parsley finely chopped (or 2 tsp dried)
- 2 garlic cloves minced (or 1/2 tsp garlic powder)
- 1/4 tsp salt
- 3/4 cup shredded cheese Parmesan, mozzarella, or cheddar
Optional Topping:
- 1 tbsp unsalted butter melted
- Coarse or flaky sea salt for sprinkling
Instructions
- Activate Yeast: In a medium mixing bowl, combine the yeast and sugar. Warm the milk to approximately 110°F (43°C) and pour over the yeast mixture, whisking gently to dissolve the sugar and activate the yeast. Cover loosely with a kitchen towel and allow it to sit for 5–10 minutes until the mixture is frothy and bubbly.
- Combine Dough Ingredients: Add softened butter, the egg, flour, salt, garlic powder, and rosemary to the activated yeast mixture. Mix on low speed with a stand mixer using the dough hook, or stir with a silicone spoon until the dough comes together and begins pulling away from the bowl sides. Add additional flour a tablespoon at a time if dough is too sticky.
- Knead the Dough: Knead the dough for 5 minutes in a stand mixer or on a lightly floured surface until soft, elastic, and slightly tacky. Perform the windowpane test by stretching a small piece of dough thin; it should stretch without tearing. If it tears easily, knead a little longer until smooth and pliable.
- First Rise: Shape the dough into a smooth ball and place in a greased large bowl. Cover with plastic wrap or foil and allow it to rise in a warm, draft-free spot until doubled in size, about 60–90 minutes. This first rise develops flavor and ensures a soft, airy interior.
- Prepare Herb Butter Filling: While dough rises, combine 5 tablespoons soft butter, rosemary, parsley, garlic, and salt in a small bowl. Mix thoroughly until fully combined and set aside at room temperature, ready for spreading. This mixture will create flavorful layers inside the bread.
- Shape Dough Pieces: Punch down the risen dough to release excess air, then place on a lightly floured surface. Divide dough into 12 equal portions and flatten each into roughly 4-inch circles. Spread 1–2 teaspoons of the herb butter onto each piece, then sprinkle with 1 tablespoon of shredded cheese.
- Assemble Loaf: Fold each dough circle in half and arrange folded pieces, round side up, in a greased 9×5-inch loaf pan. Make sure pieces are snug but not squished together, allowing them to rise evenly and “pull apart” beautifully after baking.
- Second Rise: Cover the loaf pan with plastic wrap or foil and allow dough to rise again in a warm environment until puffy and slightly domed, about 45 minutes. Preheat your oven to 350°F (177°C) during the last 15 minutes of rising.
- Bake the Bread: Place the loaf in the preheated oven on the lower third rack and bake for 50 minutes, until golden brown on top. Tent with foil if the crust browns too quickly and allow melted butter to soak into the bread.
- Finish and Serve: Remove the pan from the oven and place it on a wire cooling rack. Optional: brush melted butter on top and sprinkle with sea salt. Let the bread cool for 10 minutes before serving warm, soft, and aromatic pieces that pull apart effortlessly.
Notes
- Use fresh herbs whenever possible for the brightest flavor; dried herbs can be used in a pinch.
- Butter should be soft, not melted, to spread easily and create layered pockets in the bread.
- Make sure milk is warm but not hot (around 110°F/43°C) to activate yeast without killing it.
- Allow dough to rise in a warm, draft-free spot to ensure a soft, fluffy texture.
- This bread can be baked a day ahead and reheated to retain freshness and pull-apart texture.
- Optional: Sprinkle coarse sea salt on top for added crunch and flavor contrast.
Chef’s Secrets To Perfect Bread
The key to an extraordinary pull-apart bread is all in the layering and dough consistency.
Ensuring the dough is soft but not sticky creates a tender interior, while the windowpane test guarantees proper gluten development for an airy texture.
Herb butter should be at room temperature for easy spreading and even flavor throughout.
Using freshly chopped rosemary and parsley enhances aroma, and folding the dough over the filling creates the signature pull-apart layers.
Baking slowly on a lower oven rack ensures a golden crust without burning the top, allowing the buttery flavors to meld beautifully.
Serving Suggestions For Maximum Enjoyment
This bread pairs wonderfully with a range of meals.
Serve warm alongside soups, salads, or pasta for a hearty accompaniment, or enjoy it as a savory snack straight from the oven.
For brunch, cut individual pieces and serve with a light spread of cream cheese or tomato-based dips.
You can also use it as a sandwich base by slicing horizontally and layering roasted vegetables, grilled chicken, or deli meats.
Its pull-apart design makes it ideal for casual gatherings, allowing guests to tear off pieces easily while still enjoying a buttery, cheesy bite every time.
Storage Tips For Fresh Bread
To maintain the bread’s freshness, store it in an airtight container at room temperature for up to two days.
For longer storage, refrigerate for up to one week, but expect the crust to harden slightly; a quick reheat in a 300°F (149°C) oven for 10–15 minutes restores softness.
You can also freeze the loaf before baking or after it has cooled completely; wrap tightly in foil or freezer-safe plastic and thaw at room temperature before reheating.
Avoid microwaving directly from frozen, as it may make the bread chewy instead of soft and airy.
Frequently Asked Questions And Answers
1. Can I use dried herbs instead of fresh?
Yes! Dried rosemary and parsley can be substituted at roughly one-third the quantity of fresh herbs. While fresh herbs give a brighter flavor, dried herbs still provide aromatic depth and convenience.
2. Can I make this bread ahead of time?
Absolutely. Assemble and refrigerate the dough overnight after the first rise. Allow it to come to room temperature and complete the second rise before baking. This makes it perfect for meal prep or hosting brunch.
3. What types of cheese work best?
Parmesan, mozzarella, or white cheddar are ideal for pull-apart bread. You can experiment with combinations or add a little smoked cheese for extra flavor, but make sure it melts evenly without becoming greasy.
4. How do I prevent the top from burning?
If the loaf browns too quickly, tent it with aluminum foil halfway through baking. Placing it on the lower oven rack also helps cook the interior fully while keeping the top golden.
5. Can I make this bread gluten-free?
Yes! Substitute a high-quality gluten-free all-purpose flour blend. Be aware the texture will differ slightly, and the dough may require more precise handling during kneading and rolling to maintain structure.
This recipe has been adapted and simplified from the original version by sallysbakingaddiction. We’ve refined the steps for a smoother cooking experience and added helpful notes, nutrition insights, and essential kitchen tools to make it even easier for home cooks.