
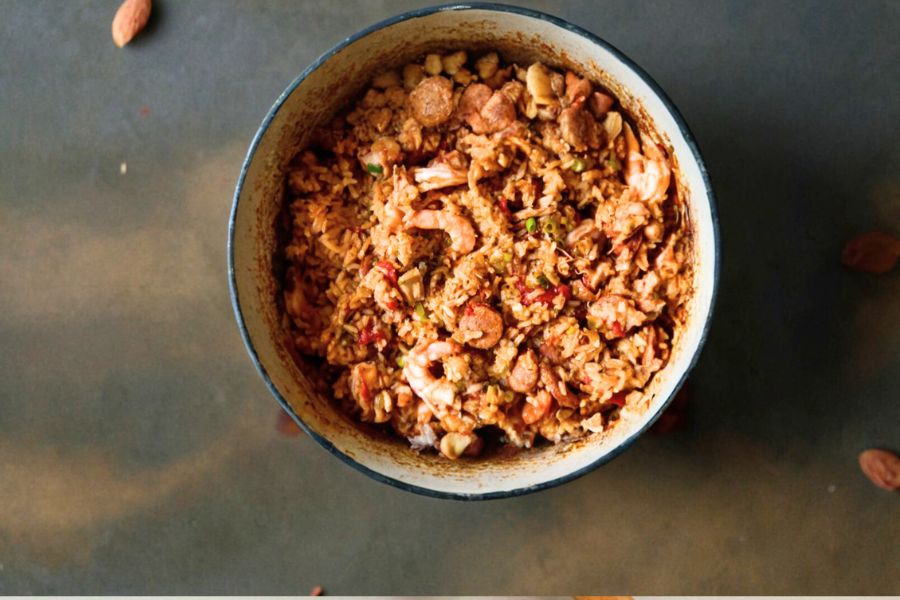
This Creole-Style Red Jambalaya is a flavorful celebration of Southern cooking, blending tender chicken, smoky sausage, and succulent shrimp with vibrant vegetables and aromatic herbs.
Rich in protein from three different sources, it’s a hearty, satisfying dish that supports muscle health and sustained energy.
The inclusion of bell peppers, celery, and onions adds fiber and essential vitamins, making it a well-rounded meal.
With moderate carbs from long-grain rice, this jambalaya balances nutrition and indulgence perfectly. Its one-pot preparation simplifies cooking and cleanup, making it an ideal choice for busy weeknights or meal prep.
The slow oven baking ensures even cooking and deep flavors, providing a comforting yet impressive dish that everyone will love.
Must-Have Tools for Perfect Results
Dutch Oven
Perfect for browning meats and simmering the jambalaya evenly in the oven. Its thick walls and lid retain heat and moisture, making it indispensable for slow-cooked dishes.
Sharp Chef’s Knife
Essential for quickly dicing vegetables and slicing meats, speeding up prep while ensuring clean, uniform cuts for even cooking.
Measuring Cups and Spoons
Accuracy in seasoning and liquid measurements is key to balancing flavors and textures in this recipe.
Mixing Bowls
Handy for prepping and holding ingredients separately, keeping the cooking process organized and efficient.
Wooden Spoon
Ideal for stirring the jambalaya, scraping the bottom to prevent burning while preserving the delicate texture of rice and vegetables.
Healthy Shrimp and Sausage Jambalaya
Equipment
- 1 Dutch Oven
- 1 Sharp Chef’s Knife
- Measuring cups and spoons
- Mixing Bowls
- Wooden Spoon
Ingredients
- 1 28-ounce can peeled whole tomatoes, packed in juice
- About 3 cups homemade chicken stock or low-sodium broth plus more if needed
- 1 1/4 pounds boneless skinless chicken thighs
- Kosher salt and freshly ground black pepper to taste
- 1 tablespoon vegetable canola, or neutral oil (plus more if needed)
- 3/4 pound cooked Cajun or Creole sausage e.g., andouille or chaurice, sliced thin
- 1 medium yellow onion diced (8 ounces)
- 2 medium green bell peppers diced (10 ounces)
- 4 celery ribs diced (6 ounces)
- 4 medium garlic cloves minced
- 1 teaspoon tomato paste
- 1 tablespoon Louisiana-style hot sauce plus more for serving
- 2 teaspoons minced fresh thyme or 1 teaspoon dried thyme
- 1 teaspoon dried oregano
- 1/4 teaspoon cayenne pepper adjust to taste
- 1/4 teaspoon garlic powder
- 2 bay leaves
- 2 cups long-grain rice 12 ounces
- 3/4 pound peeled and deveined shrimp
- 6 scallions white and light green parts only, thinly sliced
Instructions
- Prepare the Tomato-Stock Mixture: Open the can of whole peeled tomatoes and pour the contents into a medium bowl. Using your fingers, gently break apart each tomato to release the juice inside its seed compartments. Strain the tomato juice through a fine sieve into a 4-cup measuring cup, then add enough chicken stock to this juice to reach a total volume of 4 cups. Set this flavorful liquid mixture aside for later use.
- Brown the Chicken Thighs: Preheat your oven to 325°F (160°C). Season the boneless chicken thighs generously with kosher salt and freshly ground black pepper on all sides. Heat 1 tablespoon of neutral oil in a Dutch oven over medium-high heat until shimmering. Add the chicken thighs and cook, turning occasionally, until each side develops a golden-brown crust, about 6 minutes per side. Remove the chicken and let it rest on a cutting board for 5 minutes, then cut into bite-sized chunks.
- Cook the Sausage and Vegetables: In the same Dutch oven, add the sliced Cajun or Creole sausage and cook over medium heat, stirring frequently, until it starts to darken and release its smoky oils, about 3 minutes. Add diced onion, bell peppers, celery, and minced garlic to the pot. Stir well, scraping the bottom of the pot to lift any browned bits, and cook the vegetables until they soften and develop a light golden color, roughly 8 minutes.
- Build the Flavor Base: Add the tomato paste to the vegetables and stir continuously for about 1 minute until it darkens slightly and becomes fragrant. Stir in the hot sauce, thyme, oregano, cayenne pepper, garlic powder, and a generous amount of freshly ground black pepper. Mix well to coat the vegetables and sausage with the spices, creating a deep and complex flavor foundation.
- Combine Tomatoes, Chicken, and Bay Leaves: Carefully add the crushed tomatoes from the bowl along with the tomato-stock mixture and the browned chicken pieces into the Dutch oven. Nestle in the bay leaves. Stir everything gently to combine and bring the mixture to a gentle simmer over medium heat. Taste the liquid and season with salt as needed to ensure the dish is well balanced.
- Add Rice and Begin Oven Cooking: Pour in the long-grain rice and stir to distribute it evenly throughout the pot. Cover the Dutch oven with its lid and transfer it to the preheated oven. Bake for about 40 minutes, or until the rice has fully absorbed the liquid and is tender but not mushy.
- Finish with Shrimp and Scallions: Remove the Dutch oven from the oven carefully, uncover, and gently fold in the peeled and deveined shrimp along with the sliced scallions. Return the covered pot to the oven and cook for an additional 5 minutes, just until the shrimp turn pink and are cooked through.
- Rest and Serve: Remove the pot from the oven and keep it covered, allowing the jambalaya to rest for 15 minutes. This resting period lets the flavors meld further and the rice firm up slightly. Before serving, fish out the bay leaves if visible, and serve hot, offering additional hot sauce at the table for those who like extra heat.
Notes
- Use canned whole peeled tomatoes packed in juice, not purée, to ensure the right amount of cooking liquid and texture.
- Avoid stirring the jambalaya too vigorously after cooking, as overmixing can cause the rice grains to break down and become mushy.
- If you don’t have a Dutch oven, a heavy, oven-safe pot with a tight-fitting lid will work, but heat retention might vary.
- The bay leaves add subtle depth, but they should be removed before eating if possible to avoid a bitter bite.
- Adjust the cayenne pepper and hot sauce to your heat preference, making this dish as mild or spicy as you like.
Chef’s Secrets for Best Flavor
Achieving authentic Creole jambalaya starts with layering flavors carefully and using quality ingredients.
Browning the chicken and sausage separately before combining them unlocks rich, caramelized notes that build the dish’s depth.
Be patient when cooking the vegetables — sautéing them until lightly golden intensifies their natural sweetness and balances the spicy seasonings.
Using whole peeled tomatoes packed in juice ensures the right texture and acidity, critical for that signature tang.
For an even more robust flavor, homemade chicken stock works wonders, but a good-quality low-sodium broth will suffice.
Lastly, resist stirring the rice too much during cooking; this prevents it from breaking down and turning mushy, preserving the ideal texture of this hearty one-pot meal.
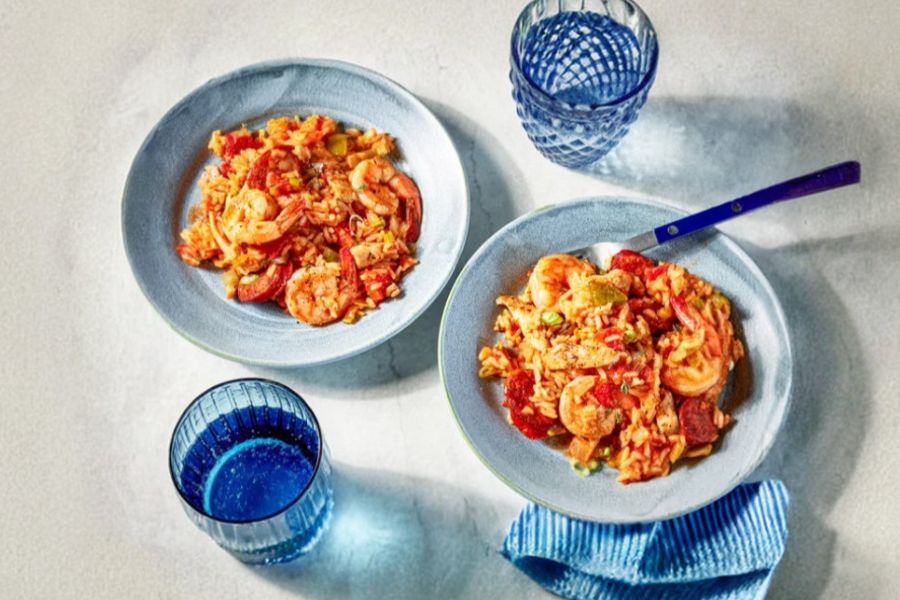
Serving Suggestions to Impress Guests
Jambalaya is a versatile dish that pairs wonderfully with simple, fresh sides to complement its bold flavors. Serve it alongside a crisp green salad with tangy vinaigrette to cut through the richness.
Cornbread or crusty French bread is perfect for soaking up the delicious sauce.
For a festive touch, offer pickled okra or a light cucumber and tomato salad as refreshing palate cleansers.
Garnish with fresh scallions and a wedge of lemon to brighten each serving.
Don’t forget to provide extra hot sauce at the table, allowing guests to customize the heat level to their preference.
This dish shines both as a casual family dinner and a crowd-pleasing party centerpiece.
Storage Tips for Leftovers
Proper storage is essential to maintain the freshness and flavors of jambalaya when saving leftovers.
Allow the dish to cool completely before transferring it to airtight containers, which help prevent moisture loss and absorption of odors from other foods.
Refrigerated jambalaya can last up to 4 days and reheats well on the stovetop or in the microwave; add a splash of broth or water to loosen the rice if it has thickened.
For longer storage, freeze portions in freezer-safe containers for up to 3 months. When thawing frozen jambalaya, defrost overnight in the refrigerator before reheating gently to preserve texture and flavor.
Frequently Asked Questions Answered
1. Can I use white rice instead of long-grain rice?
Long-grain rice is preferred because it stays separate and fluffy, but you can use white rice with careful monitoring to avoid mushiness. Adjust cooking times accordingly.
2. Is this recipe very spicy?
The heat level can be adjusted easily by controlling the amount of cayenne pepper and hot sauce. Start mild and add more to taste during serving.
3. Can I make this recipe gluten-free?
Yes! The recipe is naturally gluten-free as long as you verify that the sausage and broth contain no gluten additives.
4. Can I substitute shrimp with other seafood?
Absolutely. Firm fish or scallops can be swapped in, but add them near the end of cooking as they cook quickly.
5. What can I do if I don’t have a Dutch oven?
Use any heavy, oven-safe pot with a tight-fitting lid. Cast iron skillets with lids or deep casserole dishes work well for even heat retention.
This recipe has been adapted and simplified from the original version by seriouseats. We’ve refined the steps for a smoother cooking experience and added helpful notes, nutrition insights, and essential kitchen tools to make it even easier for home cooks.