
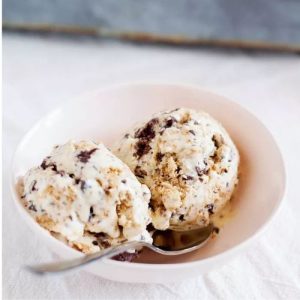
Indulge in the ultimate sweet treat with this homemade S’mores Ice Cream, a perfect fusion of creamy vanilla, rich chocolate, and toasted marshmallows.
This recipe balances decadent flavor with nutritional perks, offering protein from eggs and dairy, healthy fats from whole milk and cream, and fiber from graham crackers.
Quick to prep and customizable for your favorite add-ins, it’s ideal for everyday enjoyment or special occasions.
Whether served immediately as soft-serve or chilled for a firmer texture, this ice cream satisfies cravings while remaining simple, fun, and rewarding to make at home.
Creamy S’mores Ice Cream
Equipment
- 1 Ice cream maker with frozen bowl
- 1 Medium saucepan
- 1 Medium Mixing Bowl
- 1 Large mixing bowl
- 1 whisk
- 1 Spatula
- 1 Ladle
- 1 Fine mesh strainer (optional)
- 1 Small baking sheet
- Aluminum foil or parchment paper
Ingredients
Ice Cream Base:
- 2 cups heavy cream
- 2/3 cup whole milk
- 1 teaspoon vanilla extract
- 1/2 teaspoon salt
- 6 large egg yolks
- 1/3 cup sugar
Add-ins:
- 6 ounces chocolate or 1 cup chocolate chips
- 2 cups mini marshmallows
- 6 graham crackers broken into small pieces
Instructions
- Freeze the Ice Cream Maker Bowl: To ensure your ice cream churns perfectly, place the ice cream maker’s bowl in the freezer at least 24 hours before you plan to make your ice cream. This step is crucial because a thoroughly frozen bowl allows the custard to freeze evenly during churning, giving your ice cream a creamy, smooth texture rather than an icy or grainy consistency. Make sure the bowl is fully dry before freezing, and keep it upright to prevent any frost buildup inside.
- Warm the Dairy Mixture: In a medium saucepan over medium-low heat, combine 2 cups heavy cream, 2/3 cup whole milk, 1 teaspoon vanilla extract, and 1/2 teaspoon salt. Stir gently and allow the mixture to heat slowly. Your goal is a gentle simmer, with tiny bubbles forming around the edges. This should take about 15 to 18 minutes. Stir occasionally to prevent the cream from forming a skin or scorching. This warm dairy mixture will create a smooth foundation for the custard.
- Prepare the Egg Yolk Mixture: While your dairy heats, grab a medium mixing bowl and whisk together 6 large egg yolks and 1/3 cup sugar until the mixture turns pale and thick. This is called “ribbon stage,” where the whisk leaves a visible trail on the surface Achieving this texture ensures your custard will have a rich, silky mouthfeel.
- Temper the Eggs: To avoid scrambling your eggs, you need to temper them carefully. Using a ladle, slowly pour a small amount of the hot cream mixture into the egg yolks while whisking continuously. Gradually add the rest of the cream, a little at a time, whisking constantly. This gentle process balances the temperatures and prevents cooked egg bits, giving you a smooth, velvety custard base.
- Cook the Custard: Transfer the tempered egg mixture back into the saucepan and place it over low heat. Stir constantly with a spatula or wooden spoon, making sure to scrape the bottom and edges to avoid sticking. Cook until the custard thickens to coat the back of a spoon, roughly 8 minutes. You can test by running your finger across the back of the spoon — if the line stays clear, it’s done. Do not rush this step, as slow cooking ensures a creamy consistency.
- Cool the Custard: Once thickened, remove the custard from heat immediately. If there are any small cooked egg bits, pour the custard through a fine mesh strainer into a large bowl. Using a large bowl helps the custard cool faster. Let it come to room temperature, then cover and refrigerate for at least 4 hours, or preferably overnight. The custard should be the consistency of thick eggnog, ready to become your ice cream base.
- Prepare the Chocolate: In a small saucepan over low heat, melt 6 ounces of chocolate or 1 cup chocolate chips, stirring continuously to ensure smoothness. This should take about 5 to 7 minutes. Remove from heat and allow to cool slightly. Drizzling the chocolate in ribbons during churning will give the ice cream the signature chocolate swirl.
- Toast the Marshmallows: Preheat your oven’s broiler and place the oven rack in the center. Line a small baking sheet with foil or parchment paper and lightly spray with cooking spray. Spread 2 cups mini marshmallows evenly across the sheet. Broil for 30 seconds to 1 minute, watching carefully to prevent burning. The marshmallows should turn golden brown and slightly puffed. Remove from the oven and allow them to cool for 5 minutes.
- Break Up the Graham Crackers: While the custard chills and marshmallows cool, break 6 graham crackers into small pieces, roughly the size of a nickel. These will be folded in after churning to add texture and the classic S’mores flavor.
- Churn the Ice Cream: Pour the cooled custard into the frozen bowl of your ice cream maker. Churn according to your manufacturer’s instructions. After about 5 to 7 minutes, the mixture will thicken to a soft-serve consistency. Gradually add the toasted marshmallows, a few at a time, folding them in gently. Slowly drizzle in the melted chocolate in ribbons, letting it break apart naturally to mimic chocolate chips.
- Fold in the Graham Crackers: Once churning is complete and the ice cream reaches a creamy soft-serve texture, transfer it to a freezer-safe container. Gently fold in the graham cracker pieces, distributing them evenly without crushing the ice cream. This step preserves the crunch and adds bursts of flavor throughout every scoop.
- Freeze to Firm (Optional): If you prefer scoopable ice cream rather than soft-serve, smooth the top, press a piece of parchment over the surface, and cover with a lid. Freeze for at least 2 hours or until firm. When ready, scoop onto cones or bowls and serve immediately. The ice cream can also be stored in the freezer for several days, maintaining its creamy texture and delightful S’mores flavors.
- Serve and Enjoy: Scoop the ice cream into your favorite bowls or cones, and if desired, garnish with extra chocolate drizzle or a few toasted marshmallows on top. This homemade S’mores Ice Cream is perfect for summer gatherings, family treats, or anytime you crave a nostalgic dessert. Its combination of creamy custard, chocolate ribbons, toasted marshmallows, and crunchy graham crackers delivers the classic campfire flavor in every bite.
Notes
- Use full-fat dairy for a creamier texture; skim milk will make the ice cream icy.
- Always temper eggs slowly to prevent scrambling and ensure a smooth custard.
- Toast marshmallows carefully under the broiler — they brown quickly and can burn in seconds.
- Chocolate can be semi-sweet, dark, or milk depending on preference; adjust sugar in custard accordingly.
- Graham crackers should be broken into small pieces, not powdered, to maintain a pleasant crunch.
- For a softer texture, serve immediately; for scoopable ice cream, freeze for 2–4 hours.
- The custard base can be made up to one week in advance and stored in the fridge.
- Use a spatula to gently fold in add-ins to avoid melting marshmallows or chocolate during incorporation.
Chef’s Secrets For Perfect Ice Cream
Achieving a velvety, smooth ice cream comes down to technique and patience.
Always chill your custard thoroughly before churning; warm or room-temperature custard can produce icy textures.
Tempering the eggs properly is critical — a slow, steady stream of hot cream keeps the yolks from scrambling and ensures a rich custard.
For best flavor, use high-quality chocolate and fresh, crisp graham crackers.
Toasting the marshmallows adds caramelized notes that elevate the flavor and texture.
Gentle folding during add-in incorporation prevents melting and keeps each bite distinct.
Serving Suggestions To Impress Guests
Serve your S’mores Ice Cream in waffle cones for a nostalgic, fun presentation, or scoop into dessert bowls for a more elegant approach.
Pair it with warm chocolate sauce, a sprinkle of crushed graham crackers, or even fresh berries for contrast.
It works beautifully alongside warm brownies, chocolate lava cake, or a simple chocolate chip cookie for an indulgent treat.
For entertaining, consider layering ice cream with marshmallow fluff and chocolate drizzle in a parfait glass for a visually striking dessert.
Storage Tips For Long-Lasting Ice Cream
Homemade ice cream is best enjoyed within one week, though it can last up to two weeks if stored properly.
Use an airtight container and press a piece of parchment or plastic wrap directly onto the surface to prevent ice crystals from forming.
Keep the ice cream in the back of the freezer, where temperatures are most consistent, instead of the door.
If the ice cream becomes too firm, let it sit at room temperature for 5–10 minutes before scooping to achieve a creamy consistency.
Frequently Asked Questions About Recipe
1. Can I make this recipe without an ice cream maker?
Yes! You can make this recipe using a no-churn method. Pour the cooled custard into a freezer-safe container, fold in the chocolate and toasted marshmallows, cover tightly, and freeze for at least 4–6 hours, stirring every 30–45 minutes to break up ice crystals.
2. Can I use alternative milk or cream?
You can substitute dairy with plant-based alternatives like coconut milk, almond milk, or oat milk. Keep in mind that the texture may be slightly less creamy, and coconut cream works best for maintaining richness.
3. How do I prevent ice crystals from forming?
Chill the custard completely before churning, use full-fat dairy, and store the ice cream in an airtight container with parchment pressed on the surface. This minimizes ice crystal formation and preserves a smooth texture.
4. Can I add extra flavorings or mix-ins?
Absolutely! You can fold in caramel swirls, nuts, cookie chunks, or even a dash of cinnamon or espresso powder. Just fold gently to avoid melting your marshmallows or chocolate.
5. How long can I store homemade ice cream?
For best taste and texture, consume within one week. With proper airtight storage, it can last up to two weeks. Always allow it to soften slightly before scooping for optimal creaminess.