
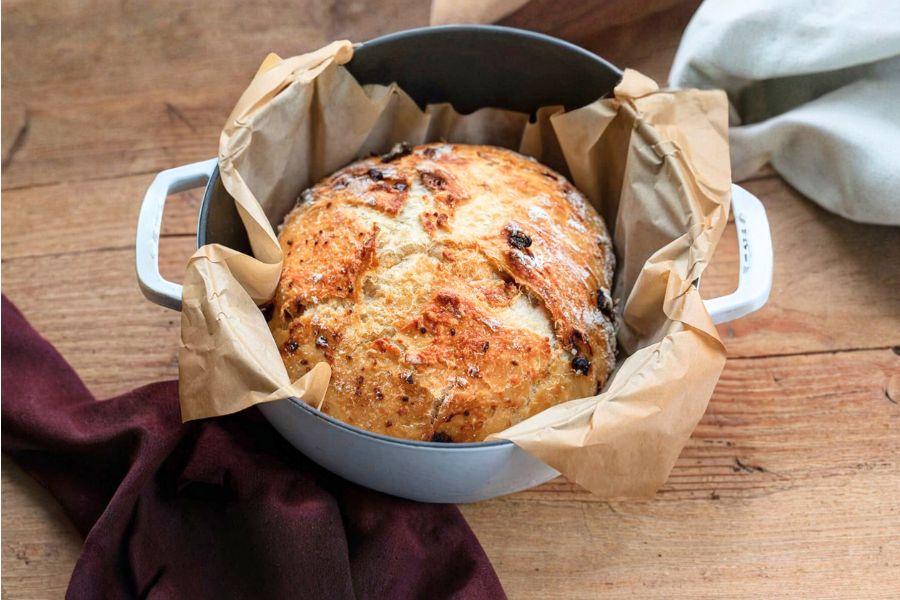
Sun-Dried Tomato Bread is a delightful twist on classic homemade bread, combining the savory richness of sun-dried tomatoes, parmesan, and asiago cheese with a hint of garlic.
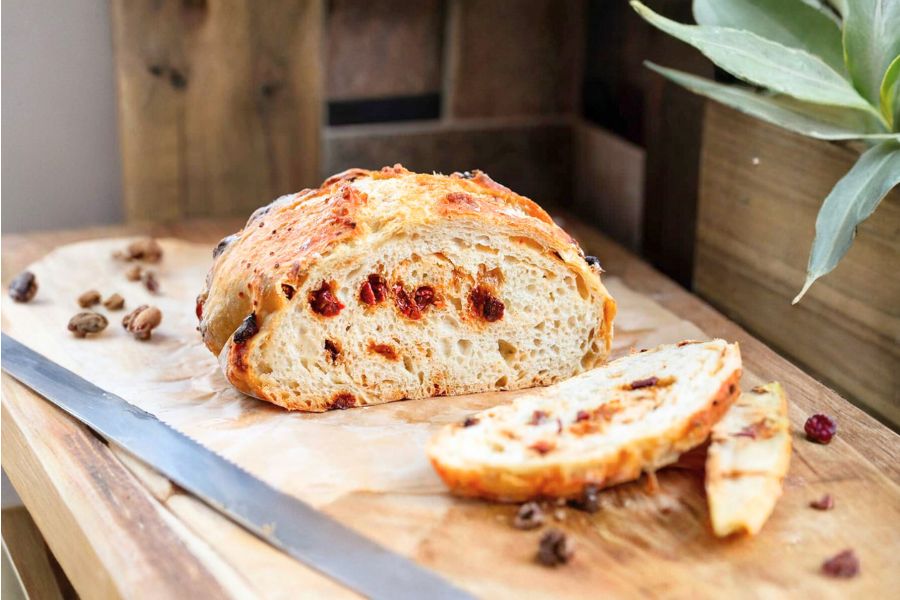
Its long, slow rise develops deep, complex flavors and a satisfyingly chewy texture, making each slice a treat for both casual snacking and elegant entertaining.
Beyond taste, this bread offers nutritional perks: it provides plant-based protein from the cheese, fiber from the flour and tomatoes, and healthy fats, making it a more balanced option than standard white bread.
With minimal hands-on prep and mostly passive rising time, it’s an ideal choice for everyday cooking, meal prep, or a weekend baking project.
Its versatility—perfect with soups, salads, or sandwiches—adds to its appeal, making it both practical and indulgent.
Must-Have Tools for Perfect Results
Dutch Oven
Essential for achieving a golden, crusty exterior while keeping the crumb soft and moist. Its heavy construction ensures even heat distribution, making it perfect for homemade breads and braises.
Mixing Bowl (Large)
Provides ample space to combine ingredients and allow dough to rise without overflowing. A durable, easy-to-clean bowl is indispensable for all baking and meal prep tasks.
Paring Knife or Bread Lame
Used to score the dough, allowing controlled expansion during baking. This tool adds both precision and professional-looking finishing touches.
Measuring Cups & Spoons
Accurate measurement ensures consistent results every time, critical for baking success. These tools also streamline everyday cooking and ingredient prep.
Plastic Wrap / Nonstick Spray
Keeps dough from sticking while rising and resting. These small tools simplify cleanup and improve overall workflow in the kitchen.
Homemade Sun-Dried Tomato Bread
Equipment
- 1 Large Mixing Bowl
- 1 Dutch Oven (4-quart recommended)
- 1 Sharp Knife or Bread Lame
- Measuring Cups & Spoons
- Plastic Wrap or Nonstick Spray
Ingredients
- 3 cups 375 g all-purpose flour
- 1 teaspoon kosher salt
- 1 teaspoon rapid-rise yeast
- 1 ½ cups water room temperature
- ¼ cup sun-dried tomatoes softened, drained, and chopped
- ¼ cup 25 g parmesan cheese, grated
- ¼ cup 25 g asiago cheese, grated
- 1 teaspoon garlic minced
Instructions
- Preparing the Dry Ingredients: In a large mixing bowl, combine 3 cups of all-purpose flour, 1 teaspoon of kosher salt, and 1 teaspoon of rapid-rise yeast. Use a whisk or fork to mix thoroughly, ensuring the salt and yeast are evenly distributed throughout the flour. This step ensures a uniform rise and even flavor throughout the bread.
- Adding the Liquid: Gradually pour in 1 ½ cups of room-temperature water while stirring gently with a wooden spoon or silicone spatula. Mix until all the flour is hydrated and the dough begins to come together. The dough will appear sticky and shaggy at this stage, which is normal. Avoid overmixing to prevent a tough texture.
- Incorporating the Flavor Enhancers: Fold in ¼ cup of softened, drained, and chopped sun-dried tomatoes, ¼ cup (25 g) grated parmesan, ¼ cup (25 g) grated asiago cheese, and 1 teaspoon of minced garlic. Use a folding motion to distribute the ingredients evenly throughout the dough. The cheeses will add richness, while the tomatoes provide bursts of umami and subtle acidity.
- Initial Rise (Bulk Fermentation): Transfer the dough into a clean, lightly greased bowl. Cover it tightly with plastic wrap to prevent drying. Allow the dough to rise at room temperature for approximately 18 hours. The dough should nearly double in size, develop an airy texture, and exhibit a pleasant, fermented aroma. For a shorter rise, you can allow 3–4 hours, though the flavor and crumb structure will be slightly less pronounced.
- Shaping the Dough: Once the dough has fully risen, lightly flour a piece of parchment paper. Gently transfer the dough onto the floured surface. Using your hands, fold and stretch the edges toward the center to form a smooth, round loaf. This shaping process builds surface tension, helping the bread hold its form during baking. Spray the top with nonstick cooking spray to prevent sticking. Cover loosely with plastic wrap and allow the dough to rest for 30 minutes.
- Scoring the Loaf: After the resting period, take a very sharp knife or bread lame and score an “X” on the top of the dough. This step allows the bread to expand in a controlled way, giving it a professional look and preventing uneven cracking in the crust.
- Preparing the Oven and Dutch Oven: Place a 4-quart Dutch oven inside a cold oven. Preheat the oven to 450°F (232°C) with the Dutch oven inside. Preheating the pot ensures a burst of steam during the initial baking stage, which promotes a crisp, golden crust and tender crumb.
- Baking the Bread: Carefully transfer the shaped dough, along with the parchment paper, into the hot Dutch oven. Cover with the lid and bake for 30 minutes. The covered baking traps steam, giving the crust a beautiful shine and helping the bread rise fully.
- Finishing the Crust: After 30 minutes, remove the lid and continue baking for an additional 15 minutes. This allows the crust to turn a rich, golden brown, creating a satisfying crunch while keeping the inside soft and airy.
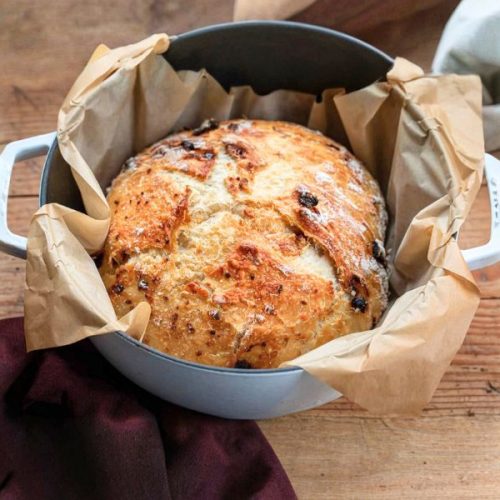
- Cooling and Serving: Carefully lift the loaf from the Dutch oven and place it on a cooling rack. Allow it to cool for at least 30 minutes before slicing. Cooling ensures the interior sets properly, preventing a gummy texture. Slice, serve, and enjoy the aroma-filled, cheesy, sun-dried tomato bread either as a snack, alongside soups, or for sandwiches.
Notes
- For a more pronounced flavor, allow the dough to rise for the full 18 hours; shorter rises are possible but yield a denser crumb.
- Soften sun-dried tomatoes in hot water for 10–15 minutes before chopping to ensure they integrate smoothly into the dough.
- Use a sharp knife or bread lame to score the dough; improper scoring can lead to uneven expansion during baking.
- If using a Dutch oven, preheat it inside the oven for even heat distribution and a crusty exterior.
- Cooling the bread completely before slicing helps maintain its structure and prevents a gummy interior.
Chef’s Secrets To Bread Perfection
The key to this bread’s exceptional texture and flavor lies in the slow, patient fermentation.
Allowing the dough to rise for 18 hours develops complex flavors and a light, airy crumb.
When folding the dough, handle it gently to preserve its delicate air pockets, which are essential for a soft, chewy interior.
Using a combination of parmesan and asiago adds a rich, savory depth, while scoring the top carefully controls expansion for a professional finish.
Preheating the Dutch oven ensures even heat and a golden crust, turning simple ingredients into an artisanal loaf.
Serving Suggestions For Every Occasion
Sun-Dried Tomato Bread pairs beautifully with a wide variety of dishes.
Serve it alongside a fresh garden salad, creamy soup, or roasted vegetables for a balanced meal. Slice and toast it for breakfast with olive oil or avocado spread.
It also makes an excellent base for paninis or grilled sandwiches, as the cheesy, tangy flavor complements cured meats, fresh mozzarella, or roasted peppers.
For entertaining, cut the loaf into bite-sized pieces and serve with a selection of cheeses and olives for a visually appealing and flavorful appetizer.
Storage Tips To Maintain Freshness
To keep the bread fresh, store it in an airtight container or bread box at room temperature for up to 3 days.
Avoid refrigerating, as this can dry out the loaf.
For longer storage, slice the bread and freeze individual pieces in a resealable freezer bag; toast or warm them directly from frozen for best results.
If the crust softens after storage, reheat the bread in a preheated oven at 350°F for 5–10 minutes to restore its crispiness.
Proper storage preserves flavor and texture, ensuring each slice remains as delightful as the day it was baked.
Frequently Asked Questions About Bread
1. Can I use regular dried tomatoes?
Yes, but they should be softened in hot water before incorporating to ensure they blend well into the dough. This prevents tough or chewy pieces in the finished loaf.
2. Can I make this bread without a Dutch oven?
You can, but a Dutch oven produces the best crust. Alternatively, bake on a preheated baking stone or sheet, and place a small pan of water in the oven to create steam for a crisp exterior.
3. Is it okay to shorten the rising time?
Yes, but expect a tighter crumb and slightly less developed flavor. Even a 3–4 hour rise can work in a pinch, but the full 18-hour fermentation yields the best texture and aroma.
4. Can I use whole wheat flour?
You can substitute up to half of the all-purpose flour with whole wheat flour for a nuttier flavor and added fiber. Keep in mind this may slightly alter the dough’s hydration and texture.
5. How can I make the crust extra crispy?
For a crunchier crust, remove the lid of the Dutch oven during the last 10–15 minutes of baking and allow the loaf to finish browning uncovered. Brushing lightly with water before baking can also enhance crustiness.
This recipe has been adapted and simplified from the original version by iamhomesteader. We’ve refined the steps for a smoother cooking experience and added helpful notes, nutrition insights, and essential kitchen tools to make it even easier for home cooks.