
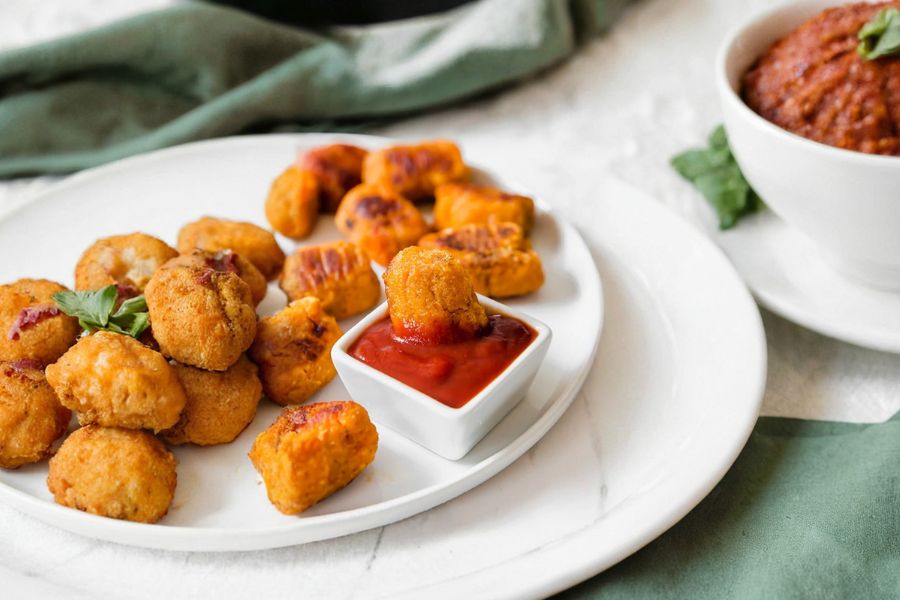
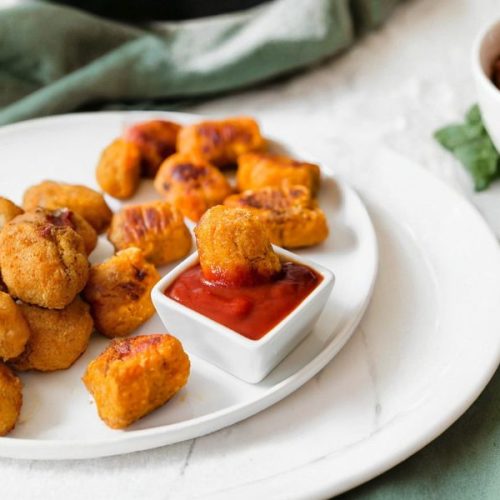
These golden butternut squash tots are a delicious twist on a classic comfort food.
Naturally sweet, tender on the inside, and slightly crispy on the outside, they offer a nutrient-packed snack or side dish that satisfies cravings without compromising health.
Packed with fiber from squash and plant-based starches, they support digestive health and sustained energy, while the avocado oil provides heart-healthy monounsaturated fats.
With low carbs, minimal saturated fat, and no refined grains, this recipe is ideal for anyone seeking a wholesome, balanced option.

Quick to prepare and easy to customize with herbs and spices, these tots are perfect for weeknight dinners, meal prep, or a kid-friendly snack that doubles as a nutritious side.
Must-Have Tools for Perfect Results
Baking Sheet
Essential for evenly baking the tots, ensuring a crispy exterior. A versatile tool for roasting vegetables, cookies, or sheet-pan meals.
Parchment Paper
Prevents sticking and reduces cleanup while promoting even browning. Great for baking, roasting, and protecting pans.
Potato Masher
Perfect for achieving a smooth, lump-free squash mash. Also useful for mashed potatoes, beans, and other soft vegetables.
Mixing Bowl
Provides ample space for combining ingredients thoroughly without mess. A staple in any kitchen for prepping doughs, batters, and salads.
Measuring Cups & Spoons
Ensure precise ingredient ratios, critical for consistency. Indispensable for both baking and cooking everyday meals accurately.
Crispy Vegan Butternut Squash Tater Tots
Equipment
- 1 Large Baking Sheet
- Parchment Paper
- 1 Potato Masher
- 1 Mixing Bowl
- Measuring cups and spoons
Ingredients
- 5 cups butternut squash cubed
- 4 tbsp avocado oil divided
- ⅓ cup coconut flour
- 3 tbsp tapioca starch
- 1 tsp dried sage
- 1 tsp dried thyme
- ½ tsp ground cinnamon
- ¾ tsp sea salt
Instructions
- Preheat & Prepare: Preheat your oven to 400°F (200°C) and line a large baking sheet with parchment paper. This ensures even baking and prevents the squash from sticking, making cleanup effortless.
- Roast Squash: Place the cubed butternut squash on the prepared sheet and drizzle with 1 tablespoon of avocado oil. Toss gently to coat each piece, then roast for 25 minutes, flipping halfway through, until tender and slightly caramelized.
- Cool Squash: Remove the roasted squash from the oven and allow it to cool completely. Cooling is crucial to avoid a sticky mash and ensures the tots hold their shape.
- Mash Squash: Use a potato masher (or your hands if fully cooled) to mash the squash into a smooth, lump-free consistency. Discard any charred pieces for a perfect texture.
- Mix Ingredients: In a mixing bowl, combine the mashed squash with 2 tablespoons of avocado oil, coconut flour, tapioca starch, and all seasonings. Stir thoroughly until the mixture is uniform and pliable.
- Shape Tots: Scoop the mixture and mold into 1-inch tot shapes, placing them evenly spaced on a parchment-lined baking sheet. Brush or drizzle with the remaining oil to promote golden, crispy edges.
- Bake & Serve: Bake for 23–25 minutes, rotating halfway through to ensure even crisping. Remove from the oven, allow to cool slightly, and serve warm with your favorite dip for a nutritious snack or side dish.
Notes
- Use fully cooled squash before mashing to ensure the tots hold their shape.
- Swap tapioca starch for arrowroot powder if desired for a slightly different texture.
- Coconut flour absorbs moisture quickly; adjust slightly if the mixture feels too wet.
- For extra crispiness, broil the tots for 1–2 minutes at the end of baking.
- These tots can be flavored with additional spices like smoked paprika, garlic powder, or nutmeg for variation.
Chef’s Secrets For Perfect Tots
The key to perfectly crispy yet tender tots lies in balancing moisture and starch.
Make sure the roasted squash is fully cooled before mashing—warm squash creates a sticky mixture that’s difficult to shape.
Using avocado oil not only adds heart-healthy fats but also enhances browning and flavor.
Evenly coating the tots with oil before baking ensures a golden exterior without frying.
Gently shaping the mixture into uniform 1-inch pieces promotes even cooking.
Lastly, don’t overcrowd the baking sheet; give each tot breathing room for optimal crisping.
Serving Suggestions To Impress Guests
These butternut squash tots are incredibly versatile.
Serve them as a side for roasted chicken or a plant-based main for a hearty meal.
They pair beautifully with dips like garlic aioli, cashew cream, marinara, or a tangy yogurt sauce.
For breakfast or brunch, sprinkle with fresh herbs and enjoy alongside avocado toast or scrambled eggs.
Their naturally sweet flavor also complements savory dishes like lentil stew or grain bowls, making them an all-day snack or side.
Storage Tips For Freshness
Store leftover tots in an airtight container in the refrigerator for up to 3–4 days.
Reheat in a preheated oven at 375°F (190°C) for 5–10 minutes to restore crispiness; microwaving may result in a softer texture.
For longer storage, freeze the shaped tots on a parchment-lined sheet for 1–2 hours, then transfer to a freezer-safe bag.
Bake from frozen, adding a few extra minutes to ensure they cook through evenly.
Proper storage preserves flavor, texture, and nutritional value, making meal prep simple.
Frequently Asked Questions Answered
1. Can I use frozen squash?
Yes! Thaw completely and drain excess water before mashing to prevent a soggy mixture. Frozen squash may be softer, so adjust coconut flour slightly if needed.
2. Are these tots gluten-free?
Absolutely. Both coconut flour and tapioca starch are naturally gluten-free, making this recipe suitable for gluten-sensitive diets.
3. Can I make them ahead of time?
Yes. You can shape and freeze the tots before baking, then bake directly from frozen for convenient meal prep.
4. Can I substitute oils?
Avocado oil is recommended for its high smoke point and flavor, but olive oil or melted coconut oil can work in a pinch. Flavor and crispiness may vary slightly.
5. How do I make them extra crispy?
For extra crispiness, brush a thin layer of oil on each tot before baking, avoid overcrowding the pan, and consider broiling for 1–2 minutes at the end.
This recipe has been adapted and simplified from the original version by unboundwellness. We’ve refined the steps for a smoother cooking experience and added helpful notes, nutrition insights, and essential kitchen tools to make it even easier for home cooks.