
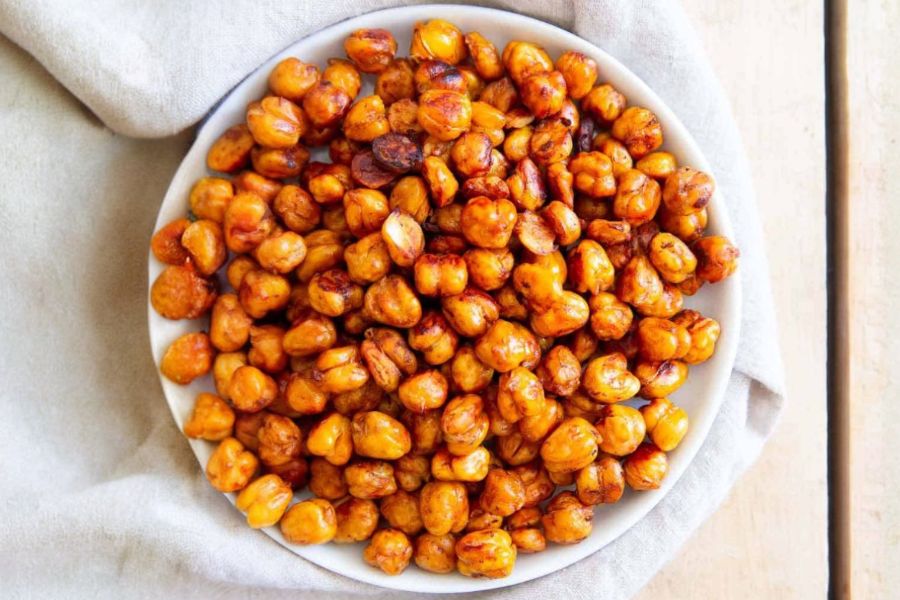
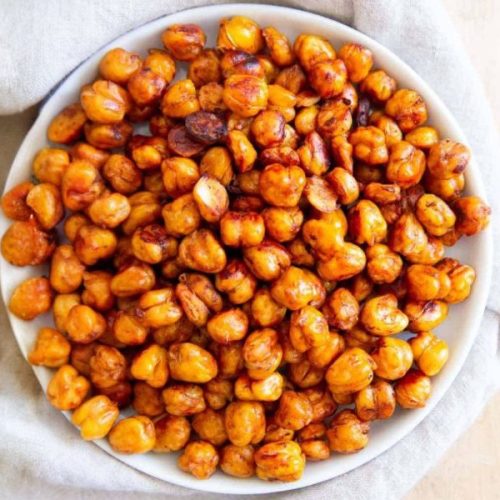
These Roasted BBQ Chickpeas are a standout snack because they combine irresistible crunch with bold, smoky flavors while being entirely plant-based.
Packed with protein and fiber, they support digestive health and keep you feeling full between meals.
The use of chickpeas provides a heart-healthy source of complex carbs, while a small amount of coconut oil adds a touch of good fat without excessive saturated fat.
Quick to prepare and naturally gluten-free, this recipe is perfect for busy weekdays, meal prep, or topping salads and bowls for added texture.
Peeling and roasting the chickpeas ensures a crisp, caramelized coating that clings beautifully to the BBQ sauce, giving each bite a satisfying crunch.
With minimal ingredients and straightforward steps, this snack is a nutritious, flavorful, and versatile addition to any kitchen.
Must-Have Tools for Perfect Results
Baking Sheet
Provides even heat distribution for roasting chickpeas and can double for baking vegetables or cookies.
Dry Dish Towel
Essential for patting chickpeas dry, ensuring they crisp up in the oven rather than steaming.
Mixing Bowl
Perfect for tossing chickpeas with coconut oil and BBQ sauce evenly; also useful for salads and other meal prep tasks.
Oven Mitts
Protect hands while handling hot baking sheets and prevent burns during roasting.
Spatula
Helps toss chickpeas and scrape them off the pan, ensuring none stick and all are evenly coated.
30-Minute BBQ Roasted Chickpeas
Equipment
- 1 Baking sheet
- 1 Dry Dish Towel
- 1 Mixing Bowl1 Spatula
- Oven mitts
Instructions
- Preheat and Prepare: Start by preheating your oven to 400°F if using a convection roast setting, or 425°F for a conventional oven. This ensures the chickpeas will roast evenly and become perfectly crispy.
- Dry the Chickpeas: Spread your drained and rinsed chickpeas on a clean, dry dish towel. Gently pat them completely dry, removing any excess moisture to prevent sogginess during roasting.
- Peel for Crispiness: Carefully remove the skins from each chickpea. Though it takes about 10 minutes, this step is crucial for achieving a crunchy texture that holds up well under BBQ sauce.
- Initial Roast: Arrange the peeled chickpeas evenly on a baking sheet. Roast them in the preheated oven for 10 minutes, shaking the pan once to prevent sticking and promote even browning.
- Coat with Oil and Sauce: Remove the chickpeas from the oven and drizzle with melted coconut oil, tossing to coat each bean. Next, pour the BBQ sauce over the chickpeas and mix thoroughly so every piece is covered.
- Final Roast and Cool: Return the baking sheet to the oven and roast for an additional 12 minutes, shaking halfway through. Turn off the oven, open the door slightly, and allow the chickpeas to cool inside for 10 minutes. Once cooled, they will be crispy and ready to enjoy, and leftover chickpeas can be stored in a paper bag to maintain crunch.
Notes
- Peeling chickpeas is key to crispiness; skipping this step may result in softer chickpeas.
- Use any BBQ sauce of your choice, from mild to smoky, to match your flavor preference.
- Coconut oil adds subtle richness, but olive oil can be substituted if preferred.
- Shake the baking sheet midway through roasting for even cooking and browning.
- Store in a paper bag to maintain crisp texture; avoid airtight containers which can trap moisture.
Chef’s Secrets For Crispy Chickpeas
Achieving perfectly crispy chickpeas starts with removing their skins, which prevents steaming during roasting and ensures a crunchy bite.
Patting them dry thoroughly is another crucial step.
Choosing a flavorful BBQ sauce and evenly coating each chickpea allows the sauce to caramelize during roasting without making the beans soggy.
Using a convection oven helps circulate heat for even browning, but if using a conventional oven, slightly higher temperatures and shaking the pan frequently can produce similar results.
Freshly roasted chickpeas are always better than pre-packaged versions, giving you control over flavor, seasoning, and texture.
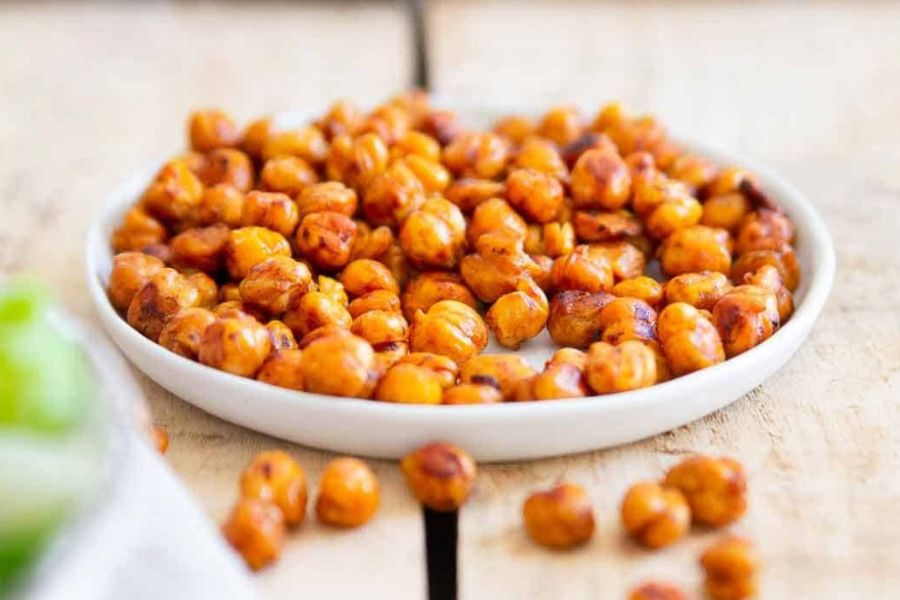
Serving Suggestions To Enhance Snack
Roasted BBQ chickpeas are versatile.
Enjoy them as a standalone snack, sprinkle over salads for a crunchy topping, or serve alongside roasted vegetables or grain bowls for added texture and flavor.
They pair well with leafy greens, avocado, or a light yogurt-based dip.
You can also mix them into soups just before serving to add a satisfying crunch.
For parties or gatherings, present them in a small bowl with toothpicks for easy snacking.
Storage Tips For Maximum Freshness
To keep chickpeas crispy, allow them to cool completely before storing.
Store leftovers in a paper bag at room temperature, which helps maintain the crunch.
Avoid airtight containers, as trapped moisture can soften the chickpeas.
If you prefer, store unroasted chickpeas in an airtight container in the pantry for quick roasting later.
Consuming within 2–3 days is best for peak crispiness and flavor.
Frequently Asked Questions About Chickpeas
1. Can I use canned chickpeas?
Yes, canned chickpeas work perfectly. Just make sure to drain, rinse, and dry them thoroughly for best results.
2. Do I have to peel the chickpeas?
Peeling is highly recommended for a crispy texture, though it’s optional if you’re short on time. Skins can soften during roasting.
3. Can I make them spicy?
Absolutely! Add chili powder, smoked paprika, or cayenne to the BBQ sauce or toss the chickpeas with spices before roasting for a kick.
4. How long do they stay crispy?
Stored properly in a paper bag at room temperature, they remain crunchy for up to 2–3 days.
5. Can I use other oils instead of coconut oil?
Yes, olive oil, avocado oil, or any neutral oil can be used. Coconut oil gives subtle sweetness and helps the sauce caramelize nicely.
This recipe has been adapted and simplified from the original version by runningtothekitchen. We’ve refined the steps for a smoother cooking experience and added helpful notes, nutrition insights, and essential kitchen tools to make it even easier for home cooks.