

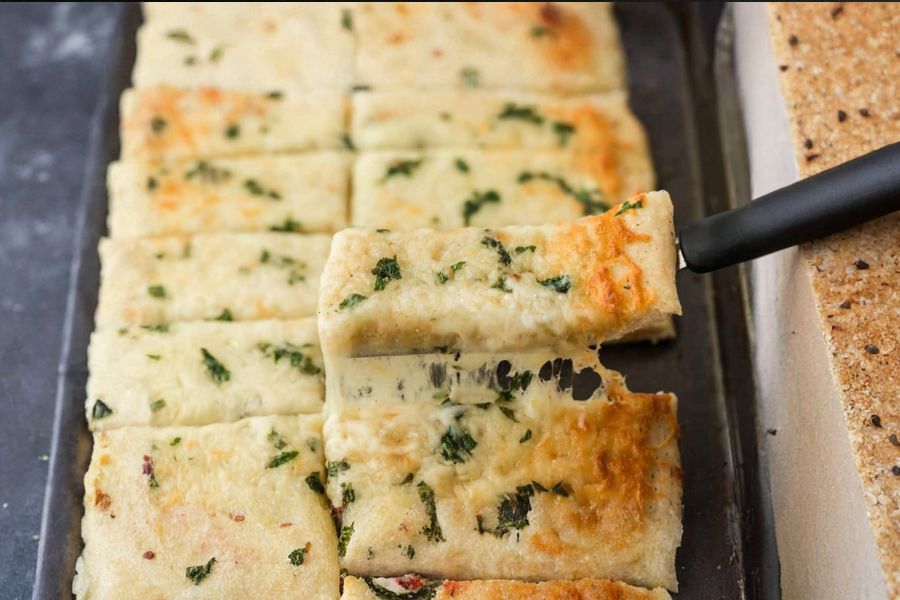
These Cheese Breadsticks are a perfect blend of soft, pillowy dough and a satisfyingly crispy exterior, topped with melted cheese and a flavorful garlic butter glaze.
What makes this recipe stand out is its simplicity and versatility—it’s easy enough for a weeknight snack yet indulgent enough for entertaining.
Nutritionally, these breadsticks offer a moderate boost of protein thanks to the cheese, while the olive oil and butter provide heart-healthy fats in balance with comfort-food satisfaction.
With 26 grams of carbs and 10 grams of protein per serving, they can fit seamlessly into a family-friendly meal or serve as a protein-enhanced snack.
Additionally, they’re highly customizable, freezer-friendly, and perfect for meal prep, making them a convenient and crowd-pleasing option for everyday cooking.
Must-Have Tools for Perfect Results
Mixing Bowl
Essential for combining your flour, yeast, and seasonings into a smooth dough. A large, high-quality bowl makes kneading and mixing easier, and it doubles as a prep bowl for countless other recipes.
Pizza Stone
Ensures evenly baked breadsticks with a crisp bottom crust. Beyond this recipe, it’s ideal for homemade pizzas, flatbreads, and pastries, delivering bakery-quality results at home.
Pastry Brush
Perfect for spreading melted garlic butter evenly across the dough. This versatile tool is also great for glazing breads, brushing oils on vegetables, or applying egg wash for golden finishes.
Oven-Safe Baking Sheet
Provides a reliable surface for rolling out and baking dough. It’s a must-have for roasting, sheet-pan dinners, cookies, and more, making it an indispensable tool for daily cooking.
Measuring Cups & Spoons
Accurate measurements ensure your dough rises perfectly and flavors are balanced. These tools are foundational for any kitchen, supporting precise cooking and baking every time.
Delicious Cheesy Garlic Breadsticks
Equipment
- 1 Medium mixing bowl
- 1 Pizza Stone or Baking Sheet
- 1 Pastry brush
- 1 Oven-Safe Baking Sheet
- Measuring Cups & Spoons
Ingredients
- 2 cups all-purpose flour
- 1 ½ tsp garlic salt
- 1 tsp granulated sugar
- 1 ½ tsp active dry yeast
- ¾ –1 cup lukewarm water
- 1 tbsp olive oil
- 4 tbsp salted butter
- 1 tsp garlic powder
- 1 tsp Italian seasoning
- 2 cups shredded Italian cheese blend
- ½ –1 tbsp grated Parmesan cheese
- Parsley for garnish
- Optional: Warm pizza sauce for serving
Instructions
- Prepare the Dough: In a medium-sized mixing bowl, combine the all-purpose flour, garlic salt, granulated sugar, and active dry yeast. Gradually pour in the lukewarm water while stirring continuously until a soft dough forms, ensuring no dry flour remains and the mixture is smooth and slightly sticky.
- Knead the Dough: Transfer the dough onto a lightly floured surface and knead it gently with your hands for about one minute, folding and pressing until it becomes elastic and cohesive. Shape the dough into a tight ball, which will help it rise evenly and develop a tender texture.
- Let the Dough Rise: Lightly coat a separate bowl with olive oil, place the dough inside, and cover it with a paper towel. Allow the dough to rest in a warm, draft-free area for about one hour, or until it has doubled in size, creating a light and airy structure.
- Preheat the Oven: While the dough is rising, preheat your oven to 425°F (220°C) and prepare a pizza stone or oven-safe baking sheet. This ensures the breadsticks will bake evenly with a golden-brown crust and a soft, tender interior.
- Roll Out the Dough: Once risen, transfer the dough onto a lightly floured surface and roll it out evenly into a rectangular or desired shape, about ½-inch thick. Carefully move the dough onto your prepared baking sheet or pizza stone, ensuring it maintains its shape.
- Prepare Garlic Butter Topping: In a small microwave-safe bowl, melt the salted butter, then whisk in the garlic powder and Italian seasoning until fully combined. Brush this fragrant mixture generously over the entire surface of the dough, coating every edge for maximum flavor.
- Add Cheese and Herbs: Evenly sprinkle the shredded Italian cheese blend over the buttered dough, followed by a light dusting of Parmesan cheese. Finish with a scattering of parsley to add a fresh, vibrant flavor and visual appeal.
- Bake to Perfection: Place the prepared breadsticks in the preheated oven and bake for 15–17 minutes, or until the dough is golden brown and the cheese is fully melted and lightly bubbly. Rotate the pan halfway through baking for uniform browning if needed.
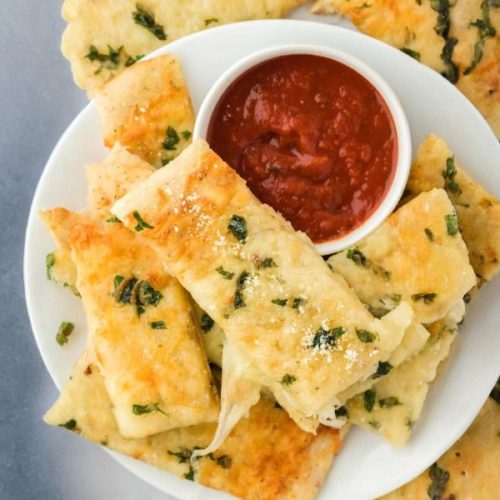
- Slice and Serve: Remove the breadsticks from the oven and allow them to cool for a few minutes. Using a sharp knife or pizza cutter, slice into individual sticks, garnish with additional parsley if desired, and serve warm with optional pizza sauce for dipping.
Notes
- Use lukewarm water (around 100–110°F) to activate the yeast without killing it.
- Knead the dough gently; overworking can make it tough instead of soft and tender.
- For extra flavor, add a pinch of smoked paprika or red pepper flakes to the garlic butter.
- Cheese can be swapped with mozzarella, cheddar, or a mix depending on preference.
- Freezing unbaked dough is possible; thaw in the fridge overnight before baking.
- Brush breadsticks with melted butter immediately after baking for a glossy, rich finish.
Chef’s Secrets For Best Results
To achieve the ultimate soft-yet-crispy texture, always let the dough rise fully in a warm, draft-free area.
Using a pizza stone creates an evenly baked bottom, but if unavailable, a heavy-duty baking sheet works just as well.
The key is balancing butter and cheese—ensuring the dough is lightly coated before adding the shredded blend helps prevent greasy spots while keeping the flavor rich.
Freshly chopped parsley or a light sprinkle of Parmesan just before serving elevates both the aroma and presentation, giving your breadsticks that professional, restaurant-quality touch.
Serving Suggestions And Pairings
These cheese breadsticks are incredibly versatile.
Serve them as an appetizer alongside a warm bowl of marinara, creamy alfredo, or zesty pizza sauce for dipping. They also pair beautifully with fresh salads or roasted vegetables for a light lunch.
For family dinners, complement them with pasta dishes, soups, or grilled chicken for a satisfying meal.
Leftover breadsticks make a fun snack—simply reheat and enjoy with a favorite dipping sauce or even a drizzle of honey for a sweet-savory twist.
Storage Tips And Reheating Advice
Allow breadsticks to cool completely before storing to prevent sogginess.
Place them in an airtight container or wrap tightly in foil; they will stay fresh in the refrigerator for 2–3 days.
For longer storage, freeze baked breadsticks in a single layer in a zip-top bag for up to one month.
To reheat, bake in a preheated oven at 350°F for 5–10 minutes or warm in an air fryer for 3–5 minutes to restore crispiness. Avoid microwaving if possible, as it can make the breadsticks chewy.
Frequently Asked Questions Answered Clearly
1. Can I use whole wheat flour?
Yes, you can substitute half or all-purpose flour with whole wheat for a nuttier flavor and more fiber. The breadsticks may be slightly denser, so allow extra rising time to ensure they remain soft.
2. How do I make them extra cheesy?
Add an additional ½ cup of shredded cheese before baking or sprinkle more cheese halfway through the bake for a melty, gooey topping that will wow your guests.
3. Can I make this recipe ahead?
Absolutely! Prepare the dough a day in advance and store it covered in the fridge. Roll out and bake when ready, allowing for a shorter second rise if desired.
4. What can I serve instead of pizza sauce?
Garlic aioli, ranch dressing, or a creamy marinara are all great alternatives. You can even experiment with pesto or a balsamic glaze for unique flavor combinations.
5. How do I prevent the breadsticks from drying out?
Brush with butter right after baking and store in an airtight container. Avoid leaving them exposed to air for long periods, as this will harden the crust and dry out the soft interior.
This recipe has been adapted and simplified from the original version by grandbaby-cakes. We’ve refined the steps for a smoother cooking experience and added helpful notes, nutrition insights, and essential kitchen tools to make it even easier for home cooks.