
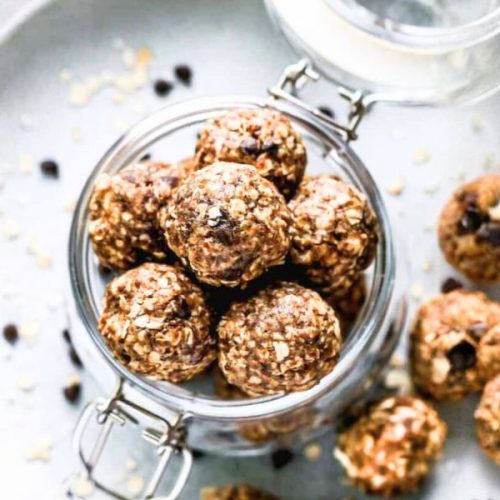
These Granola Bites are the ultimate grab-and-go snack, offering a wholesome balance of flavor, nutrition, and convenience.
Packed with whole oats, ground flaxseed, and nut butter, they deliver a plant-based protein boost and a healthy dose of dietary fiber, helping you stay fuller for longer.
The combination of peanut butter and honey provides natural energy, while optional add-ins like dried fruit or dark chocolate chips make them customizable to your taste.
With only 186 calories per serving, low saturated fat, and nutrient-dense ingredients, these bites are a smart alternative to processed snack bars.
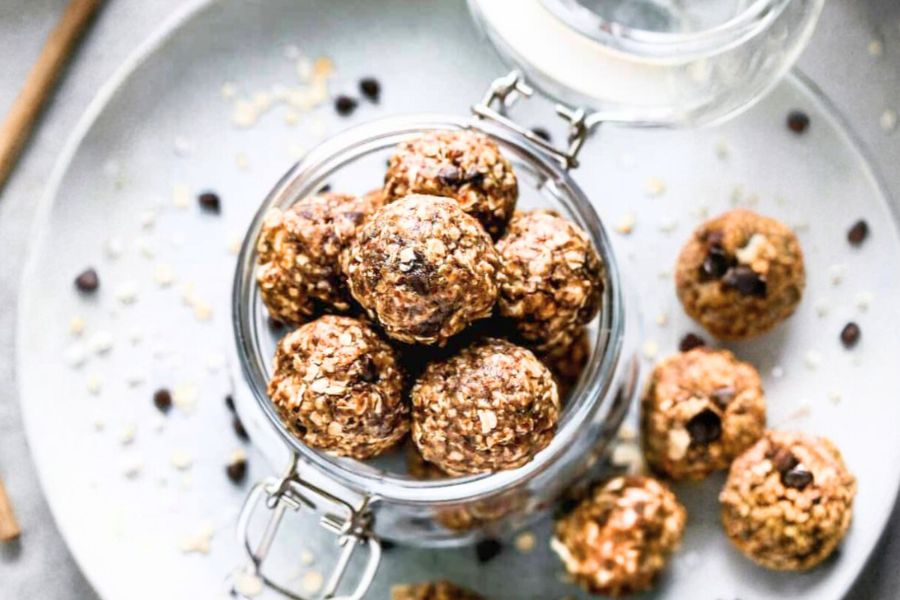
Quick to prepare in just 15 minutes and requiring no baking, they are perfect for busy mornings, post-workout fuel, or a kid-friendly lunchbox addition. Meal-prep friendly and freeze
Must-Have Tools for Perfect Results
OXO Good Grips Mixing Bowl Set
Perfect for combining all your dry and wet ingredients with ease. Non-slip bases keep the bowls steady while mixing, making prep faster and cleaner.
Spring Chef Medium Cookie Scoop
Ensures evenly sized granola bites for consistent portions and easy rolling, saving time and reducing mess.
Wilton Parchment Paper Sheets
Ideal for layering granola bites in your storage container, preventing them from sticking together. A kitchen essential for baking, roasting, and prep work.
Rubbermaid Brilliance Airtight Food Storage Containers
Keeps your granola bites fresh for up to two weeks and is great for storing other meal-prepped snacks or leftovers.
OXO Good Grips Silicone Spatula
Makes mixing sticky peanut butter and honey effortless, ensuring every bit of goodness is scraped from the bowl.
15-Minute No-Bake Granola Bites
Equipment
- 1 Large Mixing Bowl – for combining all ingredients.
- 1 Silicone Spatula – for mixing sticky ingredients effectively.
- 1 Medium Cookie Scoop – for portioning bites evenly.
- 1 Airtight Storage Container – for keeping bites fresh.
- Parchment Paper Sheets – for layering between stacked bites.
Ingredients
- 1 ½ cups rolled oats 135g — use quick or regular oats
- 1 cup ground flaxseed 100g
- ⅔ cup crispy rice cereal 20–25g, like Rice Krispies
- 1 cup creamy peanut butter 240g, or substitute with almond butter, sunflower seed butter, or other nut butter
- 1 cup mix-ins 170g such as mini chocolate chips, dried cherries, raisins, shredded coconut, chopped nuts, or a combination
- ½ cup honey 120 ml — or agave syrup as a vegan alternative
- 2 teaspoons vanilla extract 10 ml
Instructions
- Combine Dry Ingredients: In a large mixing bowl, stir together the rolled oats, ground flaxseed, and crispy rice cereal until evenly mixed. These ingredients form the hearty base and add texture to your granola bites.
- Incorporate Wet Ingredients: Add the creamy peanut butter, honey, and vanilla extract to the dry mixture. Use a spatula or sturdy spoon to thoroughly blend everything together. The mixture will be sticky and thick—this ensures your bites hold together well.
- Add Your Favorite Mix-ins: Fold in your chosen mix-ins, like mini chocolate chips or dried fruit, evenly distributing them throughout the batter. These add flavor, sweetness, and crunch.
- Shape the Bites: Using a cookie scoop, spoon, or your hands, form the mixture into small, compact balls roughly 1 to 1 ½ inches in diameter. Press firmly to help them stick and hold their shape.
- Store Properly: Place the formed granola bites into an airtight container. For best results, layer parchment paper between stacked rows to prevent sticking. Refrigerate for up to two weeks, or freeze for longer storage—up to several months.
Notes
- Gluten-Free Option: Make sure to use certified gluten-free oats if you require a gluten-free snack.
- Nut-Free Variation: Swap peanut butter for sunflower seed butter to keep this allergy-friendly.
- Sweetness Adjustments: You can modify the amount of honey or agave to suit your preferred sweetness level.
- Texture Tip: If the mixture feels too dry to hold together, add a small splash of milk (dairy or plant-based) to help bind. If too wet, add more oats or crispy cereal.
- Storage Advice: For easy portion control and freshness, freeze granola bites individually on a parchment-lined tray, then transfer to a container or freezer bag.
Chef’s Secrets for Perfect Bites
The key to creating perfectly textured granola bites lies in balancing wet and dry ingredients.
Using creamy peanut butter ensures the mixture binds easily, but don’t hesitate to adjust with a splash of milk if the batter feels too crumbly.
Mixing your add-ins evenly throughout the dough is crucial so every bite offers a delightful surprise. For extra flavor, try toasting the oats lightly before mixing—they’ll add a subtle nutty depth.
Another tip is to press the bites firmly when shaping them; this helps them hold their shape better and keeps the texture dense but chewy.
If you want a vegan twist, agave syrup is a great substitute for honey, maintaining sweetness without animal products.
Serving Suggestions That Delight Palates
Granola bites make a versatile snack that pairs well with many foods. For a wholesome breakfast, serve them alongside Greek yogurt and fresh fruit, adding crunch and natural sweetness.
They also work wonderfully as an energy booster during a midday slump, perfect with a cup of herbal tea or coffee.
For a kid-friendly option, pack them in lunchboxes with a side of apple slices or carrot sticks. If hosting, consider arranging granola bites on a platter with cheese cubes, nuts, and dried fruits for a simple, crowd-pleasing snack board.
They can even be crumbled over smoothie bowls for added texture.
Storage Tips to Keep Fresh
Proper storage is essential to maintain the freshness and chewiness of granola bites. Store them in an airtight container in the refrigerator, where they will keep well for up to two weeks.
Be sure to layer pieces with parchment paper to prevent sticking. For longer storage, freezing is a great option—individually freeze the bites on a parchment-lined tray first, then transfer them to a freezer-safe container or bag.
When ready to enjoy, simply thaw at room temperature for 10-15 minutes or eat straight from the freezer for a refreshing treat.
Avoid storing at room temperature for extended periods as the nut butter can become oily.
Frequently Asked Questions Answered
1. Can I use other nut butters?
Yes! Almond, cashew, or sunflower seed butter all work beautifully and slightly alter the flavor while keeping the texture intact.
2. Are these granola bites gluten-free?
They can be, as long as you use certified gluten-free oats and ensure your mix-ins don’t contain gluten.
3. How can I make them less sweet?
Reduce the honey or agave syrup amount, or substitute some with unsweetened applesauce for natural moisture and less sugar.
4. Can I add protein powder?
Absolutely! Adding a scoop of your favorite protein powder boosts protein content but might require adding a little extra liquid to keep the mixture sticky.
5. What’s the best way to keep bites from sticking?
Layering parchment paper between stacked bites in your storage container is key. Refrigeration also helps maintain firmness, preventing them from sticking together.
This recipe has been adapted and simplified from the original version by tastesbetterfromscratch. We’ve refined the steps for a smoother cooking experience and added helpful notes, nutrition insights, and essential kitchen tools to make it even easier for home cooks.