
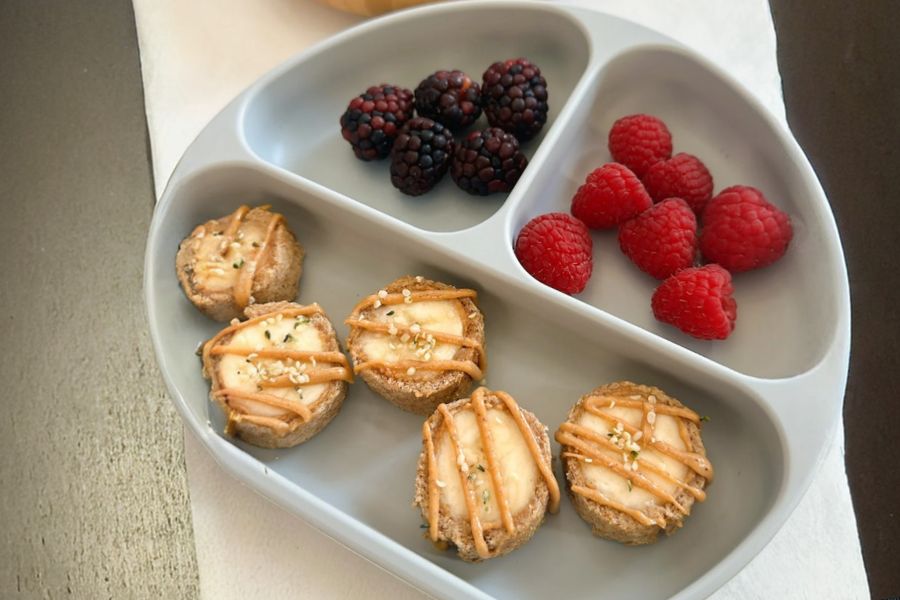
Peanut Butter Banana Sushi is a fun, quick, and nutrient-packed snack that combines creamy peanut butter with naturally sweet bananas for a satisfying bite.
This recipe is high in plant-based protein, fiber-rich from the banana, and provides healthy fats from peanut butter, making it both energizing and heart-healthy.
With just three main ingredients and optional hemp hearts for an extra nutrient boost, it’s low in refined sugar while still delivering rich flavor and creamy texture.
Perfect for lunchboxes, after-school snacks, or a quick breakfast, this recipe is ideal for busy days, meal prep, or entertaining kids.
The portability, simplicity, and wholesome ingredients make it a versatile option for everyday cooking, keeping preparation stress-free while supporting balanced nutrition.
Must-Have Tools for Perfect Results
Rolling Pin
Flattens sandwich bread evenly to make rolling easier without tearing, also useful for cookies, pastries, and dough-based recipes.
Sharp Knife
Slices bananas and sushi rolls cleanly, preventing squishing or uneven pieces. A high-quality knife ensures precision in everyday cooking.
Cutting Board
Provides a stable surface for slicing bananas and bread, protecting countertops and maintaining hygiene during food prep.
Small Spoon
Ideal for spreading peanut butter evenly across bread slices and filling cucumber cups or other snacks with precision.
Measuring Spoons
Ensures accurate portioning of peanut butter or optional toppings like hemp hearts, essential for consistent flavor and nutritional tracking.
5-Minute Peanut Butter Banana Sushi
Equipment
- 1 rolling pin
- 1 Sharp Knife
- 1 cutting board
- 1 small spoon
- 1 Set Measuring Spoons
Ingredients
- 2 slices sandwich bread
- 2 tbsp peanut butter
- 1 large banana
- 1 tbsp hemp hearts optional
Instructions
- Prepare Bread Slices: Start by removing the crusts from each slice of sandwich bread. Lay the bread flat on a clean cutting board to create an even surface for rolling. This step ensures smooth, uniform sushi rolls without tough edges.
- Flatten Bread: Using a rolling pin, gently roll each slice of bread until it’s as thin and even as possible. Apply light pressure to avoid tearing. Flattened bread is easier to wrap around the banana and helps create a compact roll.
- Spread Peanut Butter: Evenly distribute 1 tablespoon of peanut butter across each flattened slice of bread. Use the back of a small spoon or spatula to cover the entire surface, leaving a small border on one edge to help seal the roll.
- Prepare Banana: Peel the banana and slice it in half lengthwise. Position one half of the banana at the edge of a bread slice, aligning it with the peanut butter-covered side. The banana should sit snugly to prevent gaps in the roll.
- Roll the Sushi: Carefully roll the bread over the banana, pressing gently along the seam to seal it closed. Ensure the roll is tight but not squished, maintaining the banana’s shape inside while keeping the bread intact.
- Slice Into Pieces: Using a sharp knife, cut each roll into 1-inch thick pieces. Wipe the knife between cuts if necessary to ensure clean slices. The sushi pieces should be uniform for easy serving and a visually appealing presentation.
- Garnish and Serve: Optionally sprinkle hemp hearts, chia seeds, or other toppings over the cut sushi rolls for added texture and nutrients. Serve immediately for a fresh, creamy, and satisfying snack, or pack for lunchboxes.
Notes
- Use soft, fresh sandwich bread to make rolling easier without tearing.
- Choose a banana that is ripe but firm; overripe bananas can become mushy and difficult to roll.
- Spread peanut butter evenly to ensure each bite has consistent flavor.
- Optional toppings like hemp hearts, chia seeds, or crushed nuts add texture and extra nutrients.
- Serve immediately for the best texture, or store properly to maintain freshness.
- For a slightly sweeter version, drizzle with a small amount of honey or sprinkle cinnamon.
Chef’s Secrets For Perfect Rolls
The key to flawless peanut butter banana sushi is using soft bread and a ripe, firm banana.
Flattening the bread ensures it wraps around the banana without tearing, while gently pressing the seam keeps the roll intact.
Using a sharp knife for slicing prevents squishing the banana inside.
Optional toppings like hemp hearts or chia seeds enhance both nutrition and presentation, making these sushi rolls visually appealing for kids or entertaining guests.
Serving Suggestions For Creative Snacks
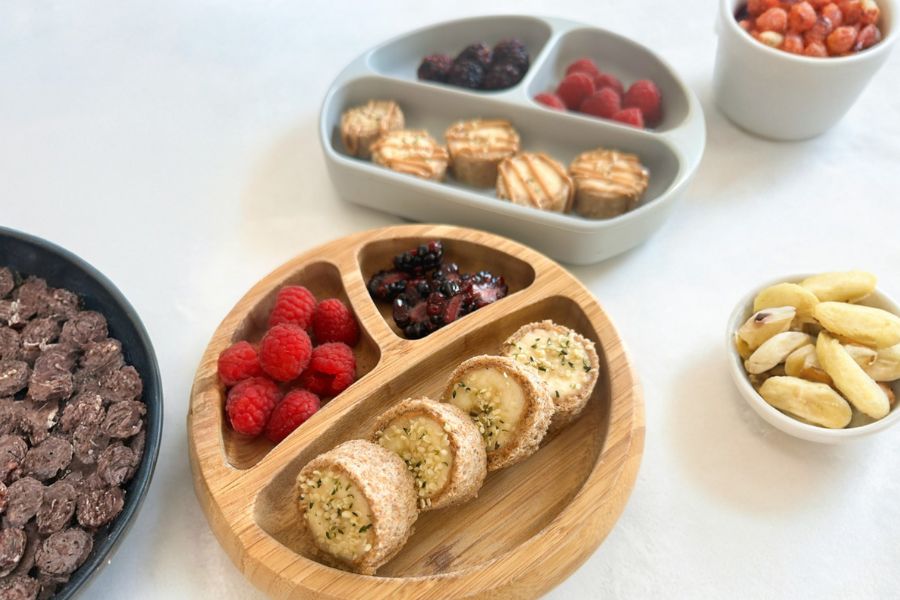
Serve these rolls as a fun breakfast, snack, or lunchbox treat.
Pair with fresh fruit, yogurt, or a glass of milk for a balanced mini-meal.
For gatherings, arrange them on a platter with a drizzle of honey or a sprinkle of cinnamon for added flavor and visual appeal.
These rolls are also great for afternoon energy boosts or a post-workout snack thanks to their protein content.
Storage Tips For Freshness
Peanut butter banana sushi is best enjoyed immediately, but you can store uncut rolls in an airtight container in the fridge for up to 24 hours.
Slice just before serving to prevent the banana from browning.
Avoid freezing, as the bread and banana texture may change when thawed.
If preparing for later, wrap each roll tightly in plastic wrap to maintain shape and freshness.
Frequently Asked Questions Answered
1. Can I use whole-grain bread instead?
Yes! Whole-grain bread adds fiber and nutrients, though it may be slightly firmer, so roll gently to avoid tearing.
2. Can I substitute nut butter?
Absolutely! Almond butter, cashew butter, or sunflower seed butter work well for nut-free alternatives.
3. How can I make it vegan?
This recipe is already vegan if using plant-based bread and avoiding dairy-based peanut butter spreads.
4. Can I add other fillings?
Yes! Try adding sliced strawberries, blueberries, or a sprinkle of cinnamon for extra flavor and variety.
5. Are hemp hearts necessary?
No, they are optional and used for extra protein, omega-3s, and visual appeal. The rolls are delicious without them.
This recipe has been adapted and simplified from the original version by feedingtinybellies. We’ve refined the steps for a smoother cooking experience and added helpful notes, nutrition insights, and essential kitchen tools to make it even easier for home cooks.