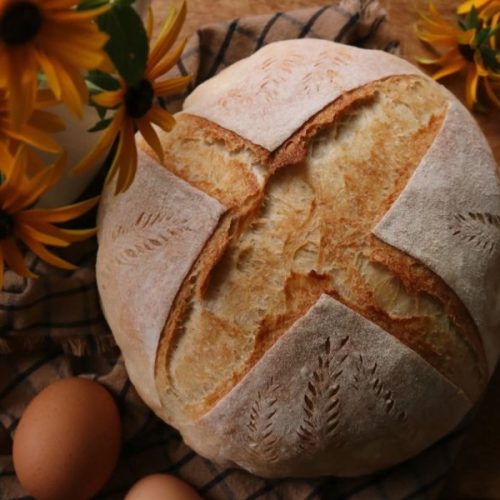
Easy Rustic Country Bread
A simple, wholesome artisan bread baked in a Dutch oven for a golden crust and tender crumb. Perfect for everyday meals, this recipe uses clean ingredients and time-tested techniques for bakery-quality results at home.
Equipment
- 1 Stand Mixer (optional)
- 1 Danish Dough Hook (optional)
- 1 Proofing Basket or Bowl
- 1 Dutch oven
Ingredients
- 2 ¼ teaspoons non-GMO active yeast
- 1 teaspoon cane sugar
- 1 ¼ cups warm filtered water 100–110°F
- 1 ½ teaspoons sea salt
- 3 –4 cups organic unbleached unbromated all-purpose flour
Instructions
- Activate the Yeast: In a large mixing bowl, stir together the yeast, cane sugar, and warm filtered water (between 100–110°F). Allow the mixture to sit undisturbed for about 5 minutes until a light foam forms on the surface, a sign that the yeast is alive and ready to work. This step is crucial because if the yeast does not bubble, the bread will not rise properly, so take care with the water temperature—too cool and the yeast won’t activate, too hot and it may die.
- Build the Dough: Once the yeast mixture is bubbly, add sea salt and begin incorporating flour gradually while mixing with a stand mixer on low speed or using a Danish Dough Hook by hand. Start with 3 cups of flour, then slowly add more if the dough feels overly sticky, keeping in mind that humidity, flour type, and room temperature can affect consistency. The goal is a dough that feels soft, elastic, and slightly tacky but no longer clings stubbornly to your fingers.
- First Rise: Shape the dough into a smooth ball and lightly coat it with flour. Transfer it into a lightly oiled bowl, making sure the seam side faces down, and cover with a damp kitchen towel or plate. Place the bowl in a warm, draft-free area and let the dough rise for about 1 hour, or until it has doubled in volume. This resting time allows gluten to develop while the yeast creates air pockets, setting the stage for a light, airy crumb.
- Shape the Loaf: Gently tip the risen dough onto a clean, floured surface, being careful not to deflate it completely.Stretch the dough into a loose rectangle, fold the edges inward, and roll it back towards yourself to create surface tension. Using your palms, lightly press and pull the dough until it feels firm yet pliable. This shaping technique strengthens the structure of the loaf so it rises upward rather than spreading outward.
- Proofing Stage: Place the shaped dough seam-side up into a floured proofing basket or a bowl lined with a floured towel. Let it rest for about 30 minutes while you preheat your oven to 450°F with the Dutch oven (and its lid) inside. The preheating ensures the Dutch oven is blazing hot, which mimics the steam-injected environment of professional bread ovens, vital for achieving a crusty exterior.
- Score and Bake: When the dough has risen again, carefully flip it onto a sheet of parchment paper so the seam side faces down. Dust lightly with flour, then use a sharp blade or bread lame to score the surface in your desired pattern, allowing controlled expansion in the oven. Using the parchment, lift the dough into the preheated Dutch oven, cover with the lid, and bake for 30 minutes. After this time, remove the lid and continue baking uncovered for 15–20 minutes more, until the crust turns deep golden brown.
- Cool and Serve: Remove the loaf from the Dutch oven and place it on a wire rack to cool for at least 1 hour. Though tempting to slice immediately, resting time is essential as the interior continues to set and develop flavor.Cutting too soon can result in a gummy texture, while proper cooling rewards you with a tender crumb and even slices. Once cooled, enjoy your artisan bread plain, toasted, or paired with your favorite toppings.
Notes
- Always proof the yeast first to confirm it’s active before mixing with flour.
- Adjust flour gradually — start with less, then add more as needed until the dough feels elastic and not sticky.
- Use a Dutch oven for the crispiest crust, but a heavy oven-safe pot with a lid also works.
- Scoring the dough helps control expansion and prevents uneven cracks while baking.
- Cooling the bread completely is just as important as baking, as it finalizes the texture.